Category: Techniques & Tips

Learn my tips and tricks from everything from hand sewing to how to start a swatch book! Click the links below to learn more about my sewing tips:

  • Critical Sewing First Steps

    Critical Sewing First Steps

    This post breaks down the critical sewing first steps you don’t want to miss when you’re starting a new project. 

    I break down my learnings from 20 years sewing experience, trial and error, and tips I’ve picked up in fashion school and along the way.

    It is very important to have a strong start to your project from the moment you pick out your sewing pattern.

    Taking time from the very beginning to set up for success goes a long way at making your projects easy to approach.

    Sewing First Steps: Pattern Foundations [Timestamp 00:36]

    Ask yourself: is this the right pattern for you?

    While there are so many beautiful sewing patterns in the world, taking the time to determine if you’re using the right pattern for your sewing skill level is critical. Some patterns may be too complicated, too intricate, or use techniques you’ve never tried before. This may extend out to using fabric and materials you’ve never worked with before, too.

    Use two tools to deep dive into it: a sewing notebook and the internet, which support your sewing detective work, to learn your project.

    Google the pattern you’re about to make. When doing so, don’t just admire the pretty photos or videos (though those help!) Instead, look for and critically observe other people’s projects, noting other sewist’s comments on complicated aspects of the design, instructions, or even corrections and work arounds. Take copious notes you can refer to over the course of the project.

    It’s critical to parse through what was difficult or easy for the person who made it, learning from their experience before you even start.

    Image of an unfolded paper sewing pattern, being read with a smiling face.

    For example, when I made a bomber jacket, reviews kept stating that the sleeves were cropped, time and time again. I ignored that advice and… their notes proved 100% correct: the sleeves were too short! Had I actually taken my own advice, I could have lengthened them by the recommended couple inches and had a better jacket.

    Once you feel confident that you know where the pitfalls are, you can move onto your sewing mise en place.

    Laughing, setting up a sewing machine

    Sewing First Steps: Your Sewing mise en place [Timestamp 02:34]

    Mise en place is French for Everything in Place, taken from the cooking world.

    Most people generally understand the importance of getting the sewing space in order, but problems pop up when you’re on a time crunch. Specifically, finding out at the last minute that you’re out of thread and the fabric store closed an hour ago.

    Yes, it has happened to me. Plenty of times.

    Mise en place is more than just all the materials being ready to go- though that’s part of it. It also includes taking inventory of how many items the pattern calls for, what specifically you need (not guessing), and evaluating how long it might take to restock a missing item so you’re not scrambling. 

    For example, this includes making sure your fabric and your pattern pieces are all accounted for. 

    Don’t skip this step.

    It’s easy to skip this step and a lot of people do. This is the difference between your first project and your five thousandth. People who do this professionally do not skip this critical first step: it’s where a lot of unnecessary annoyances and time wasters come, in trying to locate or source a material, or because it’s gone missing in the sewing space, or was accidentally thrown out. 

    Over the shoulder image of a phone displaying a sewing machine manual and diagram, next to a sewing machine

    Sewing First Steps: Setting up your equipment [Timestamp 04:36]

    Most sewing tutorials jump straight into the sewing machine, but it’s important to pause and check out our iron.

    Using a scrap of fashion fabric, adjust your iron’s settings for steam and temperature, validating that they’re correct and won’t damage your raw materials. 

    This is actually something I do before setting up the sewing machine: scorched fabric is easy to spot a mile away, no matter the stitch length or thread tension the garment was sewn with. Take your time here.

    This is also a good time to clean the iron plate for cleanliness.

    Now when it comes to the sewing machine, every machine is different. If you’re brand new to your machine, download the sewing machine manual PDF to your phone for reference during this process. 

    Common settings to check:

    • Needle size for your fabric
    • Stitch length
    • Thread tension
    • Presser foot

    Spend time thinking of all the pattern-specific details you’ll be sewing, like a buttonhole or sewing over interfacing- and test those details out as well. Write this information down to reference over time.

    If you haven’t made a muslin yet, this is the time to make that as well. Check out my tutorials for more details on how to approach your muslins!

    Once your muslin fit is right and you’ve done the recommended steps, you’re ready to put the pedal to the metal and start sewing!

    Hope these details help you on your sewing journey! Let me know down below if you follow these steps or others before you start your project. 

    All the Places, All the Stuff!

    Never miss a post by following me on Bloglovin’!
    Or go mobile- I’m on Instagram and YouTube!

  • Petite Pattern Adjustments for Fuller Figures

    Petite Pattern Adjustments for Fuller Figures

    Petite adjustments aren’t difficult! To achieve the right fit, it’s all about knowing where to look on a sewing pattern to make them possible.

    Knowing which areas are important for Petite adjustments is half the battle.

    Let’s break down the biggest differences between regular Misses’ sewing patterns and Petite sewing patterns:

    Croquis showing the difference between Misses and Petite sizing, specifically to dive into petite pattern adjustments

    The average Petite person is usually around 5’2”, with most Misses’ sewing patterns drafted for 5’5”. Imagine those differences split across the form proportionally. 

    These Petite adjustments usually need to drafted across *multiple* areas on a sewing pattern.

    Watch for these areas where petite adjustments should be taken into account:

    • The distance between shoulder points (to account for a narrower frame)
    • The distance between shoulder and bust point, down the body (to account for bodice height)
    • The distance between bust point and waist (to account for bodice height)
    • The distance between waist and knees (to account for overall height)
    • The distance between knees and ankles (to account for overall height)

    To illustrate this, let’s see how this manifests in a real bodice.

    NOTE: I’m 5’2”, DD-cup, and wear a size L/XL.

    Close up of a bodice, before having completed Petite adjustments.
    Close up of a bodice, before having completed Petite adjustments.
    Close up of a bodice at three-quarters view, before having completed Petite adjustments.
    Close up of a bodice, before having completed Petite adjustments.

    In the above sample piece, you can see a few areas which stand out:

    • The shoulder points are too wide (by over an inch!) so the sleeveless shoulders stick out past my body
    • The entire area above the bust point is exposed at the arm scythe (note how much fabric billows out, exposing foundation garments)
    • The bottom of the arm scythe is also too low
    • The waist has been hacked to be higher (see my previous video with this sample dress), but was originally over 2.5” too low. Even with the previous hacky adjustment, it’s still too baggy.

    The recommended Petite adjustments below will help tackle those issues.

    Narrow Shoulder Adjustment [Timestamp 05:13]

    This adjustment brings the shoulder points closer to the center point of the body, more in line with a Petite person. There are a couple different ways to do this adjustment, one which involves taking out width from the shoulder corner itself (demonstrated in the video) and another which notches and pivots the corner. Both options are worth exploring, so definitely experiment with which way works for you!

    Shorten the distance from bottom of the arm scythe to shoulder [Timestamp 06:43]

    The distance from the top of the shoulder to the arm scythe tends to be longer in Misses sizes. For Petite adjustments, identify that distance with your muslin, pinching out an equal amount from arm scythe to center front. Once you have that number, you can slash and overlap your pattern pieces for a better fit above the bust to the shoulder.

    Raise the arm scythe, if needed.

    Depending on the depth of the arm scythe (or if it was as drastically low as in the example images,) redraw a higher arm scythe, making sure it matches the back of the pattern by walking the pattern.

    Redraw the waist/shorten the bodice under the bust [Timestamp 07:58]

    Check your personal measurements from bust point to waist and adjust the waist height accordingly. In the example pattern, because it was a simple trapeze style, I could redraw the waistline. For more fitted bodices, slash and overlap the needed distance.

    After completing the above changes, my updated pattern with Petite adjustments looked substantially better. 

    Close up of a bodice, after having completed Petite adjustments.
    Close up of a bodice, after having completed Petite adjustments.
    Close up of a bodice, after having completed Petite adjustments.

    Knowing where your body’s measurements sit in relationship to the pattern block will save you *so much* stress, especially if you have to do Petite adjustments. 

    Taking time to understand where a sewing pattern should be shortened or taken in, you can more confidently identify where Petite issues will occur.

    This is particularly useful if shopping ready to wear: you know ahead of time when a garment isn’t fitting right off the hanger. 

    Hand close up, holding a sewing pattern that says Dress Front in pink highlighter

    And remember, just because you have a large bust or waist doesn’t mean you’re not Petite. Make sure to make a muslin to double check!

    Learn about Petite Sewing Adjustments for people who are a larger size. The image has a close up of a bodice of a floral dress, with text overlaid on top.

    All the Places, All the Stuff!

    Never miss a post by following me on Bloglovin’!
    Or go mobile- I’m on Instagram and YouTube!

  • PDF Pattern Companies to Try in 2021

    PDF Pattern Companies to Try in 2021

    Paper or PDF pattern?

    Stack of paper sewing patterns

    It’s easy to have a paper pattern buying addiction. I’m *far* from immune to the 2$ Joann’s pattern sale which has left me with a collection of over 1000 printed sewing patterns. 

    But having so many paper patterns… from the same big companies is kind of a problem.

    These printed patterns take up a lot of space. They also tend to all be designed from the same pattern block. Sometimes, they tend to not be so fresh (design-wise.) And, potentially worse, the designers may be hit or miss as to whether or not they align with your personal values. 

    Enter PDF pattern companies.

    This post features three PDF pattern designers I’m excited about right now and encourage you check out!

    PLEASE NOTE! This is not a sponsored post. I’ve actually not worked with their designs in the past. But I think they’re doing some interesting work and wanted to highlight them in this post.

    Friday Pattern Company

    Their PDF pattern designs are modern but with minimalist sensibilities and some cute details!

    What I particularly love about Friday Pattern Company is that their pdf sewing patterns go up to 7X! The increase in size range makes these designs extremely inclusive, opening the door for more people to dip their toe in and make something that makes them feel like a million bucks. 

    The two patterns below, the Davenport Dress and Sagebrush Top are gorgeous.

    Two models, side by side, modeling garments from the Friday Pattern Company, displaying the range of size inclusivity

    Both designs are feminine, practical, and have a completely different feels if sewn in different fabric. Both are extremely accessible. 

    A few other reasons to be excited about Friday Pattern Company:

    • The Friday Pattern Company size range demonstrates they’ve been committed to the mission for a while.
    • Their patterns are both available in PDF AND paper
    • They donate 5% of their pattern sales to charity and each pattern has a different correlated charity!

    Untitled Thoughts

    Besides being absolutely in love with the company name, the commitment to eco-consciousness is real with Untitled Thoughts! Brittani, who owns the small design studio, goes in depth in the About Me page about how she’s staying committed to caring for the planet.

    This even includes information about the light bulbs which are used in the studio to ensure energy efficiency! 

    The two patterns below, the Amelie and Mathilde dresses are both beautiful, and are really in the spirit of a summer picnic.

    Two dresses side by side, one with an open back and buttons down the back of the skirt, the other as a wrap top, both pdf pattern designs by Untitled Thoughts

    In addition to what I’ve mentioned above, Untitled Thoughts also donates 5-10% to charity. There’s even a yearly transparency report breaking down where the funds were sent! The amount of integrity with Untitled Thoughts is extremely refreshing, and for a PDF pattern company which is a one-person operation, it’s extremely impressive. 

    Bambini del Mare

    The PDF pattern company I’m most excited about right now is Bambini del Mare. Serah, who owns and designs this small brand, is a Bay Area local who attended CCA (California College of the Arts) — just a stone’s throw away from the VoT studio! 

    The two patterns below are my favorite from what has been designed so far:

    Two images of Bambini del Mare PDF patterns, one is a white dress with ruffles on the straps. The other is a bolero that covers the upper torso with fluttery sleeves.

    A couple more reasons I’m excited about Bambini del Mare:

    • The looks are all extremely romantic– they’re all gorgeous and vintage inspired without being frumpy
    • Serah is focused on sustainability and philanthropy and donates 5% of her earnings per quarter to a rotating list of charities.

    PDF pattern companies are doing interesting things.

    Bianca from Vintage on Tap holding up a design from Bambini del Mare on an iPad, talking about PDF pattern companies

    From donating to causes they care about, to going above and beyond with size inclusivity, to even sourcing their sample fabrics to ensure they’re sustainable, it’s extremely impressive. These are examples of what us, as sewing consumers, have an opportunity to support and vote with our dollar on. 

    While working with PDFs can come with their own set of challenges, there’s opportunities to explore new (pattern) points of view and new pattern blocks, all while supporting a small company.

    PDF Sewing Companies You Don't Know About Pinterest image, with a collage of up-and-coming designers
  • Why Slow Sewing = Sewing Better

    Why Slow Sewing = Sewing Better

    The virtues of slow sewing can definitely be a challenge if you’re used to whipping up projects FAST. 

    This is especially true if you’ve been sewing for a while. It’s very easy to get into a rhythm, working on projects back to back. After a while projects bleed together. Is there an opportunity for slow sewing that you’re not considering?

    Bianca cutting out pattern pieces at her workspace, using pattern weights and shears.

    But it made me think: if we’re churning out projects too quickly, are we enjoying the benefits of slow sewing?

    These are the tips I recommend to slow things down a little bit if you’re finding that the churn isn’t for you. 

    Machine sewing, Vintage sewing techniques and walkthrough | Vintage on Tap

    Ask yourself, why do you feel the need to rush the project?

    Seems straight forward, but it can be super easy for us to burn ourselves out without realizing it. 

    Burning ourselves out from sewing is not what we want.

    A few years ago when I started my YouTube channel, I was sewing up a storm every.single.day. It was to the point where I would finish work, and then get to the sewing machine right away.

    What I found was that my projects were not bringing me any joy. I was working on them so quickly. They all started to blur together. 

    None of them were special anymore. And then I would donate them to the thrift store without batting an eye.

    Once you have your Why to the question, you can start to put comfortable Slow Sewing parameters to the project.

    Maybe you don’t give the project a deadline. Maybe you take some time to do a more complicated finish on it, just to experiment.

    This way you can actually take your time and enjoy the whole process and enjoy what you make… even the parts that are kind of annoying because you had more time to actually work them.

    Learn how to sew with tutorials by Vintage on Tap, which walk you through the entire sewing process! | Vintage on Tap

    Ask yourself, are you cutting corners just to get the project out the door?

    This one is a tricky one, because in an effort to go fast, it’s easy to look for shortcuts. And by skipping steps, mistakes can easily be made. 

    Don’t get me wrong, not all shortcuts are bad. But it’s a slippery slope to defaulting to shortcuts always. Especially with no return to proper technique just for the sake of going fast. 

    This one is near and dear to me because I tend to go the slow route always… sometimes to my detriment. 

    But, I have a super simple example to highlight: Stay stitching. 

    Stay stitch neckline on Gertie Keyhole Blouse | Vintage on Tap

    Super simple, straight forward, not that big of a deal. But people skip it. Because they want to cut corners. And the neckline gets stretched out, the seams don’t line up, and in every single picture, the weird puckering is obvious. It was a simple mistake. A simple corner that got cut.  

    This tip is a reminder to ask ourselves why we’re sewing. 

    For so many of us, it’s NOT just to make something that’s “good enough”, but something that makes us feel like a million bucks. 

    Obviously, there’s a middle ground between shortcuts and doing everything by the book. Taking some time to consider WHY is extremely important. 

    If we’re cutting corners to go fast, why? What impact does it have on our actual enjoyment of what we’re making? Aren’t we all here to sew?

    Simplicity 8252, completed vintage and pinup dress| @vintageontap

    Ask yourself, is this a project you really want to stress about?

    Stress itself can play some mind tricks and if we’re going too fast, it can compound exponentially. 

    There’s a bunch of different reasons why we might stress over a project. The time component can make that problem even worse.

    A good example for me was a dress I made a few years ago for the channel, where I was cutting corners, stressing over a video deadline, and starting to actually resent the dress.

    In rushing and stressing and I accidentally cut into the bodice of the chiffon redingote of the dress. In a very obvious place. 

    Accidental cut into bodice of chiffon redingote due to not following slow sewing principles. Interfacing as an attempt to fix.

    I was furious with myself, the dress, and the whole situation. And it sucked.

    Even though the dress turned out ok, it wasn’t until that happened that I took a step back, took a deep breath, and realized that I was supposed to be enjoying the process.

    And I wasn’t enjoying the process. I wasn’t focused on slow sewing for enjoyment, only presentation for video. 

    How often are we stressing over something we’re making and make a careless mistake? 

    If you’re finding yourself doing this, it’s a good opportunity to take a break, get a glass of water, maybe walk around the block, get a snack, and reassess the project. 

    At the end of the day, none of us wants to resent our sewing by rushing it. Slow down, slow sew and savor the process.

  • Beautiful Clothes with NO Sewing Adjustments – Is it Possible?

    Beautiful Clothes with NO Sewing Adjustments – Is it Possible?

    Is it possible to make an amazing garment with no sewing adjustments? 

    Bianca from Vintage on Tap, standing in front of a green plant wall

    A garment that fits straight out of the envelope, with no sewing adjustments, with no problems, and fits you like a glove is a dream come true, even for me! 

    So I wanted to give it a shot.

    I wanted to find out if I could make a dress straight from the envelope and have it fit decently well.

    Bianca making a silly face with tropical fabric and the Gertie Cinch It Dress

    I chose the Charm Patterns Cinch It dress for this experiment, released in Spring 2021. 

    What drew me to this pattern was: 

    • The dress was described as a simple pop-over dress, meaning it should fit decently ok*, as long as I followed the instructions.
    • If it worked out, it had many options for customization, with additional collars, sleeves, and pockets to make several versions.
    • The completed pieces I saw online looked like vintage-inspired dream dresses!

    *: I know pop over dresses are super simple, super generalized, and made to fit at a very basic level. My expectations were medium-to-low. I wanted to get in the general ball park and feel decent in the dress.

    The moral of the story?

    No sewing adjustments is a rarity if you already face regular sewing challenges, or experience the same fit issues over and over. 

    Bianca wearing a completed Charm Patterns Cinch It Dress, a popover dress.
    Vintage on Tap, standing outside on the sidewalk, laughing

    While the concept of the dress is brilliant, I face challenges very common for my body type, which were not easily addressed with most patterns straight from the envelope. This is extremely common for most people.

    For the Charm Patterns Cinch-It, these included:

    • My incredibly petite frame, which impacts my shoulder width. The shoulders of the Cinch-it dress were roughly 1.5” too wide for me, which would make it a challenge for well fitting sleeves, had I made those options.
    • My petite frame’s torso length, which impacts bodice length and waist placement. The shirring line on the dress started over 2 inches too low for me, and extended down over 4 inches– which for a combined 6” of Torso + Waist, put the bottom edge of shirring past the midpoint of my hips.
    • Overall dress length, which is easily remedied, but worth a mention.
    Close up of elastic waist of the Charm Patterns Cinch it Dress

    Is there a pattern out there you can make with no sewing adjustments?

    Yes and no! 

    Depending on the adjustments you may tend to do, there are pattern companies which may fit your body shape more closely due to the nature of their pattern drafting block.

    Bianca reading a book about Frida Kahlo outside

    For example, Seamwork Patterns tend to fit me decently well, due to a larger block cup size and shorter torso length. While alterations are still common, their drafting is naturally closer to my body shape. You can see this well in my Penny Dress, which fit like a glove.

    Video tutorial for retro sewing, the Colette Penny dress | Vintage on Tap

    For the most part, though, it’s rare to make a pattern straight from the envelope with no sewing adjustments. 

    This is perfectly normal!

    Remember that pattern companies draft to their audience’s average. Even the patterns marketed as “easy to sew” may need some slight adjustments for a better fit. 

    Looking to dip your toe into pattern adjustments, or do you also have a petite frame like me and a larger bust? My fitting videos might provide some insights on how to approach fitting challenges!

    Click the video below to start my Fitting Videos playlist!

    Is there a pattern you’ve sewn that fit straight from the package with no sewing adjustments?

    Please let me know in the comments!


    Is it Possible to Sew with No pattern adjustments? Bianca posing in front of a vine wall, wearing a handmade dress

    Disclaimer: This post contains affiliate links. I never recommend products I wouldn’t personally use. All opinions are my own.

  • How to Read a Sewing Pattern Envelope

    How to Read a Sewing Pattern Envelope

    If you’re a beginner sewist, a sewing pattern envelope is NOT easy to read! Learning the mechanics of how to sew while also struggling to understand the pattern envelope you’re working with is exhausting.

    If you’re starting your sewing journey, let’s save you time. This post walks you through what an experienced seamstress looks at, so you can ramp up your sewing faster. 

    Stack of paper sewing patterns

    A sewing pattern envelope can look like gibberish if you don’t understand the nuances of sewing language. 

    For me, the first pattern I ever worked with was something I picked out for Halloween and… I legitimately didn’t understand anything I was looking at. From the size chart to the recommended fabrics, my eyes glazed over. I genuinely had no comprehension of what it was I was even trying to read. 

    I don’t want you to go through that experience. This post will walk you through, step-by-step, what to look at and how to interpret it.

    Once you learn the basics of what you’re reading, it’s substantially easier to use thousands of other sewing patterns.

    Choosing a Size from the Sewing Pattern Envelope

    For the Big 4 pattern companies, there’s usually a distinction between the smaller and larger patterns. These sizes are normally grouped together for printing purposes and feature size ranges. There are also groupings for plus-size, children’s sizing, petites and “standard” sizes.

    To determine if you fit into one size range versus another, take a look at the size chart. You can usually find this on the back of a printed envelope. 

    BIG NOTE: Your size in ready-to-wear (what you buy at Target, or Nordstrom, etc) is NOT the same on a sewing pattern. You want to know your physical measurements FIRST before deciding on what size range is most appropriate to you!

    The Size Chart

    Size chart, in both inches and centimeters, on a sewing pattern envelope

    The chart organized in a simple grid, outlining Bust, Waist, and Hip sizes. Additional measurements may be listed, like length or distance from neck to waist. When approaching a pattern, most fit decisions can be made with the Bust-Waist-Hips measurements.

    NOTE: You might fit into multiple sizes and that’s ok. 

    To read the chart, find the size (or range of sizes) closest to yours.

    Before you walk away with that pattern, double check the Finished Garment Measurements chart, if available. This similar chart will break down what the completed Bust-Waist-Hips measurements will be.

    If a Completed Garment Measurement differs widely from your actual measurements, that’s usually “ease” or the amount of extra moving fabric you’ll have to sit/stand/do a backflip in. This topic is outside the scope of this post.

    Pattern Description

    Sewing Pattern garment description. Breaks down in detail the elements of a garment.

    The Pattern Description is relatively straightforward on the sewing pattern envelope, breaking down the specific description of the garment. It’ll talk about the length, intended fit, and details like what type of zipper it’s using or cut of sleeve. If there are multiple designs in a pattern envelope, it’ll also detail what the difference is between them.

    This reference supports the line drawing on the envelope, specifically describing one design over another. Another bonus is that if you’re practicing additional sewing techniques, you can see what you’ll learn in that design.

    NOTE: A/B/C denote specific design elements. Pay attention to the letter, as its be used as a reference point for the entire design.

    Notions

    Scan of a sewing pattern envelope. Text displays the recommended notions and fabrics for a garment.

    Straight forward, but very simple. This section breaks down what specific notions you need for the design you want to make. If you’re making A or B, it’ll break down what size zippers, buttons, or other sundries you’ll need.

    Recommended Fabrics

    This section lists out all recommended fabrics for your sewing pattern. Using this information (as well as fabric swatch book,) you can narrow down the best material for your use case. If there are a lot of options, the list also shows you the possibilities with the design. Read the list carefully! You can dramatically change the sewing pattern by changing the fabric chosen for it.

    NOTE: Be careful if you’re selecting an unlisted fabric! Using a fabric not recommended may change the drape and silhouette of the garment in unexpected ways. I highly recommend sticking the list if you’re a beginner.

    If you’re taking the plunge on using a fabric not listed, make sure to consult your Fabric Swatch Book for something similar. This way you can ensure that you’re still getting the feel of the recommended fabrics.

    Additionally, there are quite a few warnings in the fabric description!

    • Diagonals: Some sewing patterns call out that obvious diagonals should be avoided. The way the pattern is designed means that the fabric may clash with the shape of the pattern pieces. This is an explicit call out to avoid diagonals as much as possible.
    • Extra fabric for matching: If you want to use a plaid or striped fabric, you must buy extra fabric. It doesn’t specify how much, but the rule of thumb I always use is about half an extra yard. If it’s expensive fabric, I go with an additional yard, in case of major issues.
    • Use Nap yardages for…: For fabrics which are printed with an obvious top and bottom, use the yardage amounts and layouts indicated more carefully. This ensures your pattern pieces are cut correctly (because there’s more opportunity for error)
    • Note the * // ** — which indicate how much yardage you need (in Big 4 patterns)
      • For a Napped fabric (obvious top/bottom) — one asterisk 
      • For non-Napped (no obvious top/bottom) — two asterisk

    The Yardage Chart

    Scan of a sewing pattern envelope, focused on the yardage amounts for sewing a particular garment in a particular size. Sizes 16-20 are highlighted, as well as the 45 inch and 60 inch yardage width.

    Before approaching the yardage chart, have your size on hand (as picked out on the size chart.)

    Example: based on the size chart, I range between 16 and 20, so I’m focusing on those three sizes.

    Isolate out what specific design you’re focusing on to start breaking down how much yardage you’d need. For B designs, look at areas defined by the B, etc.

    Dress Fabric

    Continuing the example above, if the fabric I’ve found on Mood or at Joann’s is 45 inches wide… I’ll buy anywhere between 6.5 and 6.75 yards of fabric (!) If the fabric I’ve found is 60 inches wide… I’ll want to buy 4.5 to 4.60 yards, based on the size ranges 16 through 20 on the example pattern.

    NOTE: If you’re a beginner, I would air on the larger amount. This helps make sure you have enough fabric to work with. If you’ve been sewing for a while, you might want to do less based on what you normally use. In my case, I’m short and have to shorten *all* my pieces, so I stick to the lower number.

    Additional Materials by Size

    Same considerations as above. Find your size range on the chart to determine how much material to purchase. 

    Learn how to pick fabric for clothes with this video tutorial, explaining how to approach your fabric search! | Vintage on Tap, Pinup Sewing Blog

    Once you know how to read a sewing pattern envelope, SO MANY doors are unlocked.

    At this point you can work with all printed sewing patterns and reading PDF pattern information as well. 
    Knowing what you’re looking at, deciphering what the envelope is saying ramps up your sewing experience.

    Many beginner sewing questions are answered on the envelope. Taking the time to read and analyze the information there goes a long way.

    I highly recommend a related video regarding Beginner Sewing Challenges, linked below:

    Sewing is a Journey all its Own, Learning the “Sewing Language” will Help!

    I hope these tips and video have helped demystify some of the Sewing Language, so you can get stitching right away, making beautiful garments!

  • Invest in These Sewing Tools for Better Projects

    Invest in These Sewing Tools for Better Projects

    There is so much to spend your money on when starting out sewing that it’s easy to fall down the rabbit hole of buying everything. Or… buying a lot of cheap stuff. Do you know what sewing tools to invest in?

    Do you know what sewing tools you bought on a budget… but deserve an UPGRADE?

    This post is written for people interested in upgrading their sewing tools, breaking down which ones should be upgraded first!

    BIG DISCLAIMER! You can get very VERY far using budget tools. But if you have the opportunity to invest in sewing tools in this list, they make a difference. 

    Sewing Tools to Invest In -- you don't have to spend a lot to start sewing, but where should you invest your money?

    You don’t have to spend money on All The Things when it comes to sewing supplies.

    Investing in the right tools can support you in creating a garment that’s sturdy and well constructed. Time and time again.

    Invest in this Sewing Tool: Your Sewing Machine

    Question tile asking, What's the. most pricey (dollar sign) sewing tool you own?

    When I asked Vintagettes what was the sewing tool they invested in, over 95% of them said their Sewing Machine! It goes to show that this one is a biggie- you can’t get around it.

    Prices range from extremely cheap ($25 machine) to extremely expensive ($3,000+!) It’s easy to get lost on this tool alone. 

    Keep in mind that for budget sewing machines:

    • They tend to be mostly plastic, which weigh too little. This means they tend to bounce around more often, which affects their timing and internal alignments
    • Cheap machines also tend to have limited settings (or worse) too many novelty settings. These tend to be rarely used for garment sewing, taking away from having more SOLID basic stitches
    • Cheap machines also tend to lack attachments or tools which you might need. Or they’re made of cheap materials which will fall apart easily.

    What makes a sewing machine more valuable?

    • Pricier machines tend to be heavier, which don’t bounce on your table (think of them like a tank)
    • They have more robust basic stitches. The straight stitch, zig zag, etc tend to have less issues over time, maintaining proper length, etc., and not skipping
    • Attachments are almost always included and don’t generally have to be replaced since they’re a lot more built for time

    If you’re looking to upgrade from an entry level or cheaper machine and don’t want to break the bank…

    • Consider the budget (obviously)
    • Think about what you actually use, day to day. For example, I tend to ONLY use a straight stitch, zig zag, and back stitch.
    • Think of what’s a nice to have versus a MUST
      • Must have a buttonhole foot
      • The machine must have all the attachments so I don’t have to buy them one at a time
      • Be easy to fix with a local repair person (or not)

    Invest in this Sewing Tool: Steam Iron

    Bianca holding a steam iron, discussing why it's a sewing tool to invest in.

    If you watched my Top Beginner Sewing Mistakes video, you’ve heard me say, “you should spend as much time worrying about your iron as you do with your sewing machine.

    While it seems like a basic tool, an iron has a lot of power in how you manipulate the fabric and fibers themselves. These details are ones that get skipped over by beginners. But in reality, they play one of the bigger factors in making something look professional and neat.

    Click HERE to learn more about Top Sewing Problems (and how to work through them)!

    What makes an iron more valuable?

    • Consistent control over temperature
    • Consistent control over steam output
    • They tend to weigh more and require less downward pressure to fuse interfacing

    If you’re using an entry level iron and don’t want to break the bank, I would recommend considering…

    • The size of the water tank needed on the iron?
    • What granularity do you want in temperature control?
    • How much steam control is needed?
    • Retractable cable or wireless?
    • Is it just for sewing or for regular clothing as well?

    Invest in this Sewing Tool: Cutting Implements

    Collection of cutting implements, discussing why they're an important sewing tool to invest in. Snips to pinking shears are displayed.

    This one is a tricky one, because everyone’s tolerance for a “nice version” of this can vary widely.

    Some people like tools with better handles, some people like having decorative ones. Some like heavy scissors and cutting tools, some like lighter ones due for ease of use, especially for joint pain.

    I have a wide range of cutting implements and each has a different purpose, collected over the years. None of these serve double purpose– they’re all very specific about what I need them to do.

    At the end of the day, I’m looking for quality, sharp tools. Tools which hold their edge the longest and which can be sharpened.

    Why? The main reason is around SAFETY. Also, cheap tools can damage fabric.

    If you’re looking for new cutting tools, think about these things:

    • Is this going to be comfortable to hold for potentially HOURS of time?
    • What do I need this to actually cut through?
    • What are my sharpening options? 

    Learning How to Invest in Sewing Tools takes time, but this list should get you up and running!

    Bianca with her sewing machine, discussing why it as an investment.

    Every tool is not only an investment, but it’s something you should be able to rely on again and again over the years.

    You don’t have to break the bank. A lot of the items on this list can be bought at a discount, with coupons, or on heavy markdown. Keep an eye out on your local stores and be sure to save up for the equipment you would really want use.


    Invest in these Sewing Tools to elevate your sewing! It's easy to get bogged down with cheap sewing tools, but the tools you invest in make a difference.
  • Spring Fabric You’ll be Excited to Sew With!

    Spring Fabric You’ll be Excited to Sew With!

    The last of the winter frost is starting to melt away. And you realize you’ve been living in a flannel, oversize sweater for months on end. Like a groundhog, you rub your eyes, peer outside, and wonder what day it is. And will it stop being cold… please. 

    Before you know it suddenly tulips are popping up everywhere, the sunshine feels warm on your face, and Spring is fully upon you: ITS EXCITING

    As someone who sews, the next question is… what’s your wardrobe looking like for the changing weather?

    What dresses and blouses are you going to make with pretty spring fabrics, now that you can wear something more free and fluttery?

    Bianca Santori from the pinup and retro sewing blog, Vintage on Tap

    If you’re browsing online right now, there are so many options to choose from for your spring fabrics, that it can be a bottomless rabbit hole. 

    This post focuses on breaking down a few of the most commonly used spring fabrics. You’ll know what to work with in your sewing, whether it’s vintage or more modern pieces you want for your wardrobe. 

    As I wrote this post, I looked for spring fabrics which had the following qualities:

    • These fabrics are frequently recommended in spring sewing patterns.
    • With layering, these spring fabrics can be used as transitional pieces.
    • They have a consistent quality, from fabric store to fabric store (which is super important if you’re shopping online during lockdown!)

    Spring Fabrics You Should Sew With

    Fabric #1: Batiste

    It’s light… it’s airy… it screams spring!

    The quality of the fabric is instantly perfect for warm days and a cardigan on top. It’s lightweight, transparent, and with it being a plain weave, is easy to sew with!

    A beautiful spring fabric to work with is Batiste, which feels cool and smooth against the skin.

    You’ll usually find this fabric used in garments such as blouses, camisoles, and simple cover ups. To ensure the garment is opaque, double it up!

    Fabric #2: Chambray

    Chambray fabric is a lovely spring version of a heartier shirting fabric, being tightly woven and soft.

    This cotton fabric is fantastic because it can be dressed up or down, depending on the application! 

    Chambray tends to be more in the blue/indigo color range, with its warp and weft yarns being dyed in different colors (one yarn blue, one white) Sometimes it’s seen in reds or (more rarely) other specialty colors. 

    A great spring fabric to work with is Chambray, specifically because it's lightweight but also works with structured garments.

    You’ll usually find this fabric used with shirt dresses, button up tops for all genders, and sometimes as shorts and lounge pants. With interlining or backing material, I’ve also spotted it in cool, cozy jackets!

    Fabric #3: Cotton Poplin

    Cotton Poplin is one of my absolute favorite fabrics! It has a crisp hand that is perfectly perky as a spring fabric. 

    Poplin is fantastic as a spring fabric because of its medium weight and structured hand. Also due to its tight plain weave and finish, it tends to have a little bit of a sheen on it, which feels super soft.

    Fun and mid-weight spring fabric, cotton poplin! Super beautiful prints are available in this type of sewing fabric.

    You find this fabric used over a bunch of different applications, including dresses with structure, tops which tend to be more fitted, and shorts and slacks which are more snappy, but still casual.

    Using Spring Fabrics is a LOT of fun!

    The three fabrics I outlined are barely the tip of the iceberg in terms of what’s available in online stores. Spring fabrics are plentiful, but using the woven fabrics I’ve listed will provide tons of options for potential garments. 

    If you’re looking to start gathering ideas from the fabrics I’ve listed, or are looking to try other spring-specific fabrics, I highly recommend creating a swatch book with them!

    Fabric Swatch Book, Free Download | Vintage on Tap

    What’s your favorite spring fabric? Is there one you keep going back to again and again?

    Spring fabrics are beautiful! Learn which fabrics to use to sew a beautiful spring wardrobe.

  • The Top 5 Sewing Beginner Problems

    The Top 5 Sewing Beginner Problems

    What was the first mistake you made when you first started sewing? Let's talk about it.

    You’re a sewing beginner, excited to make your first dress (or top, or skirt!) You have the most gorgeous fabric painstakingly picked out. You have a brand new sewing machine. A vision of what you want it to look like… and you’re ready to go.

    But after that first snip into the fabric… it’s a disaster.

    The garment fits like a giant sack, the stitch lines are wobbly and crooked. As you try and take it apart to start again, an accidental cut into the fabric! The whole thing ends up in the trash. 

    Sound familiar? 

    As sewing beginners, we have ALL been there.

    For me, it was a 1930s-style dress I was making for Halloween when I was a young teenager. Dark green, black fringe, and when I took the scissors to it, it went downhill.

    The dress was atrocious and a waste of money. I’d cut into the center front seam, the fabric was bedsheet quality, and the seams puckered and didn’t lay flat. Not knowing what I was doing, my Beginner energy was crushed. 

    I knew I wasn’t the only one who had gone through these learning woes as a sewing beginner. So I posed the question to my fellow Vintagettes on Instagram, to learn more about their early sewing days. 

    I wanted to know…

    • What were the range of problems people experienced?
    • What was their approach to sewing?
    • Where did their Beginner Enthusiasm run into problems?

    From those conversations, I distilled the following list, to support your sewing journey.

    THE TOP 5 PROBLEMS YOU’LL FACE AS A SEWING BEGINNER

    Expecting perfection from your sewing problems is expected, but not always helpful. Even life's little adventures (like a cat jumping onto your workspace) can impact your sewing projects as a sewing beginner.

    Problem #5: Expecting perfection… from the jump!

    Sewing is a practice in which skills build on each other. It’s difficult to make successful garments which don’t acknowledge that learning one or two things just isn’t enough.

    Sewing skills compound.

    Expect and account for your first several pieces to be straight garbage as you learn. And that’s ok. 

    Each piece is a learning experience, and even after 20+ years sewing, no garment is perfect. Even with hundreds of skills under my belt.

    The stress and heartache from early-stage learning can be enough to turn a lot of people off from sewing. I recommend not planning for the first few garments being worn to a party or to a special event.

    It’s important to get your feet wet in a way that makes the learning experience fun. Putting undue pressure on yourself to make a PERFECT _(insert garment)_ here is not going to do that for you.

    Expect imperfection and lean into it!

    Not coming through the instructions in a sewing pattern or your sewing machine manual can cause problems as you're learning how to sew.

    Problem #4: Not combing through and analyzing the pattern directions or learning your sewing machine.

    Sounds straightforward… but something easily overlooked and dismissed!

    Take time to look through every diagram in the sewing pattern . Do Google searches for phrases you don’t know.

    Similarly, spend time learning your sewing machine. Each machine has its own quirks. This includes how its threaded, how the bobbin is loaded, and where buttons live (or don’t live!) on the machine.

    Doing this simple review will save you a lot of frustration as a beginner. 

    Spending time up front is important. Do Google searches for specific techniques mentioned in the instructions. Read the sewing machine manual. All this decreases the amount of simple errors you can run into as a sewing beginner.

    Learn how to sew with Vintage on Tap Youtube videos! Full tutorial walkthroughs to make a wardrobe at home! | Vintage on Tap

    Problem #3: Underestimating the Power of the Iron

    Shouting this one from the rooftops:

    An iron in the sewing world is NOT OPTIONAL

    Most of us live comfortably in knitwear or wrinkle-proof clothes, the Power of the Iron is REAL.

    With heat, pressure, and steam, irons are an invaluable tool to manipulate individual fibers in fabric. They coax fabric to mold around a curve, lay flat, and encourage thread to meld into fabric.

    It’s easy to be distracted by the sewing machine, with all its stitches, bells and whistles… and completely ignore the iron. 

    Prioritize your iron!

    Pressing seams open and using steam and a tailor’s ham go a long way towards elevating your sewing. Lining things up as you sew them, encouraging seams to lay flat against the form makes your garment look professional. 

    Learn about how to pick fabric for clothes in this video tutorial, walking you through the steps. | Vintage on Tap, Pinup Sewing Blog

    Problem #2: Not Understanding Fabrics  and Choosing the Wrong Fabric for the Job

    Knowing and understanding fabrics is absolutely critical, but also one of the more challenging skills to learn with sewing. For a lot of people, this skill comes with time and experience.

    It’s one of the biggest reasons I’m such a proponent of starting your own fabric swatch book as a beginner. Understanding the different fabrics on the market and how they compare to application, especially in relation to ready-to-wear is vital.

    Looking at as much fabric as possible, feeling it and observing how its used out in the real world. It makes it easier and easier to see what fabrics are more appropriate for what purpose. 

    A pretty floral print might look gorgeous, but is it printed on fabric good enough for what you want to make?

    Fabric Swatch Book, Free Download | Vintage on Tap

    I’ve created a free swatch book template to start building your fabric swatch collection. A swatch book is an important part of the learning process. 

    Print out a few pages with simple information, noting fabric information. This practice develops a solid understanding of how to pick out material.

    By doing this, your skills as a sewing beginner will be more fine tuned towards making more beautiful garments!

    Fabric Swatch Book, Tutorial | Vintage on Tap

    Problem #1: Ready to Wear Sizing =/= Sewing Sizing

    The sad fact is, Ready to Wear clothing sizes are completely different than Sewing Pattern Sizes! A Size 8 from your favorite dress brand will be completely different from Size 8 in a sewing pattern.

    Why is that? Each brand uses their own “block” or average measurements for their audience, which influences the fit for their brand. This also extends into sewing pattern companies, who also develop their own sizing matrix.

    Also, sewing patterns tend to have more ease (or extra “space”) in their measurements, usually based on the design itself.

    The main lesson is that your real-life measurements (when you wrap a measuring tape around your waist, etc.) should be the basis of what size you pick from the sewing pattern envelope. Not what you buy off the rack in a store.

    Using your own measurements as the source of truth– not the number on your clothing label– will lead you to picking sizes which work better for you.

    Video tutorial for how to understand a full bust adjustment! | Vintage on Tap, Retro and Sewing Youtube Channel

    You *will* run into problems as a sewing beginner and that’s totally normal and ok! 

    “[Babies] ability to be bad [at walking] and have everyone be ok with it is how they get good.”

    Tom Vanderbilt, Beginners: The Joy and Transformative Power of Lifelong Learning

    A positive, self-accepting Beginner Mentality (like babies learning how to walk) will do wonders in accepting the ups and downs of sewing.

    Being OK with being bad at sewing and trusting that the more you sew the better you get will lift undue pressure from the process.

    Leave me a comment down below, letting me know how long did it take for you to feel like you were a confident beginner sewing?

    What “clicked” for you to feel more comfortable in the learning process? When did you no longer feel like a Sewing Beginner?

    The Top 5 Problems you'll encounter as a sewing beginner and how to overcome them.

  • How it Works: Anatomy of a Full Bust Adjustment

    How it Works: Anatomy of a Full Bust Adjustment

    Video tutorial for how to understand a full bust adjustment! | Vintage on Tap, Retro and Sewing Youtube Channel

    Do you know how to do a full bust adjustment?

    The full bust adjustment (FBA) is not for the faint of heart. If you’re brand new to sewing, it can seem like a confusing mess.

    The lines, slash and spread, and blending of curves can seem weird and nonsensical, and heaven forbid the adjustments need to be done on a non-conventional bodice! I remember that fear very well!

    As a sewing blogger, I receive countless questions regarding FBAs on all sorts of patterns, but when it comes down to it, the adjustment is standard. If you know the principles of how to do this pattern adjustment, and how to approach it, you’ll be able to tackle some of the trickier garments!

    Vintage Slip Empire Waist Full Bust Adjustment | @vintageontap

    Before discussing the Anatomy of an FBA…

    Evaluate if you indeed need to perform one!

    Not every pattern needs a full bust adjustment, even if you’re full busted.

    I’m a big proponent of sewing the pattern straight from the envelope, before making a decision on the sorts of adjustments that change the foundation pattern.

    Why?

    • Sewing the standard size will give you an idea of how the pieces come together in general (not related to the FBA, but to understanding the garment)
    • It’ll allow you to confirm whether the ease of the garment is right for you (the ease could potentially affect the size of the FBA)
    • You’ll also be able to see if the FBA really will be needed for a better fit at the bust and arm scythe

    I go into depth about my fitting process on my YouTube channel, where I have a dedicated playlist for Full Bust Adjustments.

    Video tutorials for understanding and doing full bust adjustments! Watch this playlist for tips on sewing your favorite pieces! | Vintage on Tap Pinup Sewing Blog

    Click to watch the FBA video tutorial playlist!

    Another resource I recommend checking out is the Sewing Out Loud Podcast (STOP! Before you FBA), which dives deep into some of the current rhetoric around how Full Bust Adjustments are being used as sewing cure-alls. (HINT: they are NOT a fitting cure-all!)

    Video tutorial for how to understand a full bust adjustment! | Vintage on Tap, Retro and Sewing Youtube Channel


    Tools to Complete a Full Bust Adjustment

    Before getting started doing an FBA, make sure you have your tools handy!

    Recommended Sewing Tools by Vintage on Tap

    Paper Scissors – Sharp, simple, nothing fancy. I prefer one with a comfortable handle, which is easy to skimp on, but makes a difference long term.

    Transparent Gridded Ruler – Look for one which is thin and flexible, which can bend around curves for pattern drafting. A regular ruler works fine, but transparent rulers will make your life easier with seam allowances, etc.

    Tape – I recommend 3M Magic tape, which allows you to draw over and erase graphite.


    Anatomy of an FBA, How it works and how to perform the adjustment | Vintage on Tap, Pinup and Sewing Blog

    Breaking down How a Full Bust Adjustment Works

    The standard FBA features three lines, as outlined in the tutorial video.

    Line One: Through the center of the primary dart, straight to the bust point.

    This line dissects the dart in two, and allows for a bigger “tent” to be made in your fabric. Adjusting the overlap of the dart will adjust how much the fabric will fit over the cup.

    Line Two: Parallel to the center front, straight down to the bottom of the bodice, starting at the bust point. 

    This line will allow the front bodice to be widened, creating for a wider space for the bust fit comfortably. NOTE: Most patterns are drafted to a B-Cup, and cup sizes above C-cup will need a little bit more space to be comfortable. The widening of the bodice adjusts the waist size as well, as widening at this line changes all measurements below the bust point.

    Line Three: Bust point to last third of arm scythe.

    The final line creates space for the “side boob”, spreading open space under the armpit. The exactly placement of this line is a general “final third” of the arm scythe, which is vague, as its specific placement isn’t specifically important. This line used as more of a pivot point. NOTE: The upper 2/3 of the arm scythe should be avoided as much as possible. Drafting this line out in the 2/3 or above area will start to distort the area above the bust, including the neckline, shoulders, sleeves, and fabric that sits above the bust.

    How does a full bust adjustment work? This video tutorial will walk you through how the adjustment works | Vintage on Tap Pinup Sewing Blog

    What’s happening on the pattern?

    As you spread the pattern pieces apart, a few different things are occurring:

    The Center Front of the pattern piece stays exactly the same.

    • The Center Front of the bodice front is staying stationary, as all pieces are pivoting around it.
    • The Center Front piece will need to be lengthened, depending on the amount of the FBA, to match the Side Front (see below.)

    Line One, which bisects the primary dart, opens to create a larger “tent” for the bust. 

    • A larger dart means there’s more space for the breast to sit forward comfortably.

    The Side Front of the bodice lowers due to the main dart getting larger (at Line One.)

    • With the Side Front lowering, it creates an offset with the Center Front, as noted above.
    • The Center Front should match the Side Front, which is accurately accommodating the bust lengthwise (up and over the bust.)

    Line Two, which splits the Center Front and Side Front, spreads apart the distance of the full bust adjustment.

    • The spreading of Line Two creates width in the pattern below the bust point.
    • The pattern is widening to accommodate the width of the breast.
    • The waist measurement is expanded an equal amount.
    • Ideally, the addition of space created by Line Two should reduce pulling at the sleeve and armpit, directly perpendicular to the bust point.
      • Note: The pulling is generally created by the fabric straining to accommodate the bust, pulling at the seams of the sleeve/armpit area and smooshing the bust down.

    How does a full bust adjustment work? This video tutorial will walk you through how the adjustment works | Vintage on Tap Pinup Sewing Blog

    Look for Pattern Distortions when Completing an FBA

    Pattern Distortion #1: Center Front to Side Front

    As discussed above, the Center Front should be lengthened to match the Side Front.

    Warning! Simply drawing the Center Front line to square off with the Side Front and “lengthen it” doesn’t always work! If your pattern is not a simple bodice, on the fold, with a square edge, follow my pattern adjustment tutorial video by cutting a few inches from the Center Front piece and MOVING IT DOWN. The hem of the bodice may not always be straight, and this avoids accidental distortions.

    How to use a French Curve, blending pattern pieces | Vintage on Tap

    Pattern Distortion #2: Mismatch on pattern true-ing

    Areas that will need a look over include:

    • The hem (see above)
    • The dart itself
    • How the front pattern piece fits against the back pattern piece
    • The armhole (see below)

    See my tutorial video to understand how to fix this distortion, How to Walk a Sewing pattern.

    Pattern Distortion #3: Armhole

    Line Three will create a pivot point at the armhole, and by completing the FBA, the pivot point pinches into the armhole. Use your French curve to correct the armhole by drawing a simple and gentle curve. (See: How to Use a French Curve)

    How to use a French Curve, blending curves in armhole | Vintage on Tap

    Full Bust Adjustments can be intimidating, but they don’t have to be.

    As you practice doing FBAs, the more complicated bodices operate in the same way. They add width for the bust line, they add length (up and over the bust), and they add a little extra for the side-boob.

    Need a little bit more Full Bust Adjustment help? Check out the videos below!

    Subscribe to Vintage on Tap on YouTube!

    Disclaimer: This post contains affiliate links :)

    All the Places, All the Stuff!

    Never miss a post by following me on Bloglovin’!
    Or go mobile- I’m on Instagram and YouTube!
    New to sewing? Check out the Start Here page!

  • Picking Fabric for Sewing: Essential Tips!

    Picking Fabric for Sewing: Essential Tips!

    Don't know how to pick fabric for dressmaking? Watch this video tutorial to learn how to select the right fabric for your sewing project | Vintage on Tap Pinup Sewing Blog

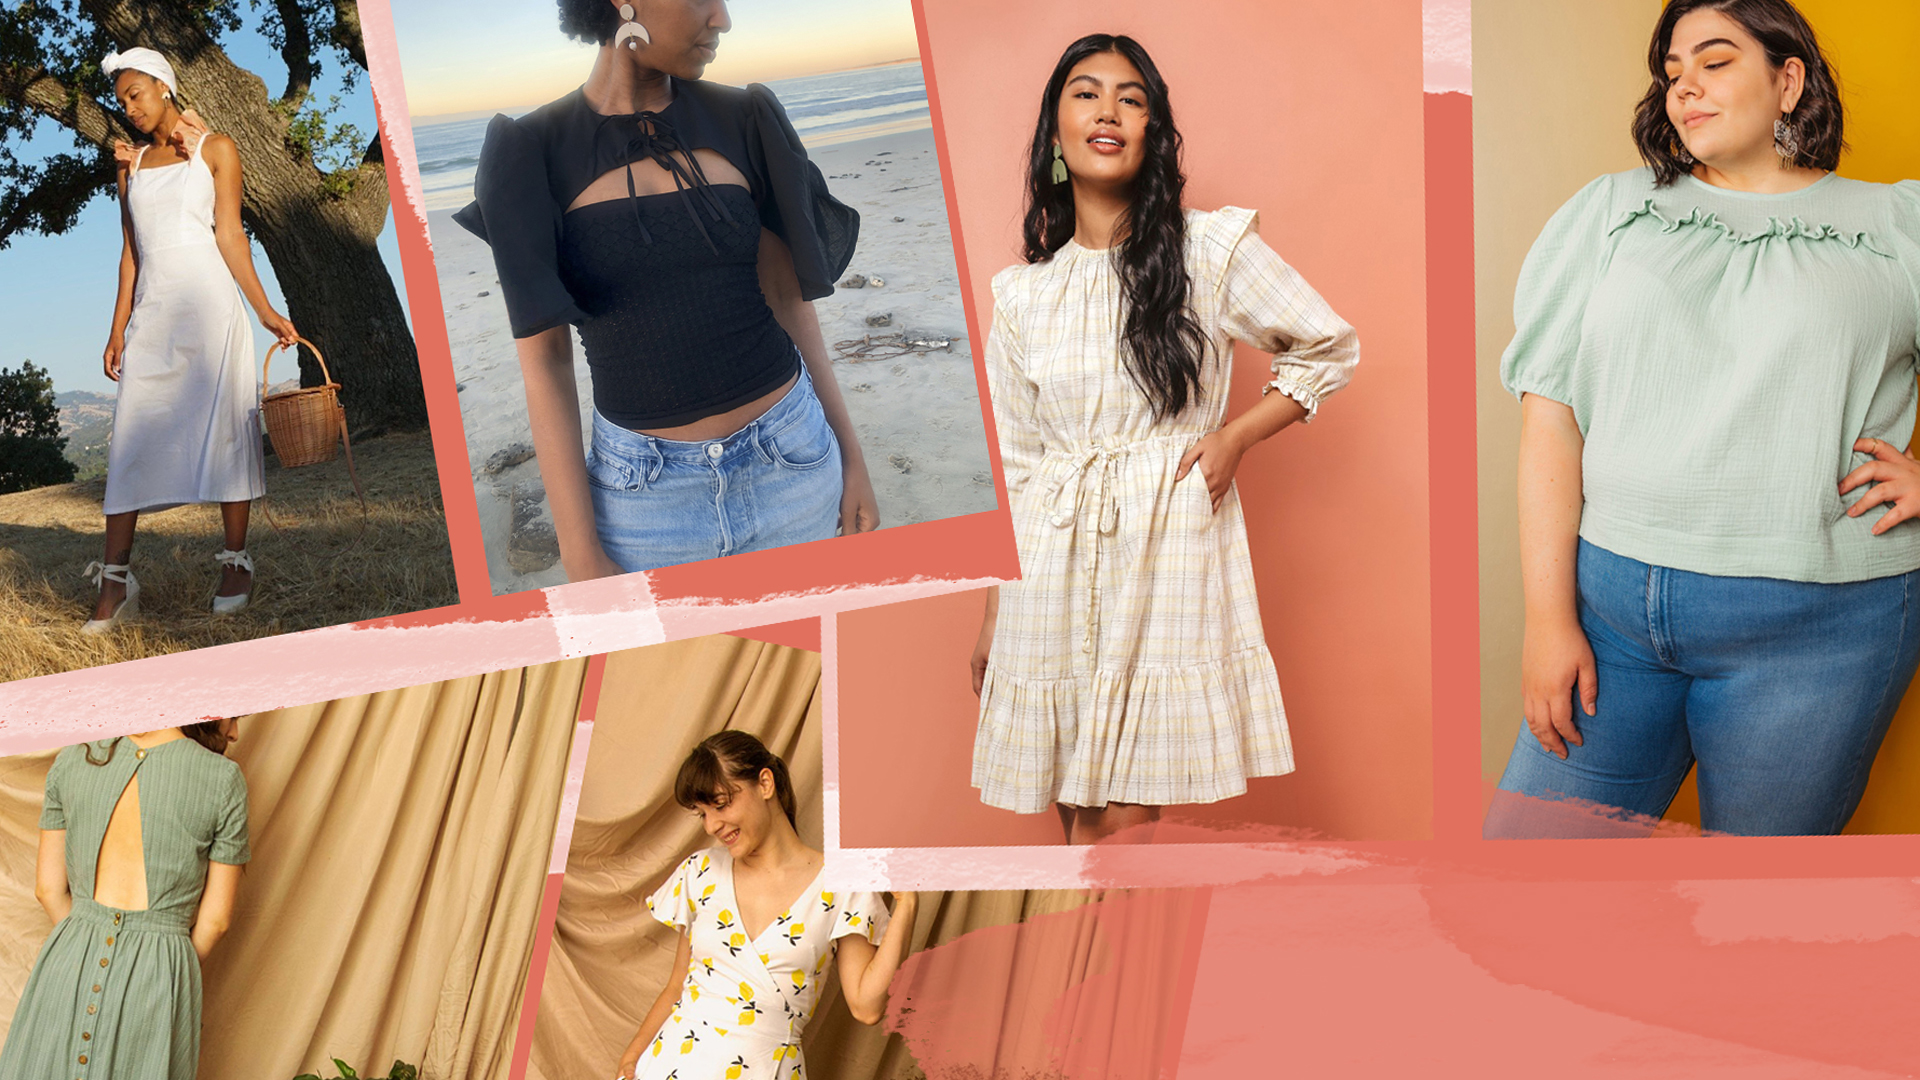
    There are many memes on the internet regarding sewing and fabric buying.

    Fabric Buying Meme | Vintage on Tap, Sewing Blog

    To be honest, if you’re brand new to sewing, they can be really misleading. The fabric world can be your oyster– or it can be overwhelming and cause anxiety trying to figure out the perfect apparel fabric for that blouse you want to make.

    Let’s be real: walking into a fabric store can be a mind blowing experience.

    What fabric do you chose? How do you know what fabric works for what garment? And if you’re buying fabric online… where do you even start?

    The topic, unfortunately, is usually glossed over on most sewing blogs and websites, and while it may seem super 101 and basic, it doesn’t get discussed enough. Your entire sewing project is impacted by the fabric you choose.

    Before I dive into this topic…

    Picking fabric for clothes is a personal choice. Please, 100% feel free to use whatever fabric you want to use. Netting and tulle for dresses? Sparkly jacquard for a pair of trousers? Jersey for a bathing suit? Part of the sewing experience is experimenting, playing with materials, and having the freedom to do whatever you envision.

    With the above disclaimer, my fabric point of view is highly informed by university study. Mainly:

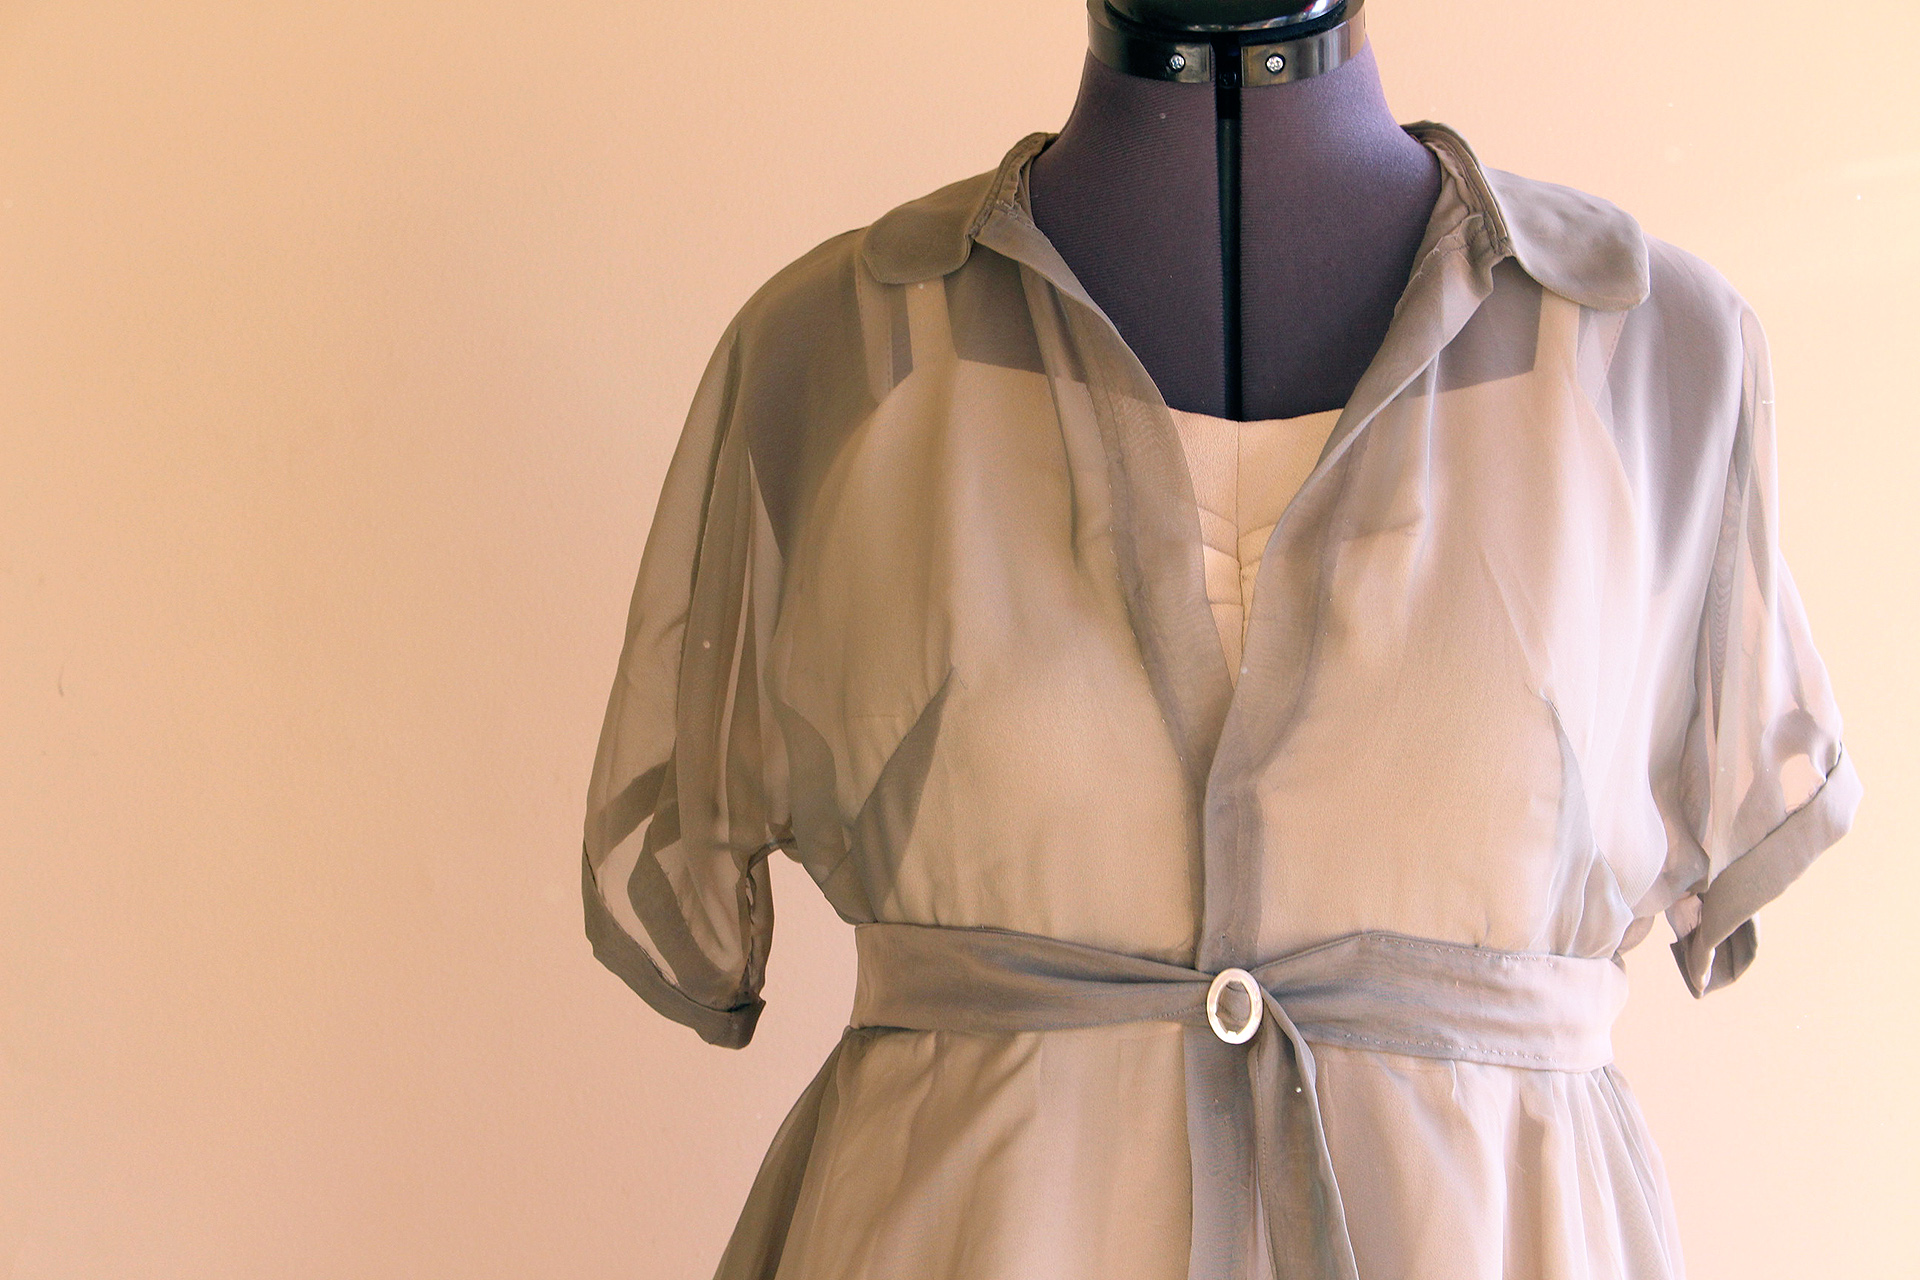
    I don’t want my home sewn garments to look homemade. I strive to make sure that my garments look professional, “unclockable”, and as RTW as possible (even if I sew vintage fashion!) When I walk down the street, I don’t want a single person to realize that the garment I’m wearing was made on a home sewing machine.

    While in university, my teachers without hesitation would point out what was obviously homemade… “Oh. That looks very home sewing.”

    As someone who started university with previous sewing experience, that’s not such a positive thing to hear, especially when using pricier fabrics is sometimes out of reach. However:

    The top way to make your home sewing look and behave professionally is to chose the best fabric for dressmaking at your price point.

    Below are my tips for how to approach picking fabric for sewing, based on my years of sewing experience.

    Learn how to pick fabric for clothes with this video tutorial, explaining how to approach your fabric search! | Vintage on Tap, Pinup Sewing Blog

    Carefully review the suggested fabrics on the back of your sewing pattern.

    The list can be long, confusing to look at, and if you’re new to sewing, be just too much. Especially when the section is usually titled, “Suggested and Recommended Fabrics.”

    Before tying yourself in knots picking fabric, take the time to consider the following question:

    What is the purpose of the garment you want to sew? Is it for work? For fun? Date night? Holiday party?

    Breaking down the reason you want to sew something will help narrow down the long list of fabrics on the back of the pattern.

    If you’re sewing something for a traditional work setting, you may want the fabric to look and feel crisp, to maintain a specific shape and feel that is work appropriate. Maybe you want the fabric to not attract cat hair that sticks to your clothing before heading into an important meeting.

    If you’re sewing something for fun, what sort of fun are you thinking? Saturday-evening-board-game sort of fun? Playing-soccer-with-friends sort of fun? If you’re looking for lounge clothes for Saturday evening board games, you might want something you can be comfortably curled into on the couch playing Monopoly. If you’re planning on playing soccer in your me made clothing, you may want fabric that is sweat-wicking and won’t cling when it has grass stains.

    The suggested fabrics may be extremely different, but it’s important to remember the list is what the pattern designer suggests, based off the way the pattern designer intended the garment to be worn. There are dozens of unlisted fabrics that may be used for nearly every single pattern.

    When in doubt: what are the fabric properties you want you garment to have?

    Fabric Swatch Book, Free Download | Vintage on Tap

    Check your swatch book before looking at what’s currently available in your local stores or online.

    Having a robust and thorough swatch book is key at this stage, especially if the range of recommended fabrics or fabric qualities you’re interested in is pretty large. Pulling out your swatch book to compare is imperative!

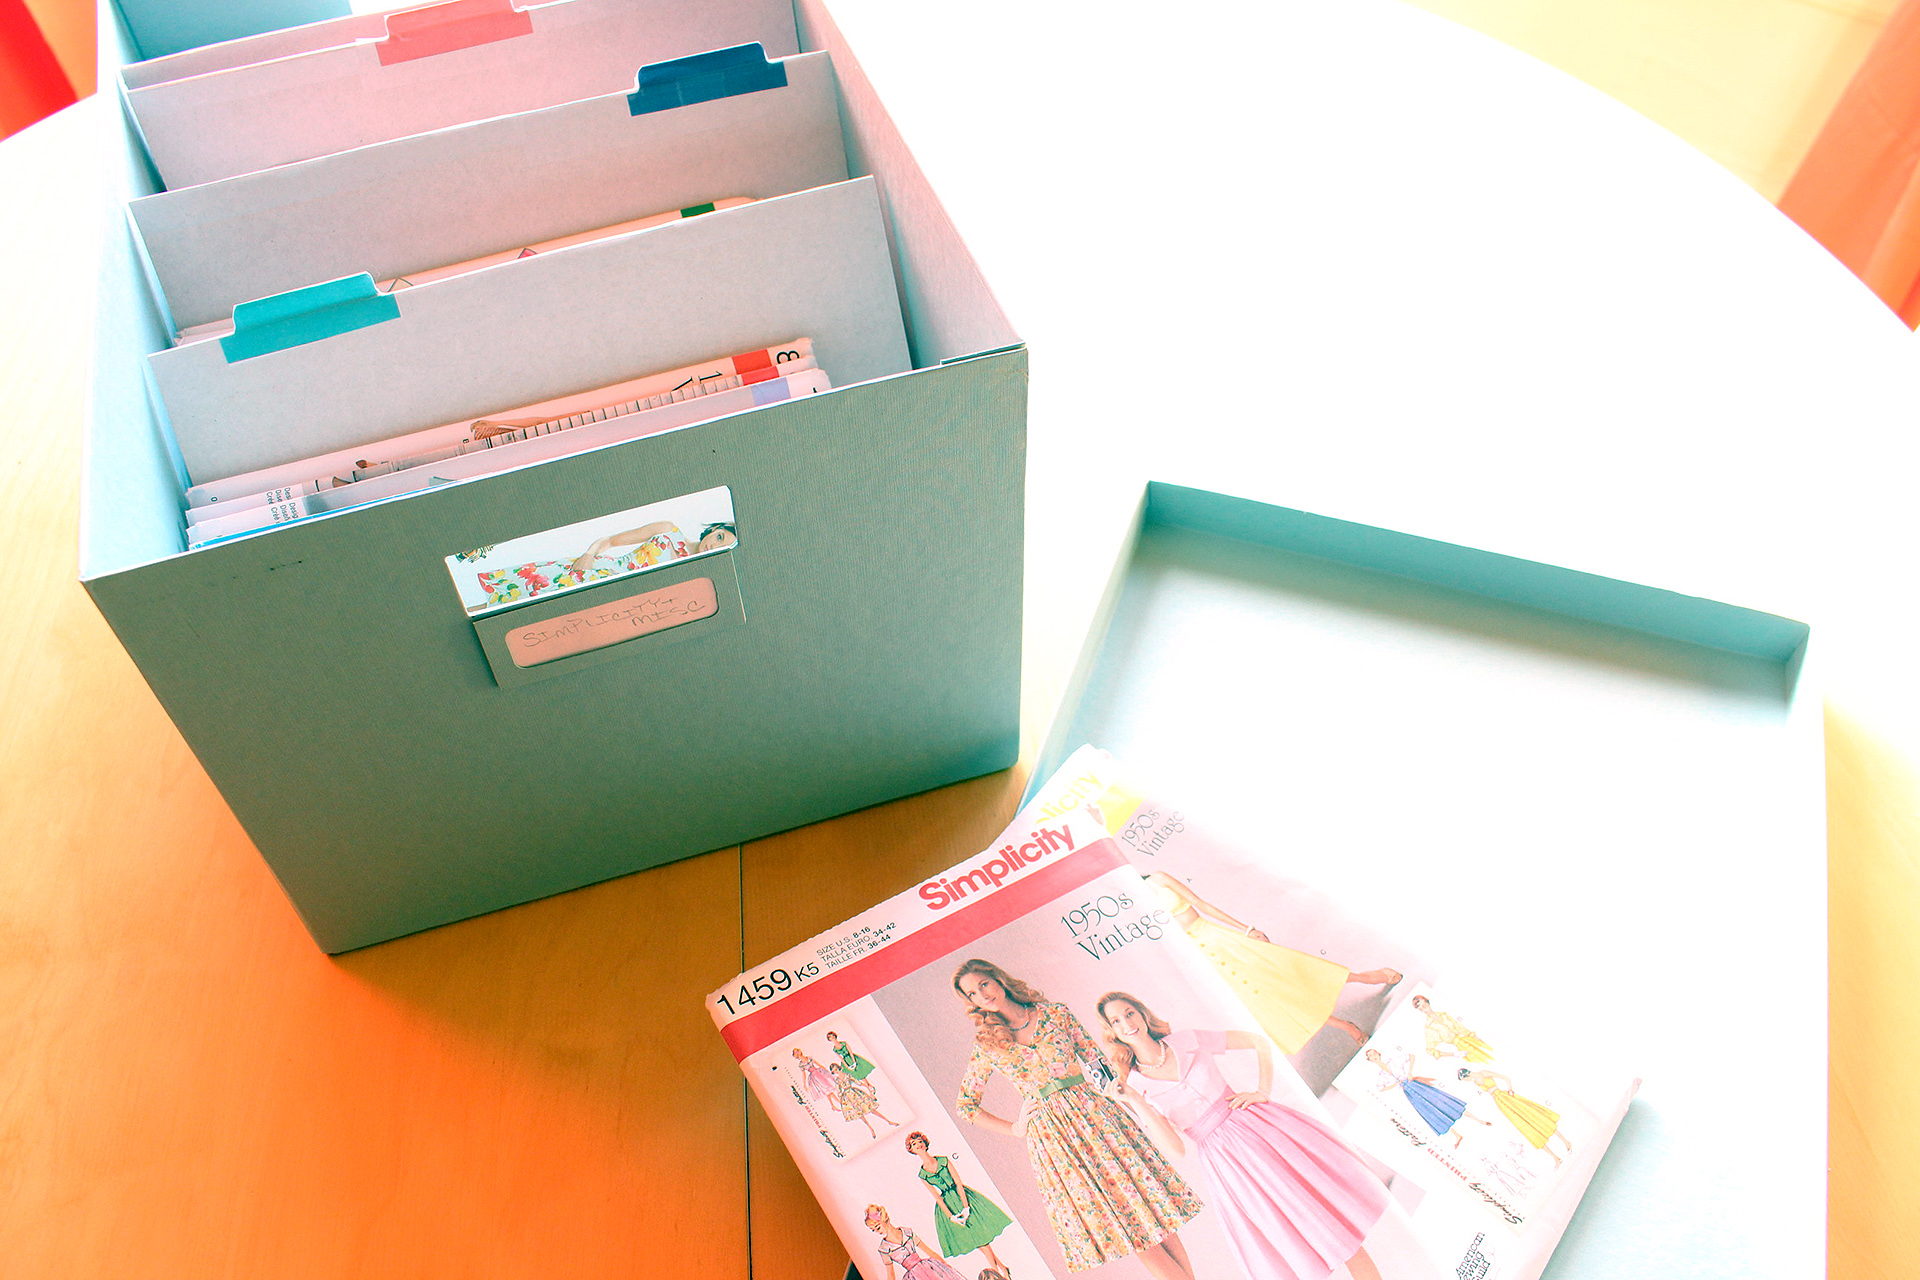
    Don’t have a swatch book? Now is the time to set yours up:

    Fabric Swatch Book, Tutorial | Vintage on Tap

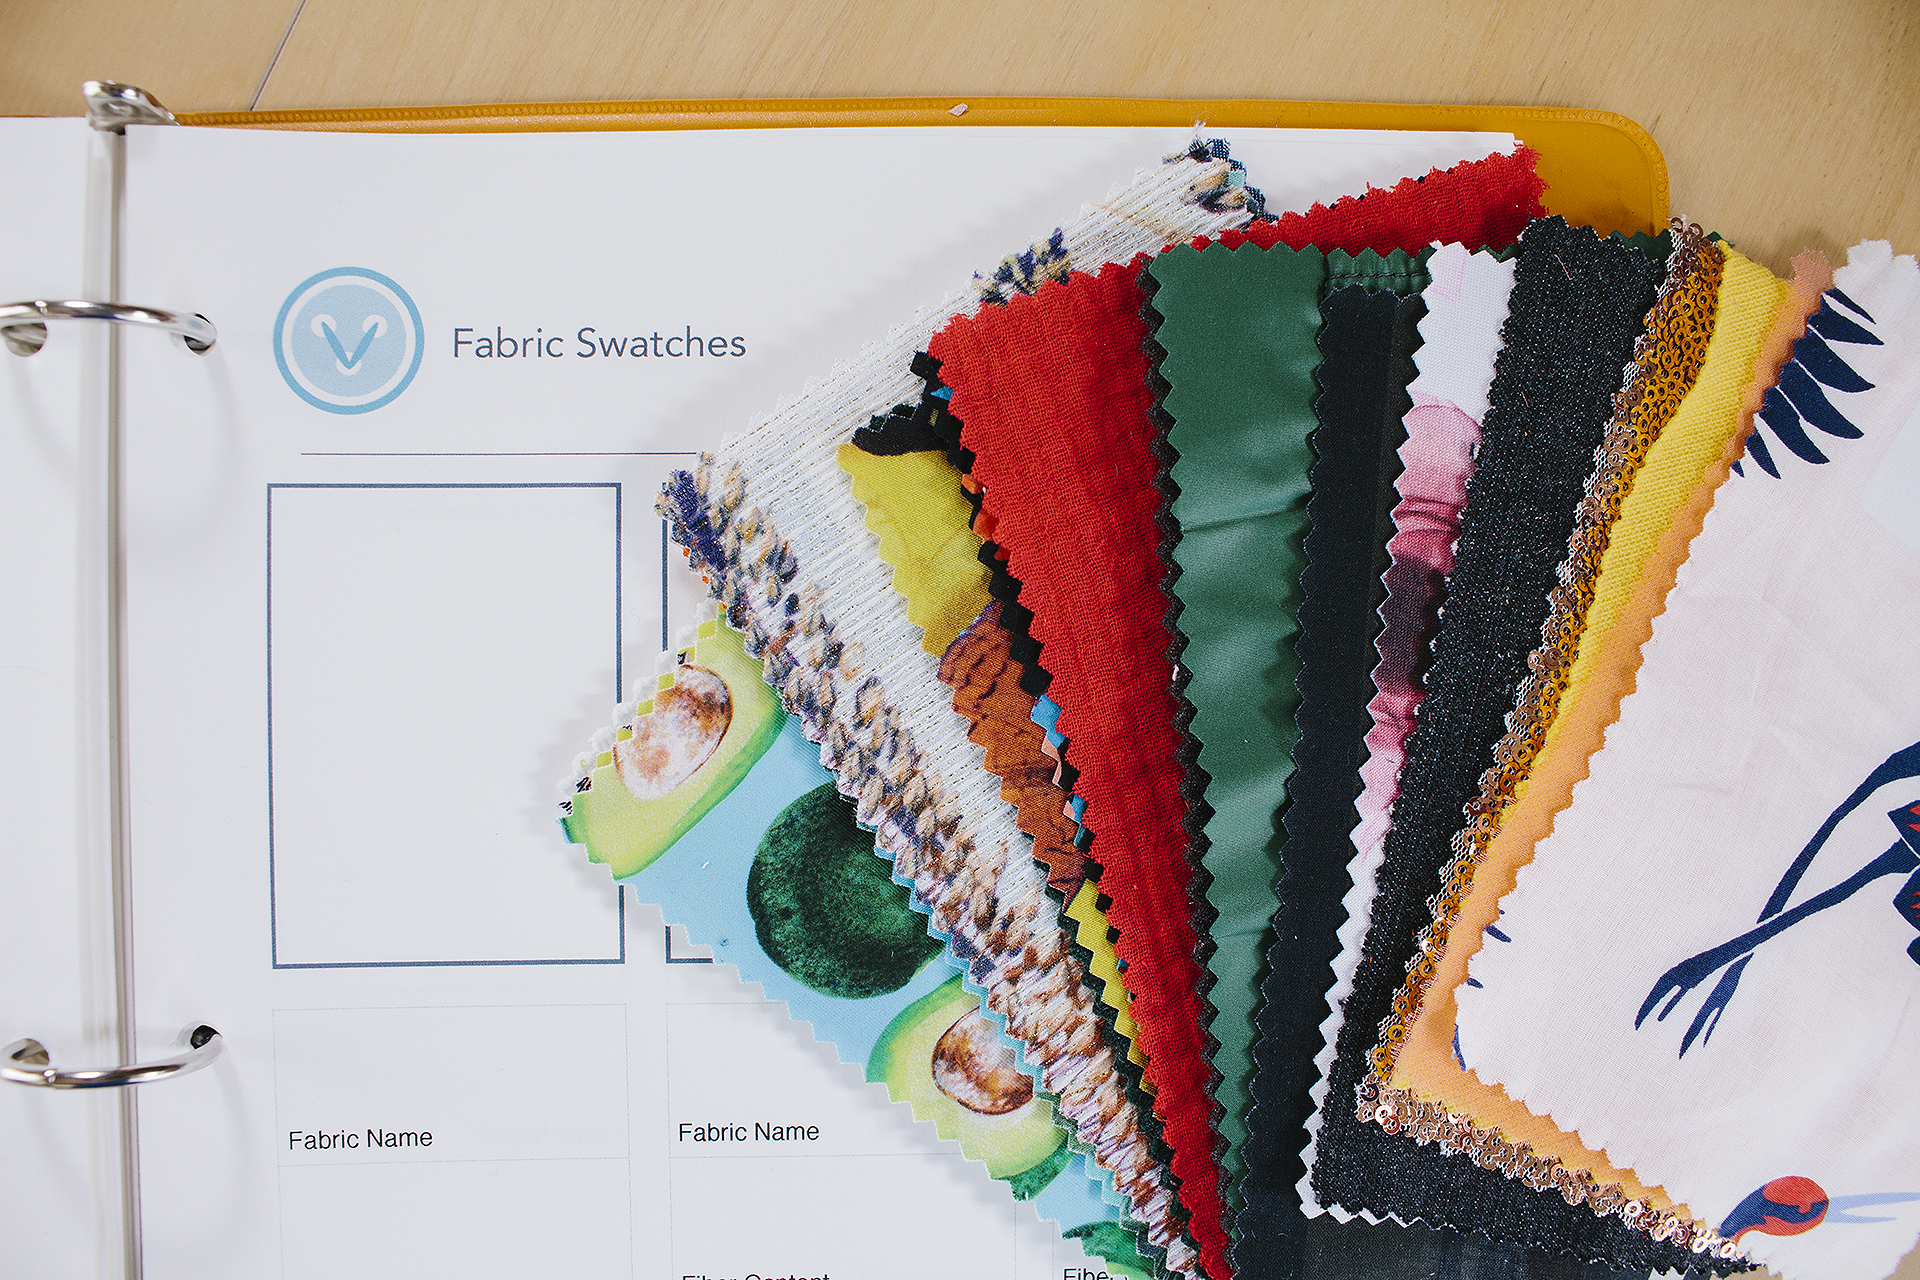
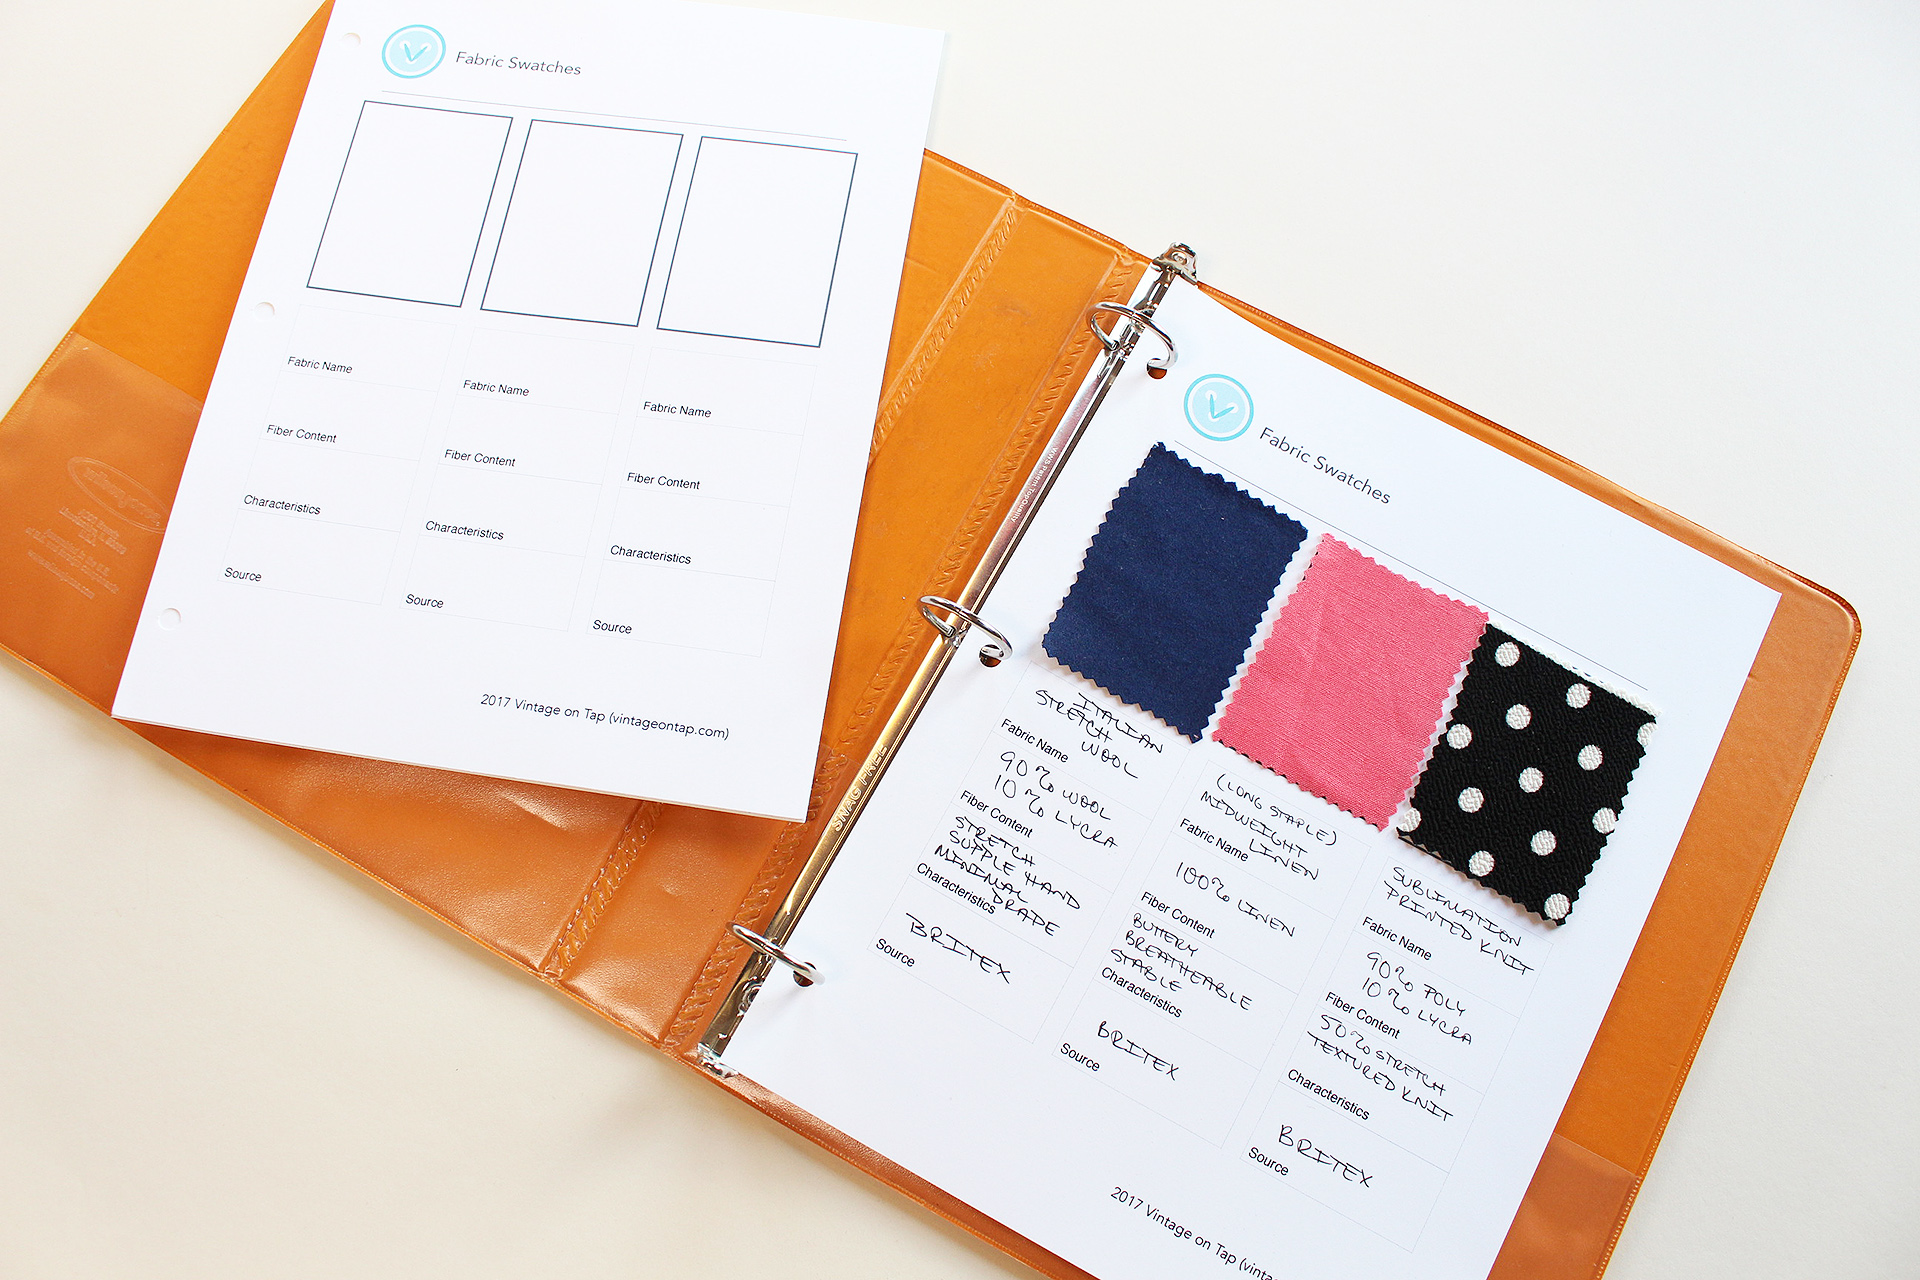
    What is a swatch book?

    A collection of swatches which are organized in a reference binder. The swatch pages list fabric names, fiber content, fabric qualities, and even where you sourced each swatch in your collection!

    Taking five or ten minutes comparing the samples you have in a swatch book against a sewing pattern’s recommended fabrics will save you time, money, and headaches down the road by picking exactly the right apparel fabric.

    To continue with the above examples:

    If you’re looking at making something for the office, you may find that half of the recommended fabrics on your sewing pattern will be too thin, too flimsy, and may not fit into the qualities you’re looking for at your traditional workplace.

    If you’re making a sweatshirt for lounging at home on game night, part of your sewing pattern fabrics may be too stiff and won’t lend themselves to being comfy on the couch.

    And for your soccer gear, the recommended fabrics might be too athleisure and less performance and may not hold up during a rough game.

    Likewise, after reviewing all the recommended fabrics, you might find that you have other fabric types in your book which are better suited for your handmade garment and possess enough similar qualities to the the fabrics listed on the back of the pattern and could work!

    The key to having a robust swatch collection for this review, though, is to make sure to continue to build your swatch book over time.

    Using services such as Mood Fabric’s recently started Mood Swatch Club will help build your book quickly, and immediately give you access to swatches to start picking fabric for your clothes.

    Learn about the Mood Swatch Club and why it's perfect to build your swatch book for sewing! Video tips and real thoughts on this great resource! | Vintage on Tap Pinup Sewing Blog

    I recently received a free sample box of the Mood Swatch Club, and was immediately impressed by twenty-five beautiful sample swatches that I immediately added to my swatch collection. It was also super handy that each fabric swatch came with sticker on the back with fabric details, including fabric number to view on Mood Fabric’s website for more information

    Learn about the Mood Swatch Club and why it's perfect to build your swatch book for sewing! Video tips and real thoughts on this great resource! | Vintage on Tap Pinup Sewing Blog

    When you expose yourself to as many different fabrics as possible, you’re able to identify and spend time picking fabric for your sewing with ease and confidence.

    Learn about how to pick fabric for clothes in this video tutorial, walking you through the steps. | Vintage on Tap, Pinup Sewing Blog

    Go to fabric stores (online or in person) with a plan.

    The best comparison for this point is think of grocery shopping. There’s three different camps of people:

    Person Number One: The people who shop with a grocery list. They decided ahead of time what they needed, they have a list on their phone or on the back of an envelope, and they’re in and out. If they see a pint of ice cream or something they like last minute, it’s all good to throw it in the cart, because they didn’t miss the important stuff.

    Person Number Two: The people who shop without a grocery list. They tend to shop last minute, have a vague idea of what they need, and because they didn’t preplan, tend to circle the store a lot more for what they need. Shopping easily takes two or three times as long as the person with a list and they may not remember things they needed since it wasn’t top of mind.

    And bonus…

    Person Number Three: The people who shop hungry. They tend to go in in a hurry, may be HANGRY and make purchasing decisions they tend to regret. They may also forget things they needed while they were rushing out to go make dinner or pick up take out.

    My best sewing advice for fabric selection is… be Person Number One. Setting foot into a fabric store without a plan of action leads to the above sort of behaviors without looking out for the fabric you really need for your garment.

    Before I dive into this point…

    I’m all for browsing the fabric stores and enjoying the act of browsing. If anything, it’s a decompressing hour or two that I actually look forward to and savor. But if I’m on a sewing mission, I’m on a mission!

    Person Number One does some (or all) of these things:

    • Brings a pattern envelope, photocopy, or photo on their phone of what they want to make, so they can envision the fabric they’re looking at in store (or online) on their intended garment.
    • Brings a swatch or two from their swatch book to compare to what’s available.
    • Knows ahead of time what notions (sewing needles, thread, etc.) they’re going to need for the fabric they’re looking for.

    While in store, going in with a vision of what you want– look, feel, color, all of that– will help narrow down what you’re on the hunt for. This does NOT mean closing yourself off to inspiration (remember: Person Number One goes for the ice cream pint if they want it!) It does, however, mean that if you’re deviating from your intended fabric qualities, you’re making a conscious decision to do so and are better equipped to understand how that’ll affect your garment.

    Learn how to pick fabric for clothes with this video tutorial, explaining how to approach your fabric search! | Vintage on Tap, Pinup Sewing Blog

    Other Fabric Picking Considerations

    Pick the best fabric you can for your price point. Without diving into have-and-have not conversations, having honest self assessments as to what range of fabrics can be reasonably purchased is 100% important to success.

    Don’t buy the $100 p/yard fabric just because. Also, don’t buy the $2 p/yard fabric just because, either.

    Look for the qualities and feel you want and then decide from there what is best for your garment. A giant SALE sign does not automatically equate to the dress or blouse you want to sew. Likewise, taking a peek at the sales rack didn’t hurt anyone.

    I’ve found some of my favorite fabrics on the sales racks, such as with this tana lawn fabric I used to make a tie top and matching skirt.

    Butterick B5895, sewed a matching summer set | @vintageontap

    Click here to learn how to sew this matching retro outfit!

    But I’m also not shy about spending that little bit extra if the fabric behaves exactly how I want.

    Also, not all versions of a single fabric are the same. Depending on manufacturer, fabric store, or even country of origin, fabrics with the same name will vary. Also, fabrics may be mislabeled or be called different names depending on the store.

    Having your ideal swatch type in hand when you go fabric shopping will help guide towards the right selection that’s right for you. If you’re buying online, order a swatch of what you believe is going to be the best fabric to use and make your decision after that point.

    Have any other tips for selecting fabric for dressmaking? Leave your tips in the comments!

    Introducing the Mood Swatch Club! Learn how to pick fabric for dressmaking with the swatch club and by building a swatch book to use for sewing! | Vintage on Tap Pinup Sewing blog

    Thanks again to Mood Fabrics for the Mood Swatch Club sample! I loved receiving it and the fabric samples were fantastic. I highly recommend it, everyone! Mood Fabrics took a lot of care in how they put their box together and I really loved how the whole thing was packaged and shipped. It was legitimately (full personal opinion here!) one of those sewing treats to receive. I actually was super excited to open the box and pour over every fabric sample. Whomever is deciding on these swatch samples on the Mood Fabrics team… wow- you’re knocking it out of the park!

     If you sign up for the Swatch Club, be sure to tag me on Instagram (@vintageontap) to see what you thought of your box! I hope you love it as much as I did!

    Pin this Post!!

    Don't know how to pick fabric for dressmaking? Watch this video tutorial to learn how to select the right fabric for your sewing projects! | Vintage on Tap Pinup Sewing Blog


    All the Places, All the Stuff!

    Never miss a post by following me on Bloglovin’!
    Or go mobile- I’m on Instagram and YouTube!
    New to sewing? Check out the Start Here page!

  • Intro to Drafting a Facing and Lining Combo!

    Intro to Drafting a Facing and Lining Combo!

    Drafting a facing and lining combination for a garment, video tutorial | Vintage on Tap

    Drafting a facing and lining combination is not as difficult as it may seem- and the results are gorgeous.

    The reason I love having both a facing and lining in my heartier garments is that I love the professional look and feel: the two pieces together feel more luxurious and intentional.

    There are plenty of garments that include either only the facing- or only the lining, and while there’s no wrong answer, if there’s an option to do both without much trouble, I like to proceed in that route.

    Places where drafting a lining and facing might be appropriate include, (but are not limited to)…

    • Coats
    • Capes
    • Blazers and jackets
    • Summer dresses that want to be winter-ized
    • Skirts

    Interior, lining view after sewing a vintage lining | Vintage on Tap

    Of course, there are always multiple factors to consider when deciding if drafting a facing and lining is right for you or for your project.

    Questions you may want to consider before proceeding with this include:

    • Is the garment simple enough for this not to be a problem?
    • Will this add extra bulk?
    • Is the shell fabric too thin/see through to need that extra layer for opacity?
    • How many sharp curves will I need to manage on the interior layer?
    • Is the facing/lining close enough in size/dimension to the shell garment? (If it’s not)- how difficult is it going to be to proportionally add a lining that corresponds to the shell? (see video tutorial!)

    If the above answers to the questions above sound reasonable, definitely give it a shot on a muslin.

    How to draft a facing and a lining combination. This video tutorial shows you how to get the job done quickly and easily! | Vintage on Tap

    Before beginning…

    Review my following tutorial videos:

    The above tutorials get you prepped and ready for the beginning of this particular tutorial video.

    Of course, every situation and every pattern differ, but if you’re unfamiliar with the above techniques, I highly recommend taking a look!

    This video teaches you how to draft a facing and lining together for your home sewn garments! | Vintage on Tap

    Step One: Eval the type of pattern you’re working with.

    Because each pattern can differ so much, approaching the pattern with a well-thought out, methodical approach is key!

    If your pattern came with just the facing-

    • Tape up any darts or corresponding shell pieces that may affect the area where the facing will be attached.
    • Overlap the facing to the shell piece, to verify if the facing is an exact copy of the shell.
    • If the facing is the same as the shell, perfect, you’re good to go!
    • If the facing is NOT the same size as the shell, note the difference. Ask the following questions:
      • Is the difference between the two a design element?
      • Does the facing serve an additional purpose than just being a facing?
      • How “off” are the two?

    If the facing is substantially different than the shell, you may not be able to draft a lining to it. As I noted above, each pattern can vary widely. But please note, most of the time you can draft a corresponding lining, but you may need to figure out an individual solution for your particular pattern. Please be sure to watch the remainder of the video tutorial to see if it will make sense for your design.

    If your pattern came with just the lining-
    • Verify that the lining matches the shell
    • If the lining is NOT the same size as the shell, note the difference. Ask the following questions:
      • Is the difference between the two a design element?
      • How “off” are the two?

    If the lining is substantially different than the shell, double check that you’ve taped up any darts or tucks that may be in the lining, but not present in the shell. There are occasions when the lining may have additional pleats/tucks/darts, and your facing should (generally) correspond more closely to the shell than to a lining with these sorts of details.

    If your pattern came without either a facing or lining-
    • Trace an additional copy of the shell as your working piece. That’s it ?
    How to draft a facing and lining combo, with video! | Vintage on Tap

    Step Two: Trace your pattern pieces onto a “working” piece of paper

    If your pattern came with just the facing-

    • Trace the shell onto a clean sheet of paper
    • Overlap the facing onto the shell tracing and copy the facing onto it
    • Make sure to transfer all pattern markings

    If your pattern came with just the lining-

    • Trace out a brand new copy of the lining
    • Make sure to transfer all the pattern markings

    If your pattern came without either a facing or lining-

    • Trace the shell
    • Make sure to transfer all pattern markings

    Step Three: Draw in your stitch line

    If your pattern came with just the facing-

    • Measure UP from the bottom edge of the facing the amount of your seam allowance

    If your pattern came with just the lining OR If your pattern came without either a facing or lining-

    • If you haven’t already viewed the How to Redraft a Facing video tutorial, now is the time!
    • Measure DOWN from the top edge of the shell the amount of the new facing you would like to add

    Drafting a facing and lining combo on a garment isn't hard with this tutorial! | Vintage on Tap

    Step Four: Add your seam allowances

    If your pattern came with just the facing-
    • Trace a line above your stitch line, the amount of your seam allowance
    • You should have a total of three lines drawn, parallel to one another

    If your pattern came with just the lining OR If your pattern came without either a facing or lining-

    • Trace a line both above AND bellow the stitch line, the amount of your seam allowance
    • You should have a total of three lines drawn, parallel to one another
    Learn how to make a facing and lining combination piece | Vintage on Tap

    Step Five: Trace the two new pattern pieces from your working paper

    From here, you are home free!

    View the diagram in the photo above, or in the tutorial video for more info as to which seam allowance goes where. Essentially, your three parallel lines correspond in opposite directions:

    1. Lining Seam Allowance 
    2. Stitch Line
    3. Facing Seam Allowance

    Please note that in my video, I discuss the curvature of the stitch line and how that may be difficult to sew. Evaluate the curve in your stitch line in Step Three, before adding your seam allowances.


    All the Places, All the Stuff!

    Never miss a post by following me on Bloglovin’!
    Or go mobile- I’m on Instagram and YouTube!
    Subscribe to Vintage on Tap on YouTube!

  • Bound Buttonholes Through a Lining or Facing, Video Tutorial

    Bound Buttonholes Through a Lining or Facing, Video Tutorial

    How to Sew Bound Buttonholes through a facing or lining, video tutorial | Vintage on Tap

    Bound buttonholes can seem intimidating, but they don’t have to be.

    The fear of bound buttonholes seems to lay in the perceived amount of steps that go into the process.

    To be honest, there aren’t as many steps as you might think. 

    Adding fuel to that fire is that there are multiple ways to sew bound buttonholes. With the sheer amount of ways to get the job done, anyone encountering the technique for the first time can be intimidated.

    For me, I was put off from them for a long time because I kept using a tutorial that was making it harder for me to understand the concept, not easier.

    At one point I had made over 20 buttonholes and they all kept coming out wrong.

    I was using what I’m dubbing the “two lips” method. With that technique, you were instructed to cut out two tiny lips and then attach them to the buttonhole and in the process, becoming stressed out and angry.

    Yikes.

    Sewing bound buttonholes should not make you angry.

    Bound buttonhole close up, showing you what the completed button looks like | Vintage on Tap

    When getting started with bound buttonholes, expect to make multiple samples before tackling your fashion fabric.

    Ultimately, practicing ANY new technique, it’s a good rule of thumb to go through at least four or five iterations. One or two iterations to mess up the technique entirely, but then by the time you get to version five+, the process looks and sews cleaner and more gorgeous.

    Setting up a bound buttonhole sample, perfect for practicing a vintage-style technique for a better buttonhole! | Vintage on Tap

    Step One: Sew your bound buttonhole rectangles.

    In my video tutorial, my rectangles were 2in x .5in (5.08cm x 1.27cm.)

    Trace your rectangle onto both your fashion fabric and the fabric that I’m dubbing the “lips” of the buttonhole. Using a couple pins, line up both rectangles as closely as possible (timestamp 1:30) and then pin the two layers of fabric together.

    Sew along the rectangle, all the way around. Start and end your stitches as exact on the corners as possible.

    Marked rectangles for a bound buttonhole. This video tutorial shows you step by step the sewing process for this vintage technique! | Vintage on Tap

    Step Two: Mark your cut lines, cut, and turn inside out.

    Starting at timestamp 2:38, draw your cutting lines. You need one line directly down the middle of the buttonhole, then as you approach the corners, create Y-shape from the center line to the corners.

    Making a quick snip into a bound buttonhole guide line, making the opening for this technique | Vintage on Tap

    Using a pin, find the center of the bound buttonhole (timestamp 2:50) and then snip down the guidelines, careful not to cut through your previous stitch line.

    Carefully turn inside out.

    Snipping through the center of bound buttonholes is definitely not scary! Practice this technique for perfect bound buttonholes | Vintage on Tap

    Snipping guide lines on bound buttonholes. Learn how to make bound buttonholes with this tutorial! | Vintage on Tap

    Turning a bound buttonhole inside out. | Vintage on Tap

    Step Three: Tack your Bound Buttonhole “lips” in place.

    Inside out tab for bound buttonhole. | Vintage on Tap

    At your iron, press the buttonhole lips in place, taking care that the corner tabs are laying correctly (timestamp 4:53.) Also be sure that your buttonhole lips are straight and look correct from the right side.

    When everything is pressed and pinned, stitch the short ends of your buttonhole, through all layers, stitching “in the ditch” (the crease.) This step will keep the buttonhole from pulling open and and will tack everything in place, timestamp 6:34.

    Trim from the wrong side any excess buttonhole lip fabric, leaving roughly 3/4″in around the buttonhole.

    Press!

    If you’re attaching a facing or lining to your bound buttonhole…

    Be sure to complete the steps above before attaching the facing or lining. You want to be sure the shell is prepared with its buttonholes so you can focus entirely on the facing/lining.

     Tacking down facing and lining to bound buttonholes, stabilizing the area for finishing the area. | Vintage on Tap

    Step Four: Stabilize the facing or lining around the bound buttonhole.

    After sewing your lining or facing to the garment as a whole, pin the facing/lining approximately 2in (5cm) around the buttonhole.

    The exact amount of pins or the exact distance is not important, however, you’re aiming for the facing/lining to not wiggle or pull during the remaining process. 

    Using pins at the edges of the bound buttonhole, identify the center of the buttonhole, timestamp 7:34.

    Back of bound buttonhole, specifically sewing the stitching attaching the lining or facing. | Vintage on Tap

    Step Five: Cut through facing/lining and handsew in place.

    Carefully snip through the facing/lining, careful not to cut through the lips of the buttonhole. Cut all the way to the edges of the opening.

    Fingerpress the facing/lining approximately 1/16in-1/8in (0.15cm – 0.32cm) under, pinning it carefully in place. Hand sew the facing to the lips of the buttonhole.

    Press and admire your work!

    Sewing bound buttonholes does not have to be a chore.

    If anything, with this type of technique you can consistently make something small but beautiful. For me personally, because I tend to use older machines with considerably janky-er buttonhole attachments, this comes out more beautifully long term. It also gives my sewing more of that Intentional Vintage Sewing look, elevating it past the standard machine made buttonhole.

    Have you made bound buttonholes before? What was your experience?

    Pin this Post!!

    How to Sew Bound Buttonholes Through a Facing or Lining, video tutorial and walkthrough for making perfect buttonholes in your favorite coat! | Vintage on Tap


    This post is part of the Vintage Vogue 9280 Video series! Check out the other installment of this series by clicking the image below:

    Sewing Vintage Vogue V9280 video series! This series breaks down the fitting and sewing process for this 1940s piece | Vintage on Tap

    All the Places, All the Stuff!

    Never miss a post by following me on Bloglovin’!
    Or go mobile- I’m on Instagram and YouTube!
    Subscribe to Vintage on Tap on YouTube!

  • How (and why!) to use Tailor’s Tacks, Video!

    How (and why!) to use Tailor’s Tacks, Video!

    How to use tailor's tacks, thread loop | Vintage on Tap

    Tailor’s Tacks might seem difficult, but I promise you, they’re amazing.

    Generally considered couture, they’re a great way to mark your fabric pieces during the sewing process.

    Tailor’s tacks carry this unfortunate stigma of being time consuming and just “ew, hand sewing”- but attention to detail counts in sewing, even down to the pattern markings. 

    Nobody wants a giant hole in their expensive fashion fabric.

    At least I THINK most people don’t want that.

    One of the most common fabric marking tools is a piercing awl, which is all well and good, except for its single purpose: piercing a hole in your beautiful fabric.

    Common places the awl might be used? Dart end points and pivot points, all areas that receive a huge amount of stress when worn. Adding an unnecessary hole to a high stress point is less than ideal.

    In the same vein, dress maker’s wheels also pierce fabric and (in general)- the less holes you pierce into your fabric the better.

    “But it’s just a tiny hole.”

    Taking the time to avoid points where fibers may become damaged over time will protect the integrity of your garment over the long haul.

    Think of your favorite pair of nylons or a yummy nylon bra. A tiny hole or snag in that will cause unraveling and before you know it, there’s a giant hole where there wasn’t one before.

    The second most common fabric marking tools are water-soluble markers.

    Water-soluble markers are great for knits and garments that will be laundered repeatedly. However, depending on the type of garment you’re making, laundering and water submersion might not be what you’re into.

    There’s a full list of fabrics that should probably avoid water and unnecessary moisture such as wools, silks, and special occasion fabrics. A pink or blue mark at a dart point is not cute, especially when you can’t wash it out.

    Tailor’s chalk might be a good option as replacement to a water soluble marker, however pattern pieces may need to be marked individually, which can also become time consuming.

    Practice your tailor’s tacks before rolling them out for a garment.

    A few practice tries on a couple scraps of fabric only take a few minutes and you’ll be using tailor’s tacks in no time!

    How and Why to Use Tailor's Tacks | Vintage on Tap

    Step One: Consider the thread and needle combination.

    Chose thread that will stand out against your fabric. Black fabric? White thread. Grey fabric? Yellow or red thread. Chose something that will be bright and easy to use instantly (no more searching for awl piercings!)

    The needle you use to create the tailor’s tacks should match the fabric you’re working with, in a similar way that your sewing machine needle matches your fashion fabric. Thin needles for delicate fabrics and chiffons, thicker needles if you’re using a denim or thick wool.

    Double your thread, but don’t knot it.

    Tailor Tacks tutorial | Vintage on Tap

    Step Two: Create your tailor’s loop.

    Push your needle through the fabric, leaving an inch to two inch tail, and pull your needle back up through your fabric to make a stitch.

    Tailor Tack's tutorial | Vintage on Tap

    Double back your needle to the starting point, again pulling your needle back up through your fabric, leaving a one inch loop.

    Snip your loop and snip the new tail, leaving an inch or two.

    How to use tailor's tacks, thread loop | Vintage on Tap

    Tailor's Tacks, what they look like | Vintage on Tap

    Step Three: Pay special care when marking multiple layers.

    When marking multiple layers, start by following the video above.

    Snip the tail and loop.

    Slowly separate the layers of fabric, evenly spacing out the threads. Snip between the fabric layers.

    Tailor's Tacks, what they look like | Vintage on Tap

    Tailor's Tacks, what they look like | Vintage on Tap

    Mishaps occasionally happen when you make a tailor’s tack.

    Tangled threads while making your loops, or even pulling the completed threads out by accident. They happen! But.

    Remarking tailor’s tacks is quick and easy and sure as hell beats piercing the sh*t out of your fabric for no reason.

    Even better, the more you practice marking your fabric in this way, the faster it’ll be.

    Tailor's Tack Tutorial, Learn how to Do Tailor's Tacks! | Vintage on Tap

     Pin this Post!!

    Learn how and why to use Tailor's Tacks in your sewing process! | Vintage on Tap

    Do you have a favorite way to mark your fabric that I haven’t mentioned? Leave it in the comments below!


    All the Places, All the Stuff!
    Never miss a post by following me on Bloglovin’!
    Or go mobile- I’m on Instagram and YouTube!
    Subscribe to Vintage on Tap on YouTube!

  • Intro to Dart Rotation, a Quick Sewing Overview

    Intro to Dart Rotation, a Quick Sewing Overview

    When I first learned about dart rotation, my mind was blown.

    I distinctly remember my thoughts were something along the lines of…

    “…wait- I can change the pattern like that?! What?! How? THIS IS GOING TO BE HARD!”

    I’ve lived through it- survived it- and let me tell you: it’s a piece of cake.

    Intro to Dart Rotation, Sewing Overview | Vintage on Tap

    Dart rotation is a reminder that a pattern piece can be anything you want it to be, so change those darts how you see fit. 

    The “standard” sloper usually has one dart, with most patterns rocking two darts on a basic bodice.

    Of course, the amount of darts in fashion design are plenty.

    • Regular plain darts
    • French darts
    • Shoulder darts
    • Shoulder gathers
    • Dart tucks
    • Waist tucks
    • Princess seams
    • Aaaaand more!

    Full disclosure: there are still quite a lot of darts/gathers/tucks that I haven’t tried sewing yet– the concept is generally the same for all.

     Intro to Dart Rotation, dart placement lines | Vintage on Tap

    You can rotate a dart anywhere on your pattern that makes sense for you and for your design.  

    There is one general “rule” to keep in mind though. However, the more you practice dart rotation, the more you may be comfortable to break the rule down the road.

    The main rule is…

    The bust point should/must/has to end about 1in away (A, B cup)/2in+ (C cup and above) from your bust point. The larger the cup size, the further the distance your bust point should end.

    For example, if you move your dart to the shoulder, as long as the dart ends the designated distance from your bust point, you’ll be good to go.

    Note that this is less of a concern if you have to change your dart to a gather, just as I did for my vintage-style slip.

    Dart rotation on a Vintage Slip sewing pattern | @vintageontap

    After completing an FBA, the bust dart was too much of a point and wasn’t flattering. I changed the dart to a gather, “softening” the dart which made much more sense for the design and for my body. (Read more about the process over my vintage slip blog post.)

    Other examples of dart rotation and dart manipulation include…

    Vintage Vogue V8789

    Vintage sewing, Vogue V8789, dart rotation tutorial | Vintage on Tap

    For this piece, after doing a full bust adjustment, I rotated my dart to a single waist dart to keep the design intact. The waist dart now included enough fullness for my full bust.

    Vintage Butterick B6282

    Flags of the World Challenge, 1940s Vintage B6282 | Vintage on Tap

    In this vintage piece, I completed a full bust adjustment and then rotated my darts out to the shoulder and waist, to keep the integrity of the gathered 1940s style.

    Want MORE sewing tips and advice?

    Get my sewing tips, advice, tutorials, and encouragement right in your inbox!

    Powered by Kit

    Grosgrain ribbon waist stay and interior reinforcement, Vogue 8789 | Vintage on Tap

    Dart rotation and dart placement for fuller chested people requires some additional care

    As much as I wish this weren’t the case, further considerations must be taken with dart rotation if you’re rocking a C-cup or above.

    Questions to consider include…

    • Does the dart accurately point to the bust point?
    • Does the angle or shape of the dart actually cup the breast in a way that makes sense?
    • Does the placement of the new dart highlight or detract from the chest area? (Depends on how much attention you want there.)
    • Does the dart make sense as a gather?
    • Do the ladies have ample space to breathe?

    Shoulder detail, vintage 1940s B6282 | Vintage on Tap

    Not all darts are created equal and not all darts will work with your body shape.

    Don’t be intimidated by changing up the garment design to make the dart work for you and your body! I know it can be intimidating to change a design, but remember you’re (usually) working from a pattern that is made to be altered to work for you.

    As long as you’re mindful of having a nice distance between dart end point and your full bust, move your dart around as you see fit.

    Intro to Dart Rotation | Vintage on Tap

    Have you tried rotating a dart? What was the hardest part? Is there a specific dart you’re stumbling with right now?


    All the Places, All the Stuff!
    Never miss a post by following me on Bloglovin’!
    Or go mobile- I’m on Instagram and YouTube!

    Subscribe to Vintage on Tap on YouTube!

  • How Sew a Bias Facing, Video Tutorial

    How Sew a Bias Facing, Video Tutorial

    How to Sew a Bias Facing, video tutorial | Vintage on Tap

    Sewing a bias facing is simple and satisfying.

    I actually love how clean and professional the technique is and have used it on almost every type of project. Whether its an armhole or a neckline, it makes for a quick finish.

    The most common place you’ll use a bias facing is on an armhole. 

    There are definitely plenty of ways to finish an armhole, including:

    • Sewing a full facing
    • Turning the edge and then stitching in place with a straight stitch
    • Serging

    While all of the above options have some pros and cons, I think bias facings are a really nice, clean solution of finishing an edge if you’re working with a woven. Its stable and the wear and tear holds up over time.

    I also used this bias facing technique in my recent short-sleeve Simplicity 1364 which was posted recently.

    Before you begin sewing your bias facing:

    Don’t skip the prep work for your armholes, which mainly includes figuring out your seam allowance situation!

    What do I mean by seam allowance situation?

    Most seam allowances are 5/8 inch, with armholes occasionally at 3/8 inch. The width of your bias binding (or bias tape, as I describe in the video) will affect how this technique works, but it can be easily accommodated for. In my video, I used a bias binding that was 1/2 inch wide. The seam allowance, when all was said and done was a scant 3/8 inch in my video.

    How did I calculate that?

    The bias tape is 1/2 wide, folded (1 inch wide, unfolded.)

    Line #1 in the video is sewn at 1/4 inch (at the first fold.)

    The bias binding, when turned and pressed, creates a lip of roughly 1/8 inch before Line #2 is sewn in place.

    If you’d like to stick to a 5/8 seam allowance, I would recommend using a 1 inch wide piece of bias binding (2 inches wide, unfolded); Line #1 stitched at 1/2 inch. 

    How to Sew a Bias Facing, video tutorial | Vintage on Tap

    Step One

    Pin your bias binding in place, time stamp 1:20.

    If you’re using commercially purchased bias binding, unfold one edge of your bias binding and pin it to the right side of your fabric. (If you’re using a simple strip of bias tape that you’ve made yourself, you probably won’t have to unfold an edge.) Do this with right sides together.

    Please note, if you’re working on a curve, please steam your bias tape into an approximate shape of the curve it will be matching before completing Step One.

    Taking the time to press the bias binding into a curve will allow the tape to naturally curve in the direction you want it to lay, making it easier to pin and sew. I go over this step at timestamp 1:11 in the video tutorial.

    Step Two

    After pressing, sew Line #1 of stitching, time stamp 2:17.

    In the sample in the video, I stitched Line #1 at roughly 1/4 inch, which coincided with the memory fold line in the bias tape. If you’re using a wider bias tape, as noted above, Line #2 may be stitched at a different seam allowance.

    How to Sew a Bias Facing, video tutorial | Vintage on Tap

    Step Three

    Press the bias tape closed at the stitch line, and then turn under, time stamp 2:36. Turn the bias tape to the wrong side of the fabric and repin in place.

    If you’re working on a curve, you’ll need some steaming action to ease the bias tape in place. Steam like crazy, aiming to shrink the bias tape as it curves in on itself and have the bias tape lay as flat as possible.

    How to Sew a Bias Facing, video tutorial | Vintage on Tap

    Step Four

    Sew Line #2, closing the bias tape, timestamp 3:25. Make sure you sew Line #2 at a location that works for your garment and that can still close up the bias tape with no problem.

    How to Sew a Bias Facing, video tutorial | Vintage on Tap

    Overall, sewing a bias facing is straight forward.

    I didn’t discover this process until after I’d been sewing a while and only because I thought I was going to tackle something complicated. The name almost hints at it being inherently difficult, but its really not.

    Definitely take the time to make a sample on a scrap of fabric of both the straight seam and curved seams, just to get the hang of it and see if you like the technique and see it being part of your sewing arsenal!

    Hopefully this video made the process a little more straight forward to understand and easy to tackle! Taking a moment to deep dive on new techniques can really build up your knowledge and I’m all about making samples of absolutely everything, just to get better and better at what you do.

    Want MORE sewing tips and advice?

    Get my sewing tips, advice, tutorials, and encouragement right in your inbox!

    Powered by Kit

    How to Sew a Bias Facing, video tutorial | Vintage on Tap

    Do you see yourself using this technique in your future projects? Have you tried this technique before? What do you like or dislike about it?

    Disclaimer: This post contains affiliate links :)


    All the Places, All the Stuff!
    Never miss a post by following me on Bloglovin’!
    Or go mobile- I’m on Instagram and YouTube!


  • How to Use a French Curve, Video Tutorial!

    How to Use a French Curve, Video Tutorial!

    Learning how to use a French curve in your pattern drafting is important.

    So important, that I would wager to say that besides my straight edge grided ruler and mechanical pencil, I would honestly flip my sh*t if my French curve went missing. Ever since I learned about it at university, its super high on my list for top sewing tools; there is not a single project that my French curve is not integral to success.

    The types of French curves on the market are numerous.

    If you’re searching Amazon, I can definitely see how they might be intimidating to even think about!

    The two in their listings that I would recommend are:

    • Fairgate Vary Form Curve
      • Pros: This is essentially the one I use (haha!), sturdy, can use it with my rotary blade
      • Cons: Not transparent
    • Dritz Styling Design Ruler
      • Pros: Love the gridded section, love the straight edge component, transparent
      • Cons: Plastic may snap or be ruined by cutting implements, not a dual sided curve, looks kind of flimsy for long term use

    How to use a French Curve | Vintage on Tap

    With so many French curves out in the market, you can use most of them in your pattern drafting. When choosing one, please just consider the following questions:

    • What are you primarily going to use it for? If for strictly pattern drafting, you’d be ok with a plastic ruler, but if you want to also be able to cut with it, stick to a metal ruler.
    • How are you planning on storing it? If hanging, make sure it has a hole in the body to hang from.
    • Is this going to be your single French curve? If so, look for a long French curve with a sharper curve at the head that can serve double duty. If you’re able to afford and have space for multiple tools, you can purchase sharper curved pieces separately and instead aim for a more traditional French curve with more gentle, natural curves.

    The length of this sewing tool is super important.

    Please, aim for a larger French curve that will be adequate for the length between your bust line to hip line– you may have to use this curve to blend that distance.

    How to use a French Curve, blending curves in armhole | Vintage on Tap

    How to Use a French Curve Tip #1: Blending jagged edges, like armholes after a full bust adjustment.

    I discuss this particular tip at the 30 second timestamp.

    The first consideration for this step is that you’re essentially looking for the median of the jagged edge: a line that blends as many of the points together into a smooth, curve that would feel natural against the body.

    1. Identify the areas that need to be blended and decide what type of curve it needs– convex, concave, S-shape, etc.
    2. Identify which part of the ruler will hit the right median between the points.
    3. Move the ruler around in order to capture different parts of the curve as needed. For example, if you’re working on an armscythe you might need one portion of the french curve versus if you’re blending the waist of a dress, you might need to reference 4+ edges of the ruler!

    The main take away of this step, is that when you’re learning how to use a French curve, you can really make that new line do whatever you want it to do. 

    Even a change in a curve of 1/4in makes a difference. If an armhole is too tight, you can change that curve as needed. If a pencil skirt is too straight, you can give it a little more va-va-voom.

    Experiment with the different parts of the ruler for the best curve for the part of the garment you’re working on, but don’t forget to walk your pattern seams after doing this step, just to make sure everything lines up!

    How to use a French Curve, blending pattern pieces | Vintage on Tap

    How to Use a French Curve Tip #2: Blending between pattern pieces.

    In my example at timestamp 1:45, I blend between the front and back pieces that aren’t matching at the side seam.

    This will apply in so many different situations:

    • Blending the shoulder seams
    • Blending a bodice to a skirt
    • Blending a sleeve head
    • Blending skirt pieces to one another

    The concept is pretty simple, though! If you’re walking a seam, and see that no matter what you do, your pattern pieces are not walking properly (bodice is too long compared to the back, etc.)– identify which pattern piece needs to be blended to its corresponding seam.

    In practice, the steps are straight forward:

    1. Walk pattern pieces and calculate how much more needs to be added or subtracted from the “off” piece
    2. Walk pattern until the relevant seam is sitting as it will ultimately be finished (for example, if you’re working on a princess seam, walk the pattern from the top edge, down the curve, to the waist seam.)
    3. Complete steps as outlined in the video, using the French curve to redraft the seam into a smooth curve
    4. Rewalk the seam to confirm that the new seam is meeting correctly (in the above example, rewalk the seam from both the top edge AND the bottom edge of the princess seam, to make sure BOTH seam ends match up and are smooth)

    How to use a French Curve, blending pattern pieces | Vintage on Tap

    Completing the above process will make a brand new cut line, so be sure to only add on the appropriate amount for the seams to match. 

    If you’re making a bodice for a dress, doing this step on the side seam means that you’ll have to rewalk the bodice pieces to the skirt to make sure THOSE seams match properly.

    Ultimately, this is where the “drafting” in “pattern drafting” is at its full, 100% effect. You are essentially using your French ruler to mold a pattern to your body and make sure a piece of paper is translating your natural curves. Its a combination of sewing and geometry, down to the 1/4 inch.

    How to Use a French Curve on Darts | Vintage on Tap

    How to Use a French Curve Tip #2: Trueing a dart.

    Or “truing” a dart- same thing. This step is covered at 3:56 in the video.

    Essentially in this step, you’re making sure that any changes to a dart are accommodated for by making sure there is enough fabric at the bottom of the dart to fit within the seam allowance.

    While this might be tricky to conceptualize, if you think back on a dart you may have had to a change on- whether its a full bust adjustment, a small bust adjustment, or even just a movement of the dart, you need to make sure that when the dart is closed, that the dart seam allowance fits neatly within the final seamline.

    To get this step done, complete the following steps:

    1. Close the dart in the direction of where the dart will be pressed
    2. Identify the seam that needs to be blended
    3. Draw the new blended line using the appropriate section of the French curve. You can also use a tracing wheel for this step. Please no more than 2- max 3- passes of the tracing wheel (too many passes and the line gets “blurry” to follow)
    4. Open up the dart and complete the new dart redraw. If you used a tracing wheel, use the French curve to connect the dots of the tracing.

    Please note- the above steps are for MOST darts, whether a side seam dart, a waist dart, skirt dart, whatever. At the very least, close the dart and make sure you have a smooth seamline just to confirm that your dart will sit properly when you move onto the fabric.

    How to Use a French Curve on Darts | Vintage on Tap

    Learning how to use a french curve can really elevate your sewing experience like crazy.

    For such a simple and relatively cheap tool, it can make for better drafting overall and for better understanding of how pieces fit together.

    As I cover in my Walking a Pattern video, a 1/4in here and there can add up into garments that don’t fit. By using a combination of walking seams and French curve, you can remove some of those obstacles that can make it difficult to fit clothing to the body.


    I hope you found the tutorial useful!

    As I said in the video, I receive lots of questions about this tool because I use it so extensively in my pattern drafting tutorials. The playlist for pattern drafting tutorials has grown like crazy at this point- and I think at this point the French curve has made in appearance in at least 50% of them!

    Want MORE sewing tips and advice?

    Get my sewing tips, advice, tutorials, and encouragement right in your inbox!

    Powered by Kit


    How to use a French Curve, tutorial | Vintage on Tap


    Have you learned how to use a French curve before? Are there any other ways that you use this tool? If you haven’t used one before, why not? How can this sewing tool help your pattern drafting?


    Disclaimer: This post contains affiliate links :)


    All the Places, All the Stuff!

    Never miss a post by following me on Bloglovin’!
    Or go mobile- I’m on Instagram and YouTube!

  • How (and Why!) to Set Up a Fabric Swatch Book!

    How (and Why!) to Set Up a Fabric Swatch Book!

    Fabric Swatch Book, Free Download | Vintage on Tap

    A fabric swatch book? What the heck is that?

    I’ll just say it up front: my fabric swatch book is one of the most important tools in my sewing arsenal.

    The swatch book has never before appeared in a single video, but I consult it regularly and it lives next to my giant sewing pattern library. Its invaluable. If I ever have a fabric question, its there for me.

    A fabric swatch book is a book of possibilities.

    Setting up my book was one of the very first projects I did as a textile design student and it taught me a few really important things:

    1. Fabric names and fiber contents
    2. Weaves and characteristics of each type of fabric
    3. Suitable end uses

    Of course, this sort of education for a home seamstress and sewist may only come from a fabric mishap and can be a painful experience. For someone who may not know what is out there, they might not know of everything they could work with. Especially if you live in an area where really high quality fabric stores are not available, not being exposed to different fabrics and understanding how they differ can really set you back in growing as a seamstress.

    Fabric Swatch Book, Free Download | Vintage on Tap

    Online fabric stores can be a game changer, but you have to know where to start.

    I’m sure there is a percentage of people who order fabric online because they expect one thing… but get something else.

    Fiber content and qualities are described as accurately as possible, but if you’ve never been exposed to Georgette, you will have no idea what it is you’re ordering.

    Enter, swatches.

    I am a huge fan of ordering swatches, specifically ordering swatches in bulk. A swatch will tell you more than color of a textile- but it’ll show you the weave, the drape, the amount of body, the color vibrancy. It’ll give you the ability to test color fastness, laundering qualities, and how much your fabric shrinks.

    Usually priced relatively cheaply ($1-$2 a swatch), I recommend picking up 3-4 swatches every online order to start building your book.

    Fabric Swatch Book, Free Download | Vintage on Tap

    Building your Fabric Swatch book is SUPER easy.

    Gather up your materials!

    Use the free printable!

    FREE Fabric Swatch Printable!

    Get this FREE printable swatch sheet in your inbox!

    Powered by Kit

    My free printable is organized with what is most important to me in a swatch, specifically:

    • Fabric name
    • Fiber content
    • Characteristics
    • Source

    The download includes three pages, the first as pictured above, the second page reverses the position of the swatch boxes (for an evenly balanced binder!), and the third includes blank boxes in case you want to track different information than what I use personally.

    If you love working with nothing but natural fibers, you might want a box that talks about shrinkage. If you want to have pages dedicated to a specific fabric company, you might want to include a box that talks about release date or collection.

    Ultimately, build your swatch book in the way that might work best for you.

    Fabric Swatch Book, Free Download | Vintage on Tap

    Step One: Ordering Swatches

    Every time you place a fabric order online, order swatches. Every.time.

    Swatches are cheap and you should really aim to start collecting swatches from fabric you’ve never used before.

    Scuba knit? Double knit? Broadcloth? By ordering a few at a time, you start to build an array to add to your book. Also, if you’re seeing the same types of fabrics listed as recommended fabrics in your favorite sewing patterns, order them, too.

    Another tip I recommend is that if you see a free swatch sample available, jump on it! For services like Spoonflower and My Fabric Designs, new fabric types become available regularly and swatches are usually distributed for promotional purposes. Put in an order and add it to the book.

    Step Two: Build the Book

    This is pretty straight forward, but please note a few things as you get started:

    1. Please use cardstock or thicker paper for this project. Regular paper is too flimsy for heavy use.
    2. You can print your sheets double sided! This way, you don’t waste paper and you can get more swatches into your binder.
    3. Decide early on how you want to organize your book. Do you want everything organized by source location? By color? By fiber content? This doesn’t have to be a strict choice, but it’ll help you organize things and find things later down the road when all like-swatches are near each other.
    4. 3M Double-sided permanent tape might not seem like it’ll hold: but it’ll hold (I promise!) My original university book still has its swatches firmly in place, even after 6 years!

    Follow along with the video, and get your book set up. And then, flip through and admire it!

    Step Three: Use the Swatch Book Regularly + Add to the Book

    This is where the book and its uses really shine!

    Picture this: you’re about to work on a brand new pattern and the recommended fabric is a satin charmeuse. You’ve never used satin charmeuse. But. You happen to remember ordering a swatch of that a while back- so you go and consult the swatch book. Now, you know what you’re getting into.

    Or, you’re in a fabric store and absolutely NOTHING is labeled. But, you touch the fabrics in store, consult your book, and now know that you’re buying 3 yards of organza and what sort of sewing needles you should be using with it.

    The uses in this vein will go on and on. A pattern might say to use a “silky type”- and you can flip through, find all your silky fabrics, and decide right away which one of them you’re going to use. Or, you might go into a department store and try on a top where you love the fabric- you can later consult your book to find out what they used so you can replicate it from home.

    Adding to the book is a piece of cake.

    Besides ordering the swatches as above, you’ll also want to add swatches of the projects you’re working on as you try new fabrics out.

    As I said in my video, not all Italian stretch wool fabrics are going to be the same and documenting the differences are going to hone your sewing and textile discerning skills. Not all tana lawns are the same, not all midweight cotton knits are the same, etc. etc.

    Building a catalog of the fabrics you’ve worked with- in addition to the swatches you’ve ordered, will make the book more robust and you’ll become stronger at recognizing the differences.

    Ultimately, getting this fabric swatch book set up will allow you to expand your fabric knowledge and be able to more accurately select the perfect fabric for your project.

    Fabric Swatch Book, Tutorial | Vintage on Tap

    Do you have a fabric swatch book? What sorts of fabrics would you want to include right away?

    Disclaimer: This post contains affiliate links :)

     
    All the Places, All the Stuff!
    Never miss a post by following me on Bloglovin’!
    Or go mobile- I’m on Instagram and YouTube

  • Sewing Vintage Linings, Butterick B5824 [Collab + Video]

    Sewing Vintage Linings, Butterick B5824 [Collab + Video]

    Lapel shot, Butterick B5824 | Vintage on Tap

    Pinup and Vintage style coat, sewing vintage linings | Vintage on Tap

    Beautiful fabric used when sewing a vintage lining | Vintage on Tap

    A coat is only as good as its lining.

    Crazy, I know, but lining a winter coat (especially a twirly one!) can make all the difference when its cold outside and you’re working with heavy fabrics that might lend themselves to fraying. A little boucle, a little tweed, lots of wool- all of it can fray like crazy and a lining that can make the inside as beautiful as the outside can make a world of difference.

    Of course, depending on the type of coat that you make and your local climate, the lining can vary in composition. Charmeuse, silk, cotton- so many different fabrics exist with properties that will support your lifestyle.

    For my Butterick B5824, I went with a polyester- wait whaaaat? But yes! Living in San Francisco can be chilly, but not terribly cold, so with a cotton underlining in my coat, I knew a simple polyester fabric would suffice, as long as it was silky enough to not cling to me as I walked.

    Butterick B5821, Red leopard twirly coat by Christina from Gussets and Godets | Vintage on Tap Butterick B5821, Red leopard twirly coat by Christina from Gussets and Godets | Vintage on Tap Butterick B5821, Red leopard twirly coat by Christina from Gussets and Godets | Vintage on Tap

    This Twirly Coat was in Collaboration with the beautiful Christina from Gussets and Godets! Her coat is gorgeous.

    The red jacket is such a stunning piece and it suits her 100%! Definitely head on over to her post about this to see more photos from her photoshoot, because not gunna lie, she’s rocking it!

    The red makes this VAVAVOOM- and of course the leopard print faux fur lapel gives it that little extra Vintage Girl twist. In regards to sewing linings, she bagged her lining, which is a different technique than I cover in my YouTube video. Bagging a lining can be a bit of a mind game, but she makes it look easy and it helps things stitch up so much faster, too!

    Christina and I went back and forth over what jacket to make for the past couple months for this collab and I’m so glad we went with this one! Granted, lots of hold ups (on my end!) in terms of when we would post our jackets, but in the end, it all came together. During the jacket research part of this project, we also were super shocked at the lack of jacket patterns out there that were super vintage inspired. In the end, we just had to go with Gertie’s design.

    This is my third collaboration for the blog so far and it’s always super fascinating to see how our garments could be from the same pattern, but turn out so differently!

    Baby the Stars Shine Bright umbrella, Butterick B5824, sewing a vintage lining | Vintage on Tap

    Adjusted waist tie, Butterick B5824, with a small peek of the pocket | Vintage on Tap

    Happy in my new plaid coat, Butterick B5824 | Vintage on Tap

    Back view, walking away in my new Butterick B5824 | Vintage on Tap

    Butterick B5824, Interior view | Vintage on Tap

    I took a deep dive into sewing vintage linings for the first time with Butterick B5821.

    It wasn’t as tricky as anticipated, and I’m so happy that I was able to create a video to show others how to do it as well!

    Using my own vintage coats, as well as a 1940s reference book, I taught myself one of the many old school ways of getting this done and I’ll be using that technique moving forward as I work on my 2017 goal of making more coats.

    Lapels, Gertie B5824 | Vintage on Tap

    Beautiful fabric used when sewing a vintage lining | Vintage on Tap

    Interior, lining view after sewing a vintage lining | Vintage on Tap

    I’m so proud to continue to learn new skills, like how to sew more authentically vintage.

    This is such a huge component to my sewing and to my experience as a seamstress. There are thousands of ways to get a technique done- so even after 15 years of sewing, I am still near the tip of the iceberg of everything I can learn and improve upon.

    Recently I got a YouTube comment about how and why I spend so much time doing the tedious things, versus finding the happiness in just sewing and to be honest, it’s the tedious things that bring me joy in what I sew. All of them build up on each other and simply cranking out a project for the sake of cranking it out isn’t very me. I savor the process of doing it by hand and being authentic in my approach.

    Disclaimer: This post contains affiliate links :)

     
    Do you like what you see?
    Never miss a post by following me on Bloglovin’!
    Or go mobile- I’m on Instagram, YouTube, and Snapchat (?vintageontap)!

  • How to Trace Vintage Sewing Patterns

    How to Trace Vintage Sewing Patterns

    How to trace Vintage Sewing Patterns, a tutorial | Vintage on Tap

    If you’re looking for how to trace vintage sewing patterns, my video has you covered!

    Yes yes, the video is a little bit on the longer side, but I go into it. The pros and cons, what tools I use, and why I even bother to trace all my modern ones, too. Its definitely a labor of love, but as I say in the video, keeping the original intact is a Big Deal for me, especially when patterns can easily go out of print or I just don’t want to spend time re-taping a PDF.

    Vintage patterns, on the other hand, should always be traced to keep the original in as pristine condition as possible. Browsing the sewing community, I know there are some outliers who go balls-to-the-wall and just use their originals and to them I say… you’re breaking my heart!

    Time Stamps for a specific pattern-type:

    • 6:38 for PDF patterns
    • 9:37 for commercial patterns
    • 14:24 for vintage patterns

    Patterns used in this tutorial were:

    Tools I used in this tutorial:

    Definitely let me know if this video was helpful for you! I’m considering doing more tutorials in 2017 and making them a regular segment of my YouTube channel. Last year, I received so many questions on how to trace vintage sewing patterns that I couldn’t resist making it my “first” sewing related video of the year (not counting my resolutions post!)

    Do you trace your sewing patterns? Why or why not?


    Do you like what you see?

    Never miss a post by following me on Bloglovin’!
    Or go mobile- I’m on Instagram, YouTube, and Snapchat (?vintageontap)!
    Disclaimer: This post contains affiliate links :)
  • Organizing your Sewing Patterns, How to Video

    Organizing your Sewing Patterns, How to Video

    Organizing your sewing patterns, digitally and storing correctly | @vintageontap

    Organizing your Sewing Patterns, tutorial | @vintageontap

    Have you spent time organizing your sewing patterns?

    For someone who sews as much as I do, it was high time that I got myself in order. After spending countless dollars on pattern sales, my storage situation was an absolute wreck: patterns were being shoved into pull drawers and being damaged constantly. If I needed to find a specific pattern, it was time consuming with no discernible organization. I knew it had to stop.

    Materials I talked about in my video:

    My video goes into a step-by-step breakdown of where my collection was being stored, to how I built their new boxes, and how I created dividers to make everything easier to find. The whole process, start to finish, took me an entire day due to the size of my collection, but the transformation to my sewing area and to my workflow has been improved dramatically.

    Organizing your sewing patterns digitally can change EVERYTHING. 

    The beauty of living in the digital age, is that now you can also organize and keep track of your entire collection in the snap of a photo. There are definitely a lot of tools out there that can make this easier, and in my video I go into using Google Photos to make it work.

    Organizing your Sewing Patterns digitally, tutorial | @vintageontap

    Organizing your Sewing Patterns digitally, tutorial | @vintageontap


    Organizing your Sewing Patterns digitally, Google Photos | @vintageontap

    Taking the time to set up Google Photos has all ready made a world of difference, especially if you have a huge stockpile of paper and PDF printed patterns. Being able to find them at a glance to check yardage and notions shaves a lot of time. Add to that, the ability to quickly check if you all ready own a pattern at home when you’re out hitting some sales. If the inspiration strikes, I can pull up a pattern and be inspired immediately and in seconds, be on my way to picking out some new fabric.

    This video was a lot of fun to shoot because it was so practical! There’s still quite a lot of organization I have to do when it comes to my growing sewing stash, but I’ll be taking you on that journey moving forward.

    Disclaimer: This post contains affiliate links :)


    Do you like what you see?
    Never miss a post by following me on Bloglovin’!
    Or go mobile- I’m on Instagram, YouTube, and Snapchat (?vintageontap)!

  • Refurbishing a Vintage Sewing Machine, For Beginners

    Starting point on a Vintage Brother Charger 651, Refurbishing a Vintage Sewing Machine | @vintageontap

    Cleaning interior of Vintage Brother Charger 651, Refurbishing a Vintage Sewing Machine | @vintageontap

    Vintage Brother Charger 651, Refurbishing a Vintage Sewing Machine | @vintageontap

    Vintage Brother Charger 651, Refurbishing a Vintage Sewing Machine | @vintageontap

    Refurbishing a Vintage Sewing Machine was definitely a learning experience!

    Can I say WOW? I’m actually super surprised that I was able to pull this restoration off. I’d been commenting to my boyfriend for ages about how much I needed to invest in an all metal machine, or even an industrial, when this Brother Charger 651 fell into my lap! I stumbled into it at a local thrift store for 25USD$ (~17£, 25AUS$) and when I verified it ran, it was purchased immediately.

    I chronicled my experiences refurbishing a vintage sewing machine, start to finish, in my latest YouTube video. To be honest, I started at square one- absolutely no idea what I was doing and what to buy. There was a lot of conflicting information online about what works and doesn’t work, so I read, a lot. Please check out the resources links at the end of the post: if you’re taking on a refurbish and restoration, you want to make sure to eat up as much knowledge as you can! Each machine is different and if you’re working on an old Singer, there’ll be extra things to worry about (like the decals!)

    The items I bought and talked about in my YouTube video are listed below. I’m sure a lot of these products are not available world wide, but do a quick Google search and you may be able to find counterparts in your area of the world.

    Cleaning:

    Rubber Gloves
    Face Mask
    Cheap paint brush set
    Cheap toothbrush
    Compressed Air
    Tri-Flow Lubricant
    WD-40
    Cotton twine
    Cotton towels
    Sewing machine oil
    MAAS Metal Polish

    Replacement Parts:

    Sewing Parts Online

    Staining:

    Assorted sandpaper
    Pre-Stain Wood conditioner
    Minwax Stain + Polyurethane
    Staining brushes

    Final Thoughts

    Please don’t let refurbishing a vintage sewing machine freak you out! The process definitely is labor intensive, but not enough to stop me from doing the process again. Spend an hour or two a day plugging away at your sewing machine, scrubbing here and there, and it’ll be done in no time. And don’t skimp on taking it in for that final tune up! It was important to take it in to be seen by a professional before stitching to make sure the electrical components were good to go. I took my machine into Serge A Lot here in San Francisco and have nothing but good things to say about it!


    Additional Reading Material + Resources:

    How to Clean and Care For Your Older Sewing Machine
    Pete Olson’s sewing machine restoration process. Bringing new life to an old Singer 301.
    Cleaning and Lubricating a Machine Head
    The Vintage Singer Sewing Machine Blog


    Disclaimer: This post includes Amazon affiliate links :)