Category: Pattern Drafting

  • Petite Pattern Adjustments for Fuller Figures

    Petite Pattern Adjustments for Fuller Figures

    Petite adjustments aren’t difficult! To achieve the right fit, it’s all about knowing where to look on a sewing pattern to make them possible.

    Knowing which areas are important for Petite adjustments is half the battle.

    Let’s break down the biggest differences between regular Misses’ sewing patterns and Petite sewing patterns:

    Croquis showing the difference between Misses and Petite sizing, specifically to dive into petite pattern adjustments

    The average Petite person is usually around 5’2”, with most Misses’ sewing patterns drafted for 5’5”. Imagine those differences split across the form proportionally. 

    These Petite adjustments usually need to drafted across *multiple* areas on a sewing pattern.

    Watch for these areas where petite adjustments should be taken into account:

    • The distance between shoulder points (to account for a narrower frame)
    • The distance between shoulder and bust point, down the body (to account for bodice height)
    • The distance between bust point and waist (to account for bodice height)
    • The distance between waist and knees (to account for overall height)
    • The distance between knees and ankles (to account for overall height)

    To illustrate this, let’s see how this manifests in a real bodice.

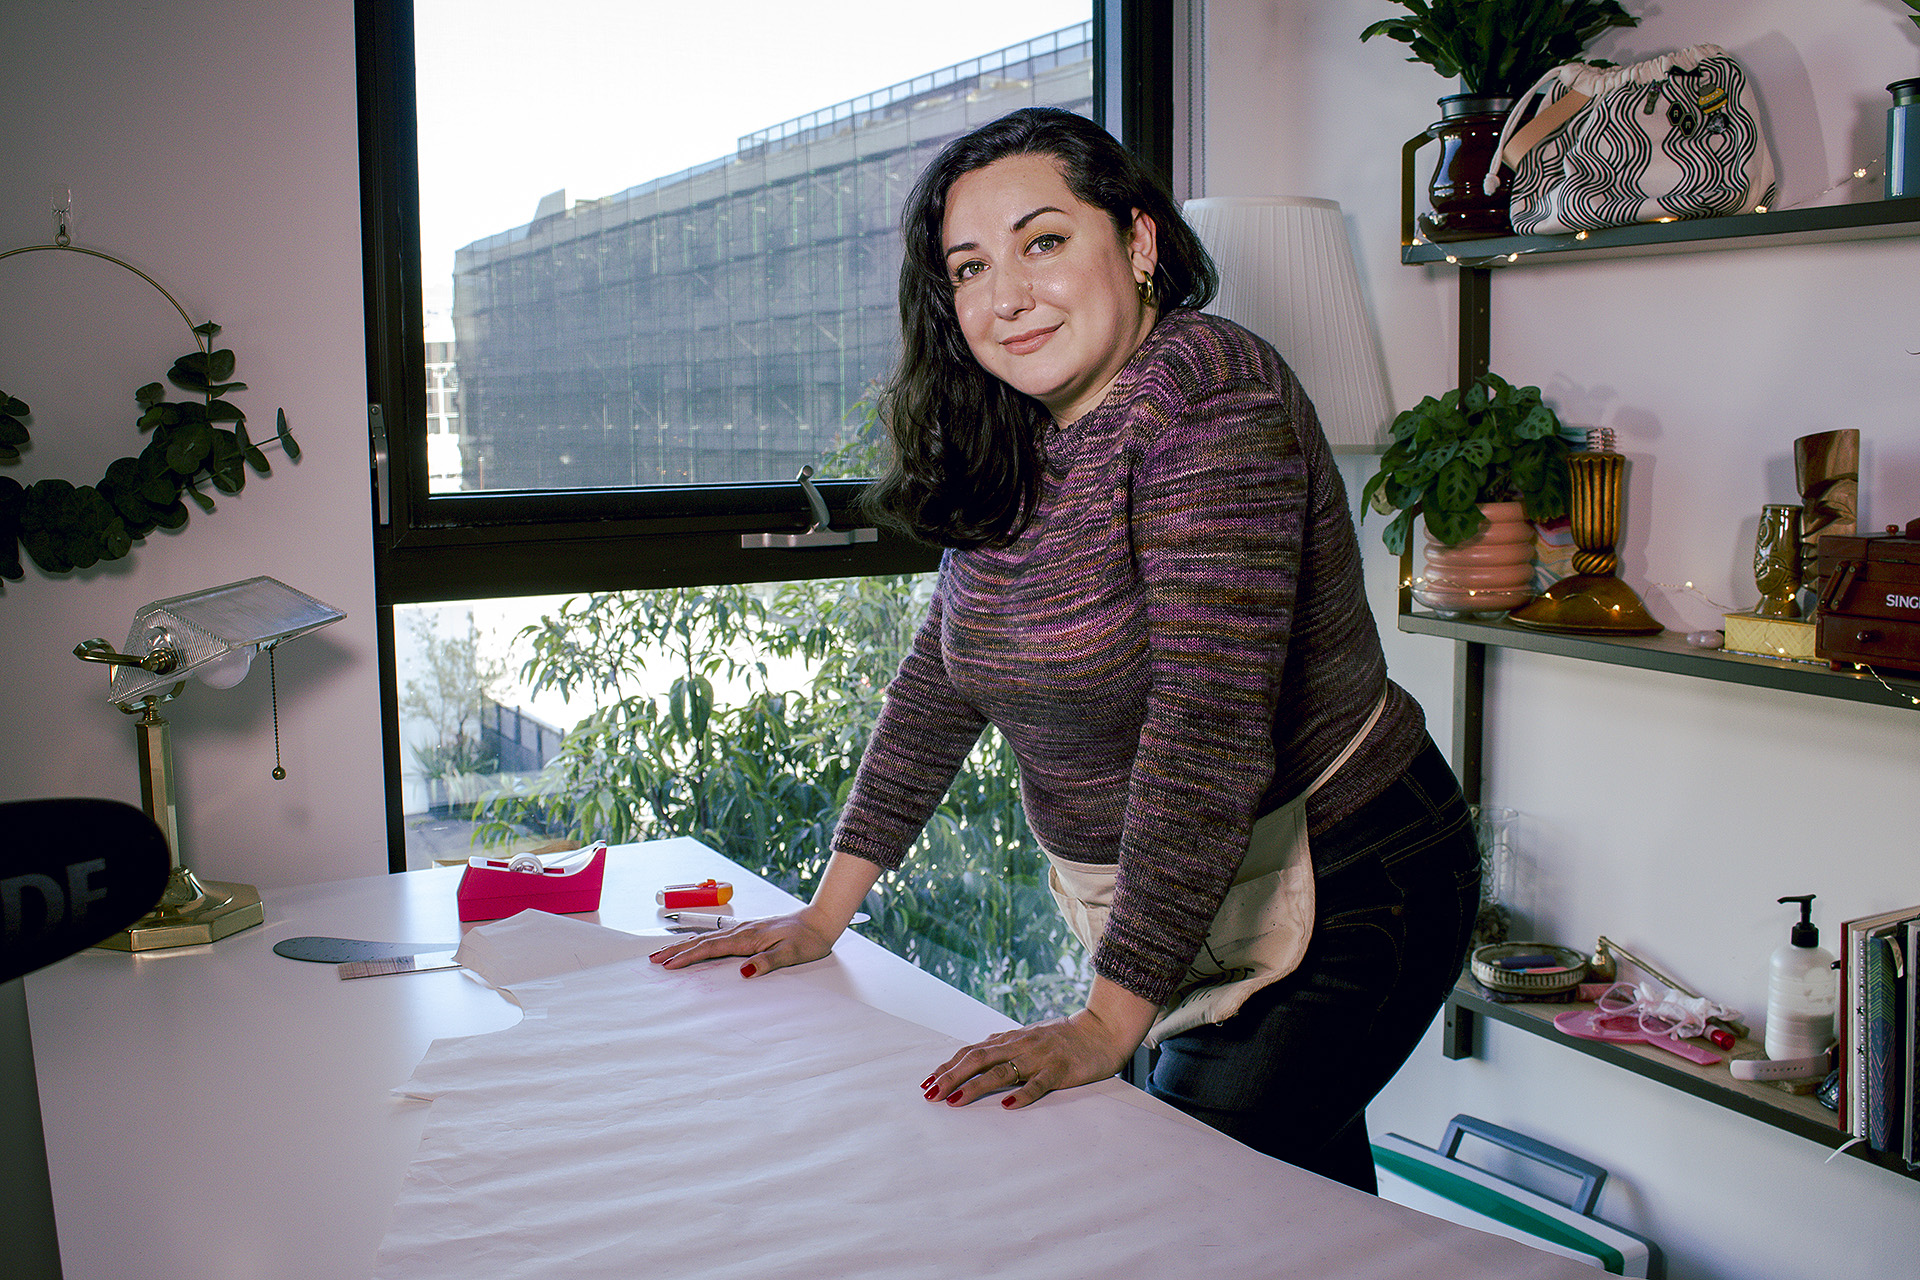
    NOTE: I’m 5’2”, DD-cup, and wear a size L/XL.

    Close up of a bodice, before having completed Petite adjustments.
    Close up of a bodice, before having completed Petite adjustments.
    Close up of a bodice at three-quarters view, before having completed Petite adjustments.
    Close up of a bodice, before having completed Petite adjustments.

    In the above sample piece, you can see a few areas which stand out:

    • The shoulder points are too wide (by over an inch!) so the sleeveless shoulders stick out past my body
    • The entire area above the bust point is exposed at the arm scythe (note how much fabric billows out, exposing foundation garments)
    • The bottom of the arm scythe is also too low
    • The waist has been hacked to be higher (see my previous video with this sample dress), but was originally over 2.5” too low. Even with the previous hacky adjustment, it’s still too baggy.

    The recommended Petite adjustments below will help tackle those issues.

    Narrow Shoulder Adjustment [Timestamp 05:13]

    This adjustment brings the shoulder points closer to the center point of the body, more in line with a Petite person. There are a couple different ways to do this adjustment, one which involves taking out width from the shoulder corner itself (demonstrated in the video) and another which notches and pivots the corner. Both options are worth exploring, so definitely experiment with which way works for you!

    Shorten the distance from bottom of the arm scythe to shoulder [Timestamp 06:43]

    The distance from the top of the shoulder to the arm scythe tends to be longer in Misses sizes. For Petite adjustments, identify that distance with your muslin, pinching out an equal amount from arm scythe to center front. Once you have that number, you can slash and overlap your pattern pieces for a better fit above the bust to the shoulder.

    Raise the arm scythe, if needed.

    Depending on the depth of the arm scythe (or if it was as drastically low as in the example images,) redraw a higher arm scythe, making sure it matches the back of the pattern by walking the pattern.

    Redraw the waist/shorten the bodice under the bust [Timestamp 07:58]

    Check your personal measurements from bust point to waist and adjust the waist height accordingly. In the example pattern, because it was a simple trapeze style, I could redraw the waistline. For more fitted bodices, slash and overlap the needed distance.

    After completing the above changes, my updated pattern with Petite adjustments looked substantially better. 

    Close up of a bodice, after having completed Petite adjustments.
    Close up of a bodice, after having completed Petite adjustments.
    Close up of a bodice, after having completed Petite adjustments.

    Knowing where your body’s measurements sit in relationship to the pattern block will save you *so much* stress, especially if you have to do Petite adjustments. 

    Taking time to understand where a sewing pattern should be shortened or taken in, you can more confidently identify where Petite issues will occur.

    This is particularly useful if shopping ready to wear: you know ahead of time when a garment isn’t fitting right off the hanger. 

    Hand close up, holding a sewing pattern that says Dress Front in pink highlighter

    And remember, just because you have a large bust or waist doesn’t mean you’re not Petite. Make sure to make a muslin to double check!

    Learn about Petite Sewing Adjustments for people who are a larger size. The image has a close up of a bodice of a floral dress, with text overlaid on top.

    All the Places, All the Stuff!

    Never miss a post by following me on Bloglovin’!
    Or go mobile- I’m on Instagram and YouTube!

  • PDF Pattern Companies to Try in 2021

    PDF Pattern Companies to Try in 2021

    Paper or PDF pattern?

    Stack of paper sewing patterns

    It’s easy to have a paper pattern buying addiction. I’m *far* from immune to the 2$ Joann’s pattern sale which has left me with a collection of over 1000 printed sewing patterns. 

    But having so many paper patterns… from the same big companies is kind of a problem.

    These printed patterns take up a lot of space. They also tend to all be designed from the same pattern block. Sometimes, they tend to not be so fresh (design-wise.) And, potentially worse, the designers may be hit or miss as to whether or not they align with your personal values. 

    Enter PDF pattern companies.

    This post features three PDF pattern designers I’m excited about right now and encourage you check out!

    PLEASE NOTE! This is not a sponsored post. I’ve actually not worked with their designs in the past. But I think they’re doing some interesting work and wanted to highlight them in this post.

    Friday Pattern Company

    Their PDF pattern designs are modern but with minimalist sensibilities and some cute details!

    What I particularly love about Friday Pattern Company is that their pdf sewing patterns go up to 7X! The increase in size range makes these designs extremely inclusive, opening the door for more people to dip their toe in and make something that makes them feel like a million bucks. 

    The two patterns below, the Davenport Dress and Sagebrush Top are gorgeous.

    Two models, side by side, modeling garments from the Friday Pattern Company, displaying the range of size inclusivity

    Both designs are feminine, practical, and have a completely different feels if sewn in different fabric. Both are extremely accessible. 

    A few other reasons to be excited about Friday Pattern Company:

    • The Friday Pattern Company size range demonstrates they’ve been committed to the mission for a while.
    • Their patterns are both available in PDF AND paper
    • They donate 5% of their pattern sales to charity and each pattern has a different correlated charity!

    Untitled Thoughts

    Besides being absolutely in love with the company name, the commitment to eco-consciousness is real with Untitled Thoughts! Brittani, who owns the small design studio, goes in depth in the About Me page about how she’s staying committed to caring for the planet.

    This even includes information about the light bulbs which are used in the studio to ensure energy efficiency! 

    The two patterns below, the Amelie and Mathilde dresses are both beautiful, and are really in the spirit of a summer picnic.

    Two dresses side by side, one with an open back and buttons down the back of the skirt, the other as a wrap top, both pdf pattern designs by Untitled Thoughts

    In addition to what I’ve mentioned above, Untitled Thoughts also donates 5-10% to charity. There’s even a yearly transparency report breaking down where the funds were sent! The amount of integrity with Untitled Thoughts is extremely refreshing, and for a PDF pattern company which is a one-person operation, it’s extremely impressive. 

    Bambini del Mare

    The PDF pattern company I’m most excited about right now is Bambini del Mare. Serah, who owns and designs this small brand, is a Bay Area local who attended CCA (California College of the Arts) — just a stone’s throw away from the VoT studio! 

    The two patterns below are my favorite from what has been designed so far:

    Two images of Bambini del Mare PDF patterns, one is a white dress with ruffles on the straps. The other is a bolero that covers the upper torso with fluttery sleeves.

    A couple more reasons I’m excited about Bambini del Mare:

    • The looks are all extremely romantic– they’re all gorgeous and vintage inspired without being frumpy
    • Serah is focused on sustainability and philanthropy and donates 5% of her earnings per quarter to a rotating list of charities.

    PDF pattern companies are doing interesting things.

    Bianca from Vintage on Tap holding up a design from Bambini del Mare on an iPad, talking about PDF pattern companies

    From donating to causes they care about, to going above and beyond with size inclusivity, to even sourcing their sample fabrics to ensure they’re sustainable, it’s extremely impressive. These are examples of what us, as sewing consumers, have an opportunity to support and vote with our dollar on. 

    While working with PDFs can come with their own set of challenges, there’s opportunities to explore new (pattern) points of view and new pattern blocks, all while supporting a small company.

    PDF Sewing Companies You Don't Know About Pinterest image, with a collage of up-and-coming designers
  • How to Read a Sewing Pattern Envelope

    How to Read a Sewing Pattern Envelope

    If you’re a beginner sewist, a sewing pattern envelope is NOT easy to read! Learning the mechanics of how to sew while also struggling to understand the pattern envelope you’re working with is exhausting.

    If you’re starting your sewing journey, let’s save you time. This post walks you through what an experienced seamstress looks at, so you can ramp up your sewing faster. 

    Stack of paper sewing patterns

    A sewing pattern envelope can look like gibberish if you don’t understand the nuances of sewing language. 

    For me, the first pattern I ever worked with was something I picked out for Halloween and… I legitimately didn’t understand anything I was looking at. From the size chart to the recommended fabrics, my eyes glazed over. I genuinely had no comprehension of what it was I was even trying to read. 

    I don’t want you to go through that experience. This post will walk you through, step-by-step, what to look at and how to interpret it.

    Once you learn the basics of what you’re reading, it’s substantially easier to use thousands of other sewing patterns.

    Choosing a Size from the Sewing Pattern Envelope

    For the Big 4 pattern companies, there’s usually a distinction between the smaller and larger patterns. These sizes are normally grouped together for printing purposes and feature size ranges. There are also groupings for plus-size, children’s sizing, petites and “standard” sizes.

    To determine if you fit into one size range versus another, take a look at the size chart. You can usually find this on the back of a printed envelope. 

    BIG NOTE: Your size in ready-to-wear (what you buy at Target, or Nordstrom, etc) is NOT the same on a sewing pattern. You want to know your physical measurements FIRST before deciding on what size range is most appropriate to you!

    The Size Chart

    Size chart, in both inches and centimeters, on a sewing pattern envelope

    The chart organized in a simple grid, outlining Bust, Waist, and Hip sizes. Additional measurements may be listed, like length or distance from neck to waist. When approaching a pattern, most fit decisions can be made with the Bust-Waist-Hips measurements.

    NOTE: You might fit into multiple sizes and that’s ok. 

    To read the chart, find the size (or range of sizes) closest to yours.

    Before you walk away with that pattern, double check the Finished Garment Measurements chart, if available. This similar chart will break down what the completed Bust-Waist-Hips measurements will be.

    If a Completed Garment Measurement differs widely from your actual measurements, that’s usually “ease” or the amount of extra moving fabric you’ll have to sit/stand/do a backflip in. This topic is outside the scope of this post.

    Pattern Description

    Sewing Pattern garment description. Breaks down in detail the elements of a garment.

    The Pattern Description is relatively straightforward on the sewing pattern envelope, breaking down the specific description of the garment. It’ll talk about the length, intended fit, and details like what type of zipper it’s using or cut of sleeve. If there are multiple designs in a pattern envelope, it’ll also detail what the difference is between them.

    This reference supports the line drawing on the envelope, specifically describing one design over another. Another bonus is that if you’re practicing additional sewing techniques, you can see what you’ll learn in that design.

    NOTE: A/B/C denote specific design elements. Pay attention to the letter, as its be used as a reference point for the entire design.

    Notions

    Scan of a sewing pattern envelope. Text displays the recommended notions and fabrics for a garment.

    Straight forward, but very simple. This section breaks down what specific notions you need for the design you want to make. If you’re making A or B, it’ll break down what size zippers, buttons, or other sundries you’ll need.

    Recommended Fabrics

    This section lists out all recommended fabrics for your sewing pattern. Using this information (as well as fabric swatch book,) you can narrow down the best material for your use case. If there are a lot of options, the list also shows you the possibilities with the design. Read the list carefully! You can dramatically change the sewing pattern by changing the fabric chosen for it.

    NOTE: Be careful if you’re selecting an unlisted fabric! Using a fabric not recommended may change the drape and silhouette of the garment in unexpected ways. I highly recommend sticking the list if you’re a beginner.

    If you’re taking the plunge on using a fabric not listed, make sure to consult your Fabric Swatch Book for something similar. This way you can ensure that you’re still getting the feel of the recommended fabrics.

    Additionally, there are quite a few warnings in the fabric description!

    • Diagonals: Some sewing patterns call out that obvious diagonals should be avoided. The way the pattern is designed means that the fabric may clash with the shape of the pattern pieces. This is an explicit call out to avoid diagonals as much as possible.
    • Extra fabric for matching: If you want to use a plaid or striped fabric, you must buy extra fabric. It doesn’t specify how much, but the rule of thumb I always use is about half an extra yard. If it’s expensive fabric, I go with an additional yard, in case of major issues.
    • Use Nap yardages for…: For fabrics which are printed with an obvious top and bottom, use the yardage amounts and layouts indicated more carefully. This ensures your pattern pieces are cut correctly (because there’s more opportunity for error)
    • Note the * // ** — which indicate how much yardage you need (in Big 4 patterns)
      • For a Napped fabric (obvious top/bottom) — one asterisk 
      • For non-Napped (no obvious top/bottom) — two asterisk

    The Yardage Chart

    Scan of a sewing pattern envelope, focused on the yardage amounts for sewing a particular garment in a particular size. Sizes 16-20 are highlighted, as well as the 45 inch and 60 inch yardage width.

    Before approaching the yardage chart, have your size on hand (as picked out on the size chart.)

    Example: based on the size chart, I range between 16 and 20, so I’m focusing on those three sizes.

    Isolate out what specific design you’re focusing on to start breaking down how much yardage you’d need. For B designs, look at areas defined by the B, etc.

    Dress Fabric

    Continuing the example above, if the fabric I’ve found on Mood or at Joann’s is 45 inches wide… I’ll buy anywhere between 6.5 and 6.75 yards of fabric (!) If the fabric I’ve found is 60 inches wide… I’ll want to buy 4.5 to 4.60 yards, based on the size ranges 16 through 20 on the example pattern.

    NOTE: If you’re a beginner, I would air on the larger amount. This helps make sure you have enough fabric to work with. If you’ve been sewing for a while, you might want to do less based on what you normally use. In my case, I’m short and have to shorten *all* my pieces, so I stick to the lower number.

    Additional Materials by Size

    Same considerations as above. Find your size range on the chart to determine how much material to purchase. 

    Learn how to pick fabric for clothes with this video tutorial, explaining how to approach your fabric search! | Vintage on Tap, Pinup Sewing Blog

    Once you know how to read a sewing pattern envelope, SO MANY doors are unlocked.

    At this point you can work with all printed sewing patterns and reading PDF pattern information as well. 
    Knowing what you’re looking at, deciphering what the envelope is saying ramps up your sewing experience.

    Many beginner sewing questions are answered on the envelope. Taking the time to read and analyze the information there goes a long way.

    I highly recommend a related video regarding Beginner Sewing Challenges, linked below:

    Sewing is a Journey all its Own, Learning the “Sewing Language” will Help!

    I hope these tips and video have helped demystify some of the Sewing Language, so you can get stitching right away, making beautiful garments!

  • How it Works: Anatomy of a Full Bust Adjustment

    How it Works: Anatomy of a Full Bust Adjustment

    Video tutorial for how to understand a full bust adjustment! | Vintage on Tap, Retro and Sewing Youtube Channel

    Do you know how to do a full bust adjustment?

    The full bust adjustment (FBA) is not for the faint of heart. If you’re brand new to sewing, it can seem like a confusing mess.

    The lines, slash and spread, and blending of curves can seem weird and nonsensical, and heaven forbid the adjustments need to be done on a non-conventional bodice! I remember that fear very well!

    As a sewing blogger, I receive countless questions regarding FBAs on all sorts of patterns, but when it comes down to it, the adjustment is standard. If you know the principles of how to do this pattern adjustment, and how to approach it, you’ll be able to tackle some of the trickier garments!

    Vintage Slip Empire Waist Full Bust Adjustment | @vintageontap

    Before discussing the Anatomy of an FBA…

    Evaluate if you indeed need to perform one!

    Not every pattern needs a full bust adjustment, even if you’re full busted.

    I’m a big proponent of sewing the pattern straight from the envelope, before making a decision on the sorts of adjustments that change the foundation pattern.

    Why?

    • Sewing the standard size will give you an idea of how the pieces come together in general (not related to the FBA, but to understanding the garment)
    • It’ll allow you to confirm whether the ease of the garment is right for you (the ease could potentially affect the size of the FBA)
    • You’ll also be able to see if the FBA really will be needed for a better fit at the bust and arm scythe

    I go into depth about my fitting process on my YouTube channel, where I have a dedicated playlist for Full Bust Adjustments.

    Video tutorials for understanding and doing full bust adjustments! Watch this playlist for tips on sewing your favorite pieces! | Vintage on Tap Pinup Sewing Blog

    Click to watch the FBA video tutorial playlist!

    Another resource I recommend checking out is the Sewing Out Loud Podcast (STOP! Before you FBA), which dives deep into some of the current rhetoric around how Full Bust Adjustments are being used as sewing cure-alls. (HINT: they are NOT a fitting cure-all!)

    Video tutorial for how to understand a full bust adjustment! | Vintage on Tap, Retro and Sewing Youtube Channel


    Tools to Complete a Full Bust Adjustment

    Before getting started doing an FBA, make sure you have your tools handy!

    Recommended Sewing Tools by Vintage on Tap

    Paper Scissors – Sharp, simple, nothing fancy. I prefer one with a comfortable handle, which is easy to skimp on, but makes a difference long term.

    Transparent Gridded Ruler – Look for one which is thin and flexible, which can bend around curves for pattern drafting. A regular ruler works fine, but transparent rulers will make your life easier with seam allowances, etc.

    Tape – I recommend 3M Magic tape, which allows you to draw over and erase graphite.


    Anatomy of an FBA, How it works and how to perform the adjustment | Vintage on Tap, Pinup and Sewing Blog

    Breaking down How a Full Bust Adjustment Works

    The standard FBA features three lines, as outlined in the tutorial video.

    Line One: Through the center of the primary dart, straight to the bust point.

    This line dissects the dart in two, and allows for a bigger “tent” to be made in your fabric. Adjusting the overlap of the dart will adjust how much the fabric will fit over the cup.

    Line Two: Parallel to the center front, straight down to the bottom of the bodice, starting at the bust point. 

    This line will allow the front bodice to be widened, creating for a wider space for the bust fit comfortably. NOTE: Most patterns are drafted to a B-Cup, and cup sizes above C-cup will need a little bit more space to be comfortable. The widening of the bodice adjusts the waist size as well, as widening at this line changes all measurements below the bust point.

    Line Three: Bust point to last third of arm scythe.

    The final line creates space for the “side boob”, spreading open space under the armpit. The exactly placement of this line is a general “final third” of the arm scythe, which is vague, as its specific placement isn’t specifically important. This line used as more of a pivot point. NOTE: The upper 2/3 of the arm scythe should be avoided as much as possible. Drafting this line out in the 2/3 or above area will start to distort the area above the bust, including the neckline, shoulders, sleeves, and fabric that sits above the bust.

    How does a full bust adjustment work? This video tutorial will walk you through how the adjustment works | Vintage on Tap Pinup Sewing Blog

    What’s happening on the pattern?

    As you spread the pattern pieces apart, a few different things are occurring:

    The Center Front of the pattern piece stays exactly the same.

    • The Center Front of the bodice front is staying stationary, as all pieces are pivoting around it.
    • The Center Front piece will need to be lengthened, depending on the amount of the FBA, to match the Side Front (see below.)

    Line One, which bisects the primary dart, opens to create a larger “tent” for the bust. 

    • A larger dart means there’s more space for the breast to sit forward comfortably.

    The Side Front of the bodice lowers due to the main dart getting larger (at Line One.)

    • With the Side Front lowering, it creates an offset with the Center Front, as noted above.
    • The Center Front should match the Side Front, which is accurately accommodating the bust lengthwise (up and over the bust.)

    Line Two, which splits the Center Front and Side Front, spreads apart the distance of the full bust adjustment.

    • The spreading of Line Two creates width in the pattern below the bust point.
    • The pattern is widening to accommodate the width of the breast.
    • The waist measurement is expanded an equal amount.
    • Ideally, the addition of space created by Line Two should reduce pulling at the sleeve and armpit, directly perpendicular to the bust point.
      • Note: The pulling is generally created by the fabric straining to accommodate the bust, pulling at the seams of the sleeve/armpit area and smooshing the bust down.

    How does a full bust adjustment work? This video tutorial will walk you through how the adjustment works | Vintage on Tap Pinup Sewing Blog

    Look for Pattern Distortions when Completing an FBA

    Pattern Distortion #1: Center Front to Side Front

    As discussed above, the Center Front should be lengthened to match the Side Front.

    Warning! Simply drawing the Center Front line to square off with the Side Front and “lengthen it” doesn’t always work! If your pattern is not a simple bodice, on the fold, with a square edge, follow my pattern adjustment tutorial video by cutting a few inches from the Center Front piece and MOVING IT DOWN. The hem of the bodice may not always be straight, and this avoids accidental distortions.

    How to use a French Curve, blending pattern pieces | Vintage on Tap

    Pattern Distortion #2: Mismatch on pattern true-ing

    Areas that will need a look over include:

    • The hem (see above)
    • The dart itself
    • How the front pattern piece fits against the back pattern piece
    • The armhole (see below)

    See my tutorial video to understand how to fix this distortion, How to Walk a Sewing pattern.

    Pattern Distortion #3: Armhole

    Line Three will create a pivot point at the armhole, and by completing the FBA, the pivot point pinches into the armhole. Use your French curve to correct the armhole by drawing a simple and gentle curve. (See: How to Use a French Curve)

    How to use a French Curve, blending curves in armhole | Vintage on Tap

    Full Bust Adjustments can be intimidating, but they don’t have to be.

    As you practice doing FBAs, the more complicated bodices operate in the same way. They add width for the bust line, they add length (up and over the bust), and they add a little extra for the side-boob.

    Need a little bit more Full Bust Adjustment help? Check out the videos below!

    Subscribe to Vintage on Tap on YouTube!

    Disclaimer: This post contains affiliate links :)

    All the Places, All the Stuff!

    Never miss a post by following me on Bloglovin’!
    Or go mobile- I’m on Instagram and YouTube!
    New to sewing? Check out the Start Here page!

  • Intro to Drafting a Facing and Lining Combo!

    Intro to Drafting a Facing and Lining Combo!

    Drafting a facing and lining combination for a garment, video tutorial | Vintage on Tap

    Drafting a facing and lining combination is not as difficult as it may seem- and the results are gorgeous.

    The reason I love having both a facing and lining in my heartier garments is that I love the professional look and feel: the two pieces together feel more luxurious and intentional.

    There are plenty of garments that include either only the facing- or only the lining, and while there’s no wrong answer, if there’s an option to do both without much trouble, I like to proceed in that route.

    Places where drafting a lining and facing might be appropriate include, (but are not limited to)…

    • Coats
    • Capes
    • Blazers and jackets
    • Summer dresses that want to be winter-ized
    • Skirts

    Interior, lining view after sewing a vintage lining | Vintage on Tap

    Of course, there are always multiple factors to consider when deciding if drafting a facing and lining is right for you or for your project.

    Questions you may want to consider before proceeding with this include:

    • Is the garment simple enough for this not to be a problem?
    • Will this add extra bulk?
    • Is the shell fabric too thin/see through to need that extra layer for opacity?
    • How many sharp curves will I need to manage on the interior layer?
    • Is the facing/lining close enough in size/dimension to the shell garment? (If it’s not)- how difficult is it going to be to proportionally add a lining that corresponds to the shell? (see video tutorial!)

    If the above answers to the questions above sound reasonable, definitely give it a shot on a muslin.

    How to draft a facing and a lining combination. This video tutorial shows you how to get the job done quickly and easily! | Vintage on Tap

    Before beginning…

    Review my following tutorial videos:

    The above tutorials get you prepped and ready for the beginning of this particular tutorial video.

    Of course, every situation and every pattern differ, but if you’re unfamiliar with the above techniques, I highly recommend taking a look!

    This video teaches you how to draft a facing and lining together for your home sewn garments! | Vintage on Tap

    Step One: Eval the type of pattern you’re working with.

    Because each pattern can differ so much, approaching the pattern with a well-thought out, methodical approach is key!

    If your pattern came with just the facing-

    • Tape up any darts or corresponding shell pieces that may affect the area where the facing will be attached.
    • Overlap the facing to the shell piece, to verify if the facing is an exact copy of the shell.
    • If the facing is the same as the shell, perfect, you’re good to go!
    • If the facing is NOT the same size as the shell, note the difference. Ask the following questions:
      • Is the difference between the two a design element?
      • Does the facing serve an additional purpose than just being a facing?
      • How “off” are the two?

    If the facing is substantially different than the shell, you may not be able to draft a lining to it. As I noted above, each pattern can vary widely. But please note, most of the time you can draft a corresponding lining, but you may need to figure out an individual solution for your particular pattern. Please be sure to watch the remainder of the video tutorial to see if it will make sense for your design.

    If your pattern came with just the lining-
    • Verify that the lining matches the shell
    • If the lining is NOT the same size as the shell, note the difference. Ask the following questions:
      • Is the difference between the two a design element?
      • How “off” are the two?

    If the lining is substantially different than the shell, double check that you’ve taped up any darts or tucks that may be in the lining, but not present in the shell. There are occasions when the lining may have additional pleats/tucks/darts, and your facing should (generally) correspond more closely to the shell than to a lining with these sorts of details.

    If your pattern came without either a facing or lining-
    • Trace an additional copy of the shell as your working piece. That’s it ?
    How to draft a facing and lining combo, with video! | Vintage on Tap

    Step Two: Trace your pattern pieces onto a “working” piece of paper

    If your pattern came with just the facing-

    • Trace the shell onto a clean sheet of paper
    • Overlap the facing onto the shell tracing and copy the facing onto it
    • Make sure to transfer all pattern markings

    If your pattern came with just the lining-

    • Trace out a brand new copy of the lining
    • Make sure to transfer all the pattern markings

    If your pattern came without either a facing or lining-

    • Trace the shell
    • Make sure to transfer all pattern markings

    Step Three: Draw in your stitch line

    If your pattern came with just the facing-

    • Measure UP from the bottom edge of the facing the amount of your seam allowance

    If your pattern came with just the lining OR If your pattern came without either a facing or lining-

    • If you haven’t already viewed the How to Redraft a Facing video tutorial, now is the time!
    • Measure DOWN from the top edge of the shell the amount of the new facing you would like to add

    Drafting a facing and lining combo on a garment isn't hard with this tutorial! | Vintage on Tap

    Step Four: Add your seam allowances

    If your pattern came with just the facing-
    • Trace a line above your stitch line, the amount of your seam allowance
    • You should have a total of three lines drawn, parallel to one another

    If your pattern came with just the lining OR If your pattern came without either a facing or lining-

    • Trace a line both above AND bellow the stitch line, the amount of your seam allowance
    • You should have a total of three lines drawn, parallel to one another
    Learn how to make a facing and lining combination piece | Vintage on Tap

    Step Five: Trace the two new pattern pieces from your working paper

    From here, you are home free!

    View the diagram in the photo above, or in the tutorial video for more info as to which seam allowance goes where. Essentially, your three parallel lines correspond in opposite directions:

    1. Lining Seam Allowance 
    2. Stitch Line
    3. Facing Seam Allowance

    Please note that in my video, I discuss the curvature of the stitch line and how that may be difficult to sew. Evaluate the curve in your stitch line in Step Three, before adding your seam allowances.


    All the Places, All the Stuff!

    Never miss a post by following me on Bloglovin’!
    Or go mobile- I’m on Instagram and YouTube!
    Subscribe to Vintage on Tap on YouTube!

  • Intro to Dart Rotation, a Quick Sewing Overview

    Intro to Dart Rotation, a Quick Sewing Overview

    When I first learned about dart rotation, my mind was blown.

    I distinctly remember my thoughts were something along the lines of…

    “…wait- I can change the pattern like that?! What?! How? THIS IS GOING TO BE HARD!”

    I’ve lived through it- survived it- and let me tell you: it’s a piece of cake.

    Intro to Dart Rotation, Sewing Overview | Vintage on Tap

    Dart rotation is a reminder that a pattern piece can be anything you want it to be, so change those darts how you see fit. 

    The “standard” sloper usually has one dart, with most patterns rocking two darts on a basic bodice.

    Of course, the amount of darts in fashion design are plenty.

    • Regular plain darts
    • French darts
    • Shoulder darts
    • Shoulder gathers
    • Dart tucks
    • Waist tucks
    • Princess seams
    • Aaaaand more!

    Full disclosure: there are still quite a lot of darts/gathers/tucks that I haven’t tried sewing yet– the concept is generally the same for all.

     Intro to Dart Rotation, dart placement lines | Vintage on Tap

    You can rotate a dart anywhere on your pattern that makes sense for you and for your design.  

    There is one general “rule” to keep in mind though. However, the more you practice dart rotation, the more you may be comfortable to break the rule down the road.

    The main rule is…

    The bust point should/must/has to end about 1in away (A, B cup)/2in+ (C cup and above) from your bust point. The larger the cup size, the further the distance your bust point should end.

    For example, if you move your dart to the shoulder, as long as the dart ends the designated distance from your bust point, you’ll be good to go.

    Note that this is less of a concern if you have to change your dart to a gather, just as I did for my vintage-style slip.

    Dart rotation on a Vintage Slip sewing pattern | @vintageontap

    After completing an FBA, the bust dart was too much of a point and wasn’t flattering. I changed the dart to a gather, “softening” the dart which made much more sense for the design and for my body. (Read more about the process over my vintage slip blog post.)

    Other examples of dart rotation and dart manipulation include…

    Vintage Vogue V8789

    Vintage sewing, Vogue V8789, dart rotation tutorial | Vintage on Tap

    For this piece, after doing a full bust adjustment, I rotated my dart to a single waist dart to keep the design intact. The waist dart now included enough fullness for my full bust.

    Vintage Butterick B6282

    Flags of the World Challenge, 1940s Vintage B6282 | Vintage on Tap

    In this vintage piece, I completed a full bust adjustment and then rotated my darts out to the shoulder and waist, to keep the integrity of the gathered 1940s style.

    Want MORE sewing tips and advice?

    Get my sewing tips, advice, tutorials, and encouragement right in your inbox!

    Powered by Kit

    Grosgrain ribbon waist stay and interior reinforcement, Vogue 8789 | Vintage on Tap

    Dart rotation and dart placement for fuller chested people requires some additional care

    As much as I wish this weren’t the case, further considerations must be taken with dart rotation if you’re rocking a C-cup or above.

    Questions to consider include…

    • Does the dart accurately point to the bust point?
    • Does the angle or shape of the dart actually cup the breast in a way that makes sense?
    • Does the placement of the new dart highlight or detract from the chest area? (Depends on how much attention you want there.)
    • Does the dart make sense as a gather?
    • Do the ladies have ample space to breathe?

    Shoulder detail, vintage 1940s B6282 | Vintage on Tap

    Not all darts are created equal and not all darts will work with your body shape.

    Don’t be intimidated by changing up the garment design to make the dart work for you and your body! I know it can be intimidating to change a design, but remember you’re (usually) working from a pattern that is made to be altered to work for you.

    As long as you’re mindful of having a nice distance between dart end point and your full bust, move your dart around as you see fit.

    Intro to Dart Rotation | Vintage on Tap

    Have you tried rotating a dart? What was the hardest part? Is there a specific dart you’re stumbling with right now?


    All the Places, All the Stuff!
    Never miss a post by following me on Bloglovin’!
    Or go mobile- I’m on Instagram and YouTube!

    Subscribe to Vintage on Tap on YouTube!

  • How to Trace Vintage Sewing Patterns

    How to Trace Vintage Sewing Patterns

    How to trace Vintage Sewing Patterns, a tutorial | Vintage on Tap

    If you’re looking for how to trace vintage sewing patterns, my video has you covered!

    Yes yes, the video is a little bit on the longer side, but I go into it. The pros and cons, what tools I use, and why I even bother to trace all my modern ones, too. Its definitely a labor of love, but as I say in the video, keeping the original intact is a Big Deal for me, especially when patterns can easily go out of print or I just don’t want to spend time re-taping a PDF.

    Vintage patterns, on the other hand, should always be traced to keep the original in as pristine condition as possible. Browsing the sewing community, I know there are some outliers who go balls-to-the-wall and just use their originals and to them I say… you’re breaking my heart!

    Time Stamps for a specific pattern-type:

    • 6:38 for PDF patterns
    • 9:37 for commercial patterns
    • 14:24 for vintage patterns

    Patterns used in this tutorial were:

    Tools I used in this tutorial:

    Definitely let me know if this video was helpful for you! I’m considering doing more tutorials in 2017 and making them a regular segment of my YouTube channel. Last year, I received so many questions on how to trace vintage sewing patterns that I couldn’t resist making it my “first” sewing related video of the year (not counting my resolutions post!)

    Do you trace your sewing patterns? Why or why not?


    Do you like what you see?

    Never miss a post by following me on Bloglovin’!
    Or go mobile- I’m on Instagram, YouTube, and Snapchat (?vintageontap)!
    Disclaimer: This post contains affiliate links :)