Category: Darts

  • How To: No-Dart Full Bust Adjustment [2022 Update]

    How To: No-Dart Full Bust Adjustment [2022 Update]

    If you’re a C-cup or above, doing a full bust adjustment goes hand-in-hand with sewing. This even applies to sewing t-shirts.

    Seamwork Magazine Astoria Sweater | Vintage on Tap

    I’m sure we’ve all been there: weird drag lines from the arms and above the chest, fabric pulled to its limit, and uncomfortable compression across the front of our bodies which feels and looks terrible, because the fabric and pattern doesn’t have enough give. 

    Just because it’s sewn with stretchy fabric, doesn’t mean that t-shirt is going to fit correctly. 

    In enters the No-Dart Full Bust Adjustment, perfect for those shirts and knit dresses that just need a little bit of extra space across the bust, creating comfort, removing the “wings” from the garment and adding ease to your piece.

    Key components to creating a knit garment for larger chested people are straight forward, but should be done step-by-step. 

    Testing Your Fabric

    Not all knits are the same! Planning on sewing a t-shirt? Test the fabric’s stretch, calculating if it matches the required stretch percentage of the pattern you’re making. 

    Use the simple formula below to calculate your fabric’s stretch:

    Graphic describing the formula for Percentage Stretch of a fabric. Stretched distance divided by the original distance, minus one.

    Also watch for:

    • What does the fabric’s bounce-back look like after it’s been stretched?
      • If it bounces back to it’s original size and shape, fantastic!
      • If it doesn’t, maybe reconsider the fabric choice, as over time, it’ll warp over the body and wear out poorly.
    • Does it look transparent, shiny, or “off” when stretched?
      • The fiber content may not be able to support a high stretch or not look as intended when worn.
    • Does the fabric warp when stretched?
      • Again, will probably not look as intended when worn.

    In all cases above, they might work for you and your fabric- but take note regardless. You may find that the look of the stretched version is not what you want to wear across your chest.

    Choosing the Right Size for You + Your Fabric

    After confirming your fabric is great for your sewing project, it’s time to pick the right size to work from. 

    Watch the video below if you need help reading a size chart on a pattern:

    A few high level things to take into account when selecting a pattern size:

    • Choosing your Bust size should be based on your High Bust measurement, with anticipation that a no-dart full bust adjustment will increase both the waist and bust measurements in width.
    • Sizing up will also mean sizing up the width of the shoulders and arm scythes– try and match those measurements more closely than the Waist and Bust size. The Waist and Bust measurements can be changed- the others will be substantially more challenging.

    Once you select your size, confirm your fabric’s full stretch against the size. Use the formula below to confirm your fabric will indeed stretch to capture your body’s measurements:

    Graphic describing the formula for completed garment measurement with stretch. Finished garment times 1.(percentage of stretch)

    Once you’re able to confirm that the fabric will stretch to your measurements based on the selected size, you’re ready to move on to doing sewing pattern adjustments.

    Doing the No-Dart Full Bust Adjustment

    No Dart Adjustment =/= there are no darts involved! Instead, it means we have to use dart methodologies to get the adjustment done. 

    First, decide how much of an FBA you have to do, using the general guidelines below:

    Graphic describing standard Full Bust Adjustment guidelines. C cup, add 1 inch, D/DD cup, add 2-3 inches, E cup+, add 1+ inch per size.

    If your fabric is low stretch, you may need to make a half muslin and measure out the distance between the center front of your muslin and the center front of your body, as demonstrated in the image below:

    Once this number is found, you’re able to move onto the sewing adjustment. 

    Step One: Complete a “regular” Full Bust Adjustment [Timestamp: 09:36]

    If the pattern has a bust point indicated, follow the normal steps to completing a full bust adjustment. If the pattern does not have a bust point indicated, watch my video for how to identify this location on your pattern, based on your measurements. 

    Step Two: Rotate the Dart to the Bottom of the Pattern [Timestamp: 18:43]

    Cut out the side dart, and rotate the side dart closed, pivoting the dart to the bottom of the pattern. Tape the side dart closed and fill in paper at the bottom of the pattern piece. 

    Sewing pattern, showing you that a side dart has been rotated to the bottom of the pattern

    Step Three: Rotate the Dart… OUT! [Timestamp: 21:23]

    To complete the no-dart full bust adjustment, rotate the dart out from the side of the pattern. Measure the size of the dart from Step Two, and take the distance out from the side seam. From there, true out the side seam, to make a smooth curve matching the original pattern shape as closely as is reasonable. Then, walk your pattern seam.

    Unsure of how to walk your pattern pieces? Watch the video below to learn how:

    Step Four: Complete the Full Bust Adjustment

    After walking your side seam, make sure the pattern hasn’t been lengthened too long in the front. Measure the center front and compare that to you– if it’s too long, bring it up. But make sure to keep a touch of extra length, to allow the fabric to comfortably go over your chest.

    Step Five: Sew your Final Muslin

    Especially if this is your first time doing a no-dart full bust adjustment, I highly recommend doing this step. If you’re a seasoned seamstress, this may not be needed.

    How to do a No-Dart Full Bust Adjustment Tutorial, this time in a white shirt showing a completed version

    All the Places, All the Stuff!

    Never miss a post by following me on Bloglovin’!
    Or go mobile- I’m on Instagram and YouTube!

  • Beautiful Clothes with NO Sewing Adjustments – Is it Possible?

    Beautiful Clothes with NO Sewing Adjustments – Is it Possible?

    Is it possible to make an amazing garment with no sewing adjustments? 

    Bianca from Vintage on Tap, standing in front of a green plant wall

    A garment that fits straight out of the envelope, with no sewing adjustments, with no problems, and fits you like a glove is a dream come true, even for me! 

    So I wanted to give it a shot.

    I wanted to find out if I could make a dress straight from the envelope and have it fit decently well.

    Bianca making a silly face with tropical fabric and the Gertie Cinch It Dress

    I chose the Charm Patterns Cinch It dress for this experiment, released in Spring 2021. 

    What drew me to this pattern was: 

    • The dress was described as a simple pop-over dress, meaning it should fit decently ok*, as long as I followed the instructions.
    • If it worked out, it had many options for customization, with additional collars, sleeves, and pockets to make several versions.
    • The completed pieces I saw online looked like vintage-inspired dream dresses!

    *: I know pop over dresses are super simple, super generalized, and made to fit at a very basic level. My expectations were medium-to-low. I wanted to get in the general ball park and feel decent in the dress.

    The moral of the story?

    No sewing adjustments is a rarity if you already face regular sewing challenges, or experience the same fit issues over and over. 

    Bianca wearing a completed Charm Patterns Cinch It Dress, a popover dress.
    Vintage on Tap, standing outside on the sidewalk, laughing

    While the concept of the dress is brilliant, I face challenges very common for my body type, which were not easily addressed with most patterns straight from the envelope. This is extremely common for most people.

    For the Charm Patterns Cinch-It, these included:

    • My incredibly petite frame, which impacts my shoulder width. The shoulders of the Cinch-it dress were roughly 1.5” too wide for me, which would make it a challenge for well fitting sleeves, had I made those options.
    • My petite frame’s torso length, which impacts bodice length and waist placement. The shirring line on the dress started over 2 inches too low for me, and extended down over 4 inches– which for a combined 6” of Torso + Waist, put the bottom edge of shirring past the midpoint of my hips.
    • Overall dress length, which is easily remedied, but worth a mention.
    Close up of elastic waist of the Charm Patterns Cinch it Dress

    Is there a pattern out there you can make with no sewing adjustments?

    Yes and no! 

    Depending on the adjustments you may tend to do, there are pattern companies which may fit your body shape more closely due to the nature of their pattern drafting block.

    Bianca reading a book about Frida Kahlo outside

    For example, Seamwork Patterns tend to fit me decently well, due to a larger block cup size and shorter torso length. While alterations are still common, their drafting is naturally closer to my body shape. You can see this well in my Penny Dress, which fit like a glove.

    Video tutorial for retro sewing, the Colette Penny dress | Vintage on Tap

    For the most part, though, it’s rare to make a pattern straight from the envelope with no sewing adjustments. 

    This is perfectly normal!

    Remember that pattern companies draft to their audience’s average. Even the patterns marketed as “easy to sew” may need some slight adjustments for a better fit. 

    Looking to dip your toe into pattern adjustments, or do you also have a petite frame like me and a larger bust? My fitting videos might provide some insights on how to approach fitting challenges!

    Click the video below to start my Fitting Videos playlist!

    Is there a pattern you’ve sewn that fit straight from the package with no sewing adjustments?

    Please let me know in the comments!


    Is it Possible to Sew with No pattern adjustments? Bianca posing in front of a vine wall, wearing a handmade dress

    Disclaimer: This post contains affiliate links. I never recommend products I wouldn’t personally use. All opinions are my own.

  • How it Works: Anatomy of a Full Bust Adjustment

    How it Works: Anatomy of a Full Bust Adjustment

    Video tutorial for how to understand a full bust adjustment! | Vintage on Tap, Retro and Sewing Youtube Channel

    Do you know how to do a full bust adjustment?

    The full bust adjustment (FBA) is not for the faint of heart. If you’re brand new to sewing, it can seem like a confusing mess.

    The lines, slash and spread, and blending of curves can seem weird and nonsensical, and heaven forbid the adjustments need to be done on a non-conventional bodice! I remember that fear very well!

    As a sewing blogger, I receive countless questions regarding FBAs on all sorts of patterns, but when it comes down to it, the adjustment is standard. If you know the principles of how to do this pattern adjustment, and how to approach it, you’ll be able to tackle some of the trickier garments!

    Vintage Slip Empire Waist Full Bust Adjustment | @vintageontap

    Before discussing the Anatomy of an FBA…

    Evaluate if you indeed need to perform one!

    Not every pattern needs a full bust adjustment, even if you’re full busted.

    I’m a big proponent of sewing the pattern straight from the envelope, before making a decision on the sorts of adjustments that change the foundation pattern.

    Why?

    • Sewing the standard size will give you an idea of how the pieces come together in general (not related to the FBA, but to understanding the garment)
    • It’ll allow you to confirm whether the ease of the garment is right for you (the ease could potentially affect the size of the FBA)
    • You’ll also be able to see if the FBA really will be needed for a better fit at the bust and arm scythe

    I go into depth about my fitting process on my YouTube channel, where I have a dedicated playlist for Full Bust Adjustments.

    Video tutorials for understanding and doing full bust adjustments! Watch this playlist for tips on sewing your favorite pieces! | Vintage on Tap Pinup Sewing Blog

    Click to watch the FBA video tutorial playlist!

    Another resource I recommend checking out is the Sewing Out Loud Podcast (STOP! Before you FBA), which dives deep into some of the current rhetoric around how Full Bust Adjustments are being used as sewing cure-alls. (HINT: they are NOT a fitting cure-all!)

    Video tutorial for how to understand a full bust adjustment! | Vintage on Tap, Retro and Sewing Youtube Channel


    Tools to Complete a Full Bust Adjustment

    Before getting started doing an FBA, make sure you have your tools handy!

    Recommended Sewing Tools by Vintage on Tap

    Paper Scissors – Sharp, simple, nothing fancy. I prefer one with a comfortable handle, which is easy to skimp on, but makes a difference long term.

    Transparent Gridded Ruler – Look for one which is thin and flexible, which can bend around curves for pattern drafting. A regular ruler works fine, but transparent rulers will make your life easier with seam allowances, etc.

    Tape – I recommend 3M Magic tape, which allows you to draw over and erase graphite.


    Anatomy of an FBA, How it works and how to perform the adjustment | Vintage on Tap, Pinup and Sewing Blog

    Breaking down How a Full Bust Adjustment Works

    The standard FBA features three lines, as outlined in the tutorial video.

    Line One: Through the center of the primary dart, straight to the bust point.

    This line dissects the dart in two, and allows for a bigger “tent” to be made in your fabric. Adjusting the overlap of the dart will adjust how much the fabric will fit over the cup.

    Line Two: Parallel to the center front, straight down to the bottom of the bodice, starting at the bust point. 

    This line will allow the front bodice to be widened, creating for a wider space for the bust fit comfortably. NOTE: Most patterns are drafted to a B-Cup, and cup sizes above C-cup will need a little bit more space to be comfortable. The widening of the bodice adjusts the waist size as well, as widening at this line changes all measurements below the bust point.

    Line Three: Bust point to last third of arm scythe.

    The final line creates space for the “side boob”, spreading open space under the armpit. The exactly placement of this line is a general “final third” of the arm scythe, which is vague, as its specific placement isn’t specifically important. This line used as more of a pivot point. NOTE: The upper 2/3 of the arm scythe should be avoided as much as possible. Drafting this line out in the 2/3 or above area will start to distort the area above the bust, including the neckline, shoulders, sleeves, and fabric that sits above the bust.

    How does a full bust adjustment work? This video tutorial will walk you through how the adjustment works | Vintage on Tap Pinup Sewing Blog

    What’s happening on the pattern?

    As you spread the pattern pieces apart, a few different things are occurring:

    The Center Front of the pattern piece stays exactly the same.

    • The Center Front of the bodice front is staying stationary, as all pieces are pivoting around it.
    • The Center Front piece will need to be lengthened, depending on the amount of the FBA, to match the Side Front (see below.)

    Line One, which bisects the primary dart, opens to create a larger “tent” for the bust. 

    • A larger dart means there’s more space for the breast to sit forward comfortably.

    The Side Front of the bodice lowers due to the main dart getting larger (at Line One.)

    • With the Side Front lowering, it creates an offset with the Center Front, as noted above.
    • The Center Front should match the Side Front, which is accurately accommodating the bust lengthwise (up and over the bust.)

    Line Two, which splits the Center Front and Side Front, spreads apart the distance of the full bust adjustment.

    • The spreading of Line Two creates width in the pattern below the bust point.
    • The pattern is widening to accommodate the width of the breast.
    • The waist measurement is expanded an equal amount.
    • Ideally, the addition of space created by Line Two should reduce pulling at the sleeve and armpit, directly perpendicular to the bust point.
      • Note: The pulling is generally created by the fabric straining to accommodate the bust, pulling at the seams of the sleeve/armpit area and smooshing the bust down.

    How does a full bust adjustment work? This video tutorial will walk you through how the adjustment works | Vintage on Tap Pinup Sewing Blog

    Look for Pattern Distortions when Completing an FBA

    Pattern Distortion #1: Center Front to Side Front

    As discussed above, the Center Front should be lengthened to match the Side Front.

    Warning! Simply drawing the Center Front line to square off with the Side Front and “lengthen it” doesn’t always work! If your pattern is not a simple bodice, on the fold, with a square edge, follow my pattern adjustment tutorial video by cutting a few inches from the Center Front piece and MOVING IT DOWN. The hem of the bodice may not always be straight, and this avoids accidental distortions.

    How to use a French Curve, blending pattern pieces | Vintage on Tap

    Pattern Distortion #2: Mismatch on pattern true-ing

    Areas that will need a look over include:

    • The hem (see above)
    • The dart itself
    • How the front pattern piece fits against the back pattern piece
    • The armhole (see below)

    See my tutorial video to understand how to fix this distortion, How to Walk a Sewing pattern.

    Pattern Distortion #3: Armhole

    Line Three will create a pivot point at the armhole, and by completing the FBA, the pivot point pinches into the armhole. Use your French curve to correct the armhole by drawing a simple and gentle curve. (See: How to Use a French Curve)

    How to use a French Curve, blending curves in armhole | Vintage on Tap

    Full Bust Adjustments can be intimidating, but they don’t have to be.

    As you practice doing FBAs, the more complicated bodices operate in the same way. They add width for the bust line, they add length (up and over the bust), and they add a little extra for the side-boob.

    Need a little bit more Full Bust Adjustment help? Check out the videos below!

    Subscribe to Vintage on Tap on YouTube!

    Disclaimer: This post contains affiliate links :)

    All the Places, All the Stuff!

    Never miss a post by following me on Bloglovin’!
    Or go mobile- I’m on Instagram and YouTube!
    New to sewing? Check out the Start Here page!

  • Full Bust Adjustment + Fitting Simplicity 1364 How To!

    Full Bust Adjustment + Fitting Simplicity 1364 How To!

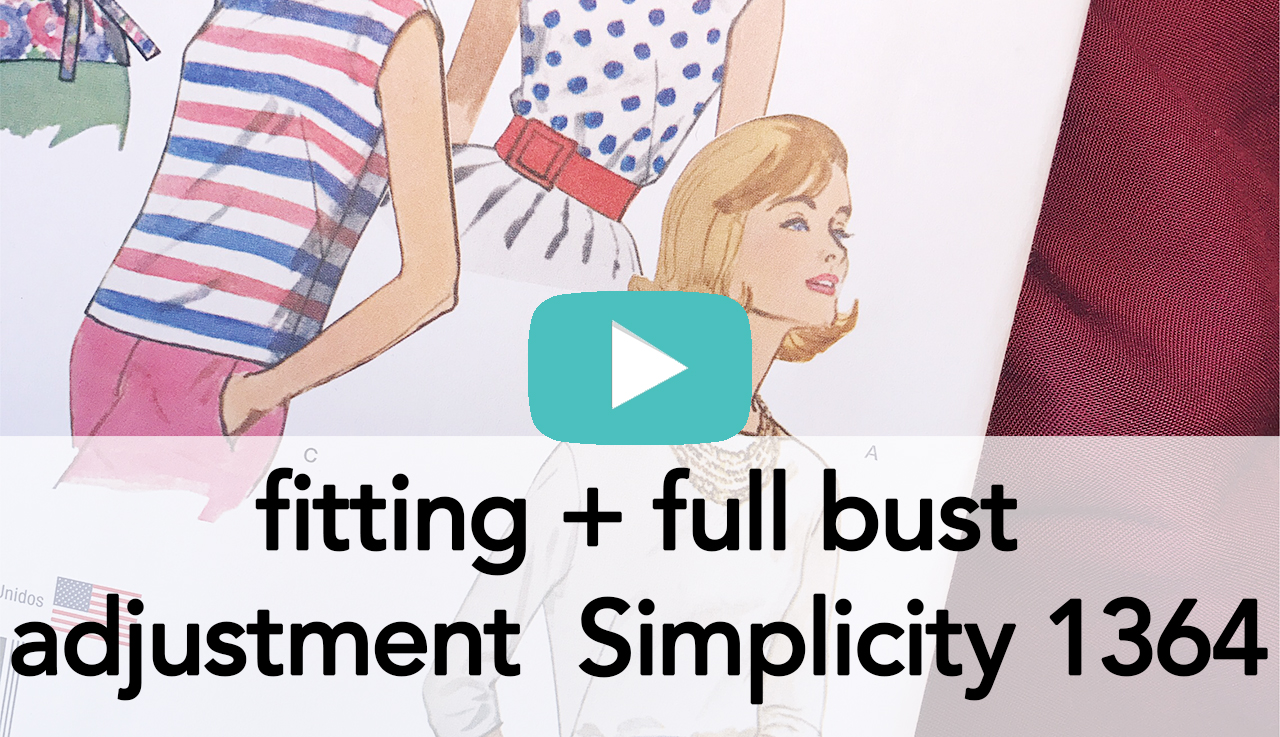
    Fitting and Full Bust Adjustment, Fitting Simplicity 1364 | Vintage on Tap

    Fitting Simplicity 1364 is simple, but the dart can be ridiculous.

    As you can see in the above image, the french dart on this bodice is insane, but sometimes a big bust just needs a big dart.

    For this blouse, I did a full bust adjustment of two inches. 

    The two inches is pretty normal for me, so I expected this much of a dart increase (especially since there was no additional dart to balance the fullness out.)

    Fitting and Full Bust Adjustment, Fitting Simplicity 1364 | Vintage on Tap

    If you’re experiencing weight fluctuation, this top might be for you.

    I was recently asked in the comments section of one of my previous videos, Weight and Sewing Self Esteem, if I had any recommendations for people who are currently moving a little bit around in their measurements.

    Simplicity 1364 is pretty versatile and I definitely recommend it as a comfortable, wearable, flattering top. 

    Specifically the tank top version. The long sleeve version will be discussed more at length in my next sewing video!

    Fitting and Full Bust Adjustment, Simplicity 1364 | Vintage on Tap

    Getting started with fitting Simplicity 1364.

    You will need the items below or their equivalents:

    Step One: Shorten (or lengthen) the bodice + Swayback

    In my case, I shortened my bodice about 1.25in because I’m suuuper short with no torso. You can observe the length of the bodice at timestamp 46 seconds in the video.

    Also, I went ahead and took care of the swayback at this point because it would just be easier, with a .5inch swayback at timestamp 1:49.

    Step Two: The Full Bust Adjustment

    As in my previous videos, I measured the distance between center front of the bodice and the center of my actual body, timestamp 2:43, to determine how much I would need to adjust for.

    The whole adjustment is covered at minute 2:52, however, as noted above the dart will be humongous if you have to do as much of an adjustment as I do. 

    Why is this important?

    Side darts normally finish cleanly into the side seam. If you have to do as drastic of an adjustment as I did (2in adjustment)- your dart might stretch into the bottom seam.

    There are a few things to consider at this point.

    1. Does your dart need to be rotated? After finishing the FBA, do a full bodice muslin to double check that the darts are landing at 1-2in from your bust point if you’re rocking a C-to-above. If the dart is pointing in the wrong place, you will need to rotate it, which may include rotating it off the waist seam.
    2. Are you sewing your dart with a slight curve, to complete a French Dart?
    3. If the dart looks ok, that’s fine! After sewing the dart, trim it so no extra fabric goes into the bottom seam. I decided to do this for this Simplicity 1364.

    Fitting and Full Bust Adjustment, Simplicity 1364 | Vintage on Tap

    I originally posted this fitting Simplicity 1364 video before publishing this post.

    Right away I got questions about things I didn’t cover in the video, so I’ve snapped a few pictures with additional tips down below. The questions focused primarily on fixing the shoulder and fixing the arm scythe, which are an easy, quick fix! And also are just a good excuse to pull out your french curve!

    Fitting and Full Bust Adjustment, Simplicity 1364 | Vintage on Tap

    Adjusting the shoulders

    The first thing you have to remember is that if you adjust the shoulders on this pattern, you will need to adjust the facing pieces to match. Please review my redrafting facings tutorial video to see how to transfer your chances over.

    In the above example sketch, I decided to move the shoulder closed about an inch, to close up the neck a little bit.

    Lines 1, 2, and 3 are variations on how you can blend that adjustment to the neckline, depending on the look you’re going for. When adjusting the shoulders on a blouse like this, you will be changing the style line at the neck just a touch, so please note that as you decide how much to bring in the shoulder.

    Notice line 3. Line 3 blends roughly one inch away from the center front seam, which is cut on fold with this pattern. You want to make sure that you leave about an inch or so of the regular neckline, just to make sure the center of your neckline looks smooth, with no interruption or abrupt weird curves.

    Fitting and Full Bust Adjustment, Simplicity 1364 | Vintage on Tap

    The arm scythe area definitely needs a little bit of blending.

    Please note: The arm scythe adjustments in this tutorial are for View C, without the sleeves attached. If you’re working on View A, measure the armhole size, and adjust the sleeve piece accordingly.

    The black pencil line is the curve after completing the FBA, where you can see that the curve is all jagged and weird. Depending on how much of an adjustment you had to complete, this area might be all choppy and weird.

    Use your French Curve to find a smooth transition along the sharpest area of change (line 1.) And then, if your bra is still peaking out slightly, you can add extra width to that area to make sure everything is covered as you find most comfortable.

    Fitting and Full Bust Adjustment, Simplicity 1364 | Vintage on Tap

    I hope you found this tutorial on fitting Simplicity 1364 useful to your project!

    Are you thinking of making this blouse? Do you want to make the short sleeve or long sleeve version? Do you have any other questions about fitting Simplicity 1364?

    Disclaimer: This post contains affiliate links :)


    All the Places, All the Stuff!
    Never miss a post by following me on Bloglovin’!
    Or go mobile- I’m on Instagram and YouTube