Tag: silk

  • How to Sew a Pinup Holiday Dress, Video Tutorial

    How to Sew a Pinup Holiday Dress, Video Tutorial

    Butterick B5603 Pinup dress, silk dupioni fabric from Britex Fabrics | @VintageonTap

    Every girl into 50s fashion should sew a pinup holiday dress.

    In sultry emerald green, sequin black, or shimmery white, sewing a pinup holiday dress is a good excuse to pull out the Fancy Fabric.

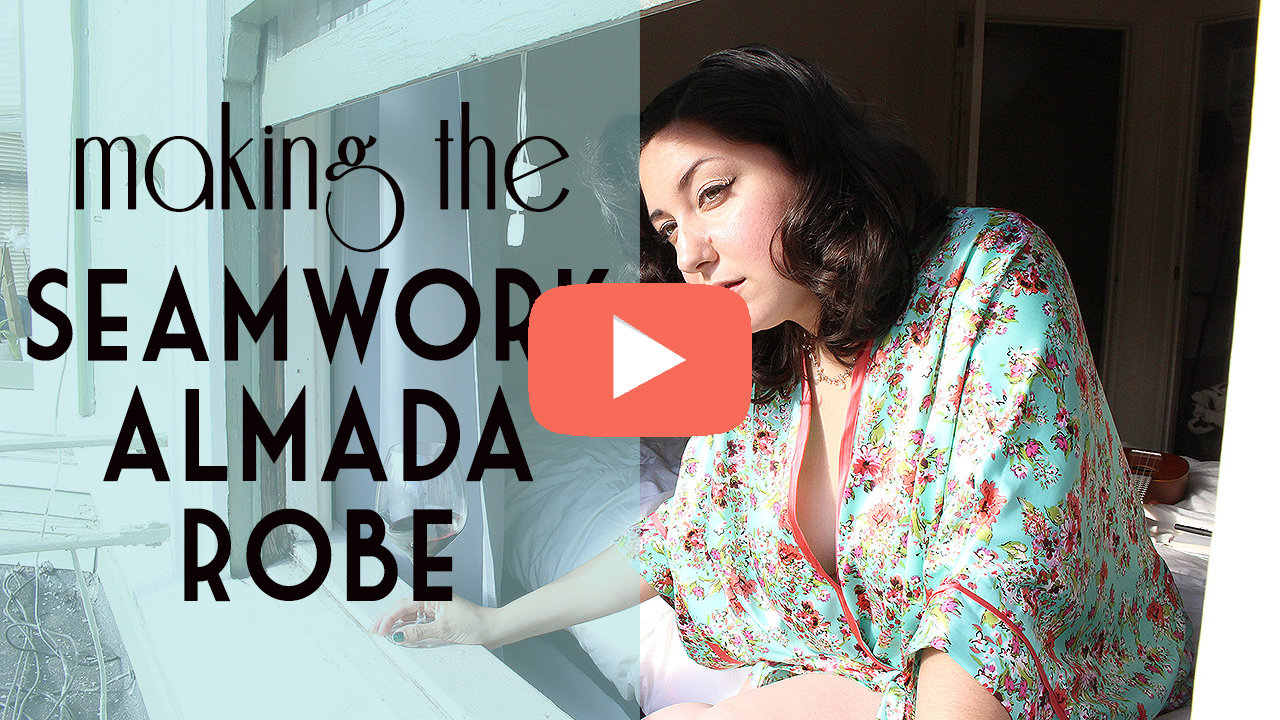
    For the version featured in my YouTube tutorial, I used silk.

    I wanted shimmer and fabric with body, so silk dupioni was an amazing choice. It holds its shape super well and rustles in a very luxurious way when I walk. For me, this immediately became a dry-clean only dress, so super special care taken from beginning to end on construction. In this particular fabric, the warp and weft are two different colors, so when I move in the sun, it changes colors.

    Butterick B5603 Pinup dress, silk dupioni fabric from Britex Fabrics | @VintageonTap

    Butterick B5603 Pinup dress, shoulder tie | @VintageonTap

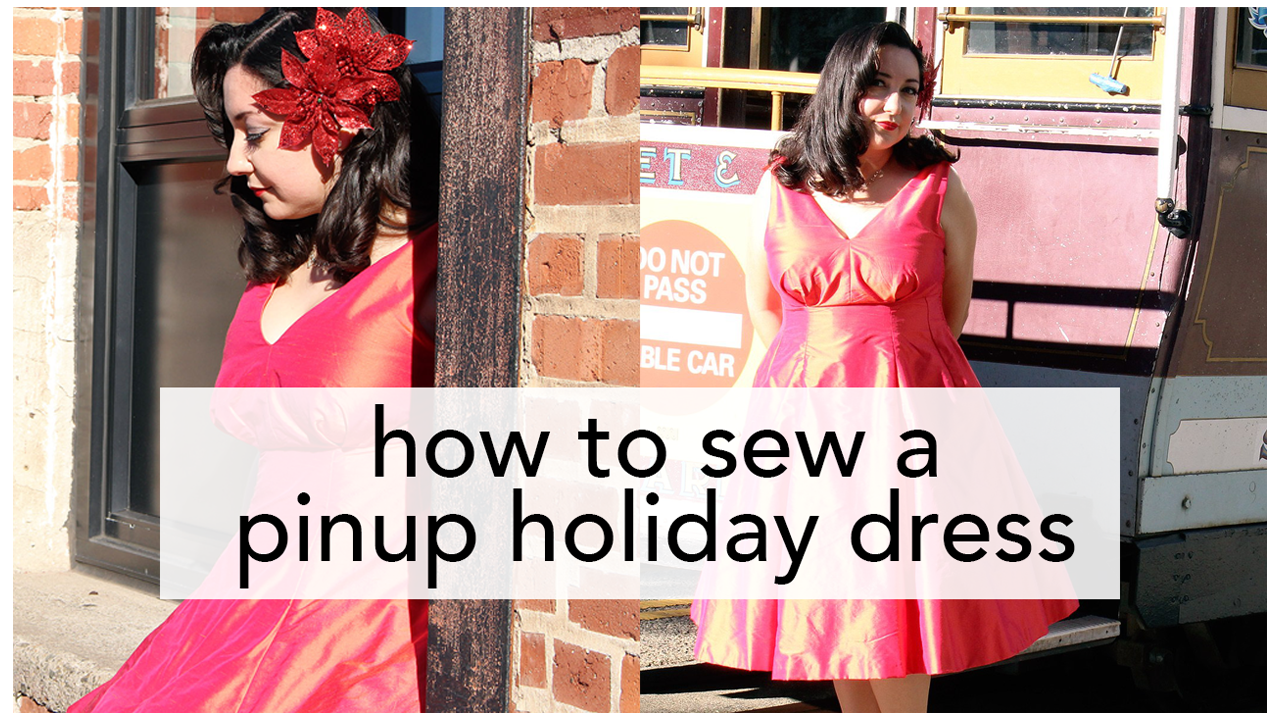
    The pattern I selected for my pinup holiday dress was Butterick B5603, from the 1950s.

    Click to buy the pattern!

    Buy this beautiful Butterick pattern and then watch my sewing tutorial to make your own! | Vintage on Tap

    I decided to go with View B for this dress, with the V-neck (and V-back) and tie top shoulders. There was just something about how elegant the design is that really drew me to it. Also, the nipped in princess lines at the waist are attractive and give a natural slenderness that would look demure and very cute during holiday celebrations.

    If you’re considering this pattern, please read my sewing tips down below!

    Butterick B5603 Pinup dress, back view | @VintageonTap

    Butterick B5603 Pinup dress, Union Square Christmas Tree | @VintageonTap

    Step One: Pay special attention to “Special Occasion” fabrics.

    Before starting to sew, determine the look and feel of the fabric you want to use. If you have a fabric swatch book (click here to learn more about fabric swatches!), look over the options that you may want to work with.

    Questions to ask yourself:

    • Does it have the right texture and drape for the pinup holiday dress you want to make?
    • Have you had the opportunity to work with the fabric before?
    • Will this fabric be dry-clean only, or can you hand or machine wash it?

    Going through the steps to investigate your fabric will help determine how much time, effort, and even how much difficulty you might have in stitching up your pinup holiday dress!

    It’ll also determine the internal foundation that will need to be worked into the sewing process, to make sure that your dress holds its shape and stands the test of time with nights out dancing!

    Butterick B5603 Pinup dress, silk dupioni | @VintageonTap

    Step Two: Read the Underlining and Silk Organza cheat sheet

    After you’ve selected your fabric, spend a few minutes reading the cheat sheet I created for this project. The FREE Underlining and Silk Organza cheat sheet outlines directions for reinforcing and strengthening your garment from the inside out.

    These vintage techniques are essential to sewing a pinup holiday dress. The cheat sheet goes into:

    • How to underline fabric. This is useful when working on special occasion fabrics that might be slippery or difficult to work with. Underlining will make them more stable so you can sew them a lot more quickly.
    • Reinforcing your seams with silk organza. Reinforcing them will reduce stretching on the bias, which can cause the neckline (such as the V-neck of this Butterick B5603 dress) to warp and become distorted.

    Both techniques are useful even past sewing a special occasion dress- they work over all sewing types and are techniques you’ll want to know if you want your garments to last over time.

    To download the cheat sheet, just fill out the form below!

    FREE Checklist PDF!

    Get my checklist for Underlining and Stabilizing with Silk Organza FREE and sent to your inbox!

    Powered by Kit
    Butterick B5603 Pinup dress, made in Britex Fabrics | @VintageonTap

    Step Three: Don’t Rush It.

    Simple, but easy to over look when things are crazy in your corner of the world. Having a festive pinup dress to wear at the end of the year is fantastic, but speed sewing should not be a practice when you’re working on materials that may be more finicky than the standard quilting cotton.

    • Cut fabric one day, start sewing the next. Spending one day cutting out your fabric will ensure that you don’t rush into snipping into the Nice Fabric and accidentally cut things incorrectly. Special occasion fabric can occasionally be costly, and giving cutting time its own time and space will make a difference.
    • When you start sewing, take frequent breaks. Every hour get up to stretch, drink a glass of water and maybe go outside for some fresh air.
    • Don’t work on your pinup holiday dress for more than four to five hours in a day. Similar to the Take Frequent Breaks note, working on the dress in small chunks of time guarantees that when you see it, you’ll be in a good headspace and able to tackle it with fresh eyes every time. This is especially important if you’re working with fabric that can be new to you and/or expensive.

    Butterick B5603 Pinup dress, made in Britex Fabrics | @VintageonTap

    This pinup holiday dress is ready for Christmas or Valentine’s Day.

    This dress was sewn in conjunction with Britex Fabrics, who kindly donated a gorgeous silk dupioni that shimmers gold in the light. Please note that the color fabric I have is SOLD OUT! But there are still plenty of dupioni options available on the Britex website.

    Vintage sewing techniques in this pinup dress include extreme (!!) use of silk organza throughout to prevent warping at the neckline, waist seam, and zipper insertion point. Also, rayon seam binding was used quite a bit. To add extra stability to the entire piece, though, I used silk charmeuse as underlining.

    Be sure to watch the sewing walkthrough video to see how I made this pinup holiday dress from start to finish!

    How to Sew a Pinup Holiday Dress! Video Tutorial and sewing tips | Vintage on Tap

    My B5603 holiday dress was also sewn as part of a collab with…

    Allie J!

    Butterick B5603 dress, made by Allie J | @VintageonTap

    Butterick B5603 dress, made by Allie J | @VintageonTap

    Butterick B5603 dress, made by Allie J | @VintageonTap

    Doesn’t her dress look amazing?

    We decided to tackle the same pattern and give it our own twist. Allie chose version A of Butterick B5603 and I chose version B. Both versions feature a handpicked zipper, and a gored, flared skirt. The instructions for both dresses are nearly the same… except for the approach of the bodice which can give this pattern a totally different feeling!

    Allie goes into her thoughts and experiences sewing version A of this pattern over at her blog; please go check it out!

    I love the textured fabric Allie used for her dress, which gives her garment a super luxe feeling. It’s absolutely her style- very timeless and very classy (reminds me of something First Lady Michelle Obama might wear!) I also like the addition of the second pleated detail on the waist line, which breaks up the long line on the skirt. Allie also runs a mailing list where you can keep up with her different projects and get a behind the scenes look into her life. Click here to subscribe to keep up with Allie! 

    Pin this Post!!

    How to Sew a Pinup Holiday Dress! Video tutorial with tips for making a beautiful dress at home | Vintage on Tap

    Subscribe to Vintage on Tap on YouTube!

    Disclaimer: This post was made possible by Britex Fabrics :) Also, this post contains affiliate links.


    Do you like what you see?

    Never miss a post by following me on Bloglovin’! Or go mobile- I’m on Instagram and  YouTube!

  • How to Sew a Robe: The Seamwork Almada video tutorial

    How to Sew a Robe: The Seamwork Almada video tutorial

    How to sew a robe, the Spring Seamwork Almada Robe | @vintageontap

    If you were curious about how to sew a robe, this video tutorial is perfect for you.

    Working on a string of tricky projects always makes me want to turn my eye to something light, airy, and comfortable. And no matter your sewing level, stitching up the Seamwork Almada robe is simple and quick.

    The Almada robe is a Seamwork Magazine pattern that was released as part of their Intimates issue in 2016. Its comfortable kimono-style makes it a quick make and a nice lounging piece.

    This robe is comfortable and it would also work just as well in a light flannel for cuddling up on the couch when its cold out!

    Enjoying a glass of wine in my Spring Seamwork Almada Robe, learn how to sew a robe with this post! | @vintageontap

    Using a seam ripper on my Alamada Robe, learn how to sew a robe with this post | @vintageontap

    I sewed this kimono robe with a smooth poly/rayon satin.

    I picked this blend specifically for its washing ease and soft print, which for it being a “home” piece, was absolutely paramount. The bias binding trim was self-made from 100% silk, which gives the robe a great pop of color, though the original pattern doesn’t include this trim. Instead, the original pattern uses the bias band as an interior bias facing, but I decided to skip it since the trim is more fun! I covered this section in my video tutorial at 0:48 and more in depth at 3:17.

    Luxe sewing details are always a fun thing to incorporate when you’re considering how to sew a robe, and I decided to add piping on the sleeve hem, since it seemed to make sense with the silk bias band. I go over this in depth at 4:02 in the robe sewing video.

    To buy this pattern, subscribe to Seamwork Magazine (and get $3 off your first month!) by clicking here.

    Or, buy the pattern as a standalone by clicking here.

    Wine afternoon in my Seamwork Almada Robe | @vintageontap

    Wine afternoon in my Seamwork Almada Robe video tutorial | @vintageontap

    Learning how to sew a robe of this fabric type requires a few extra steps.

    Because of the fabric, I opted for french seams throughout to completely cut down on the unraveling issues. For the hem, I did a simple rolled hem with a rolled hem foot I didn’t realize I’ve had for years!

    I also made sure to use only sewing needles and pins that would be maintain the integrity of the fabric, which meant satin-grade pins and thin sewing machine needles.

    Ukulele love with Seamwork's Almada Robe | @vintageontap

    Sewing Spring Seamwork Alamada Robe | @vintageontap

    Curious about my sewing tools? Click below!

    Recommended Sewing Tools by Vintage on Tap

    Learn how to sew a robe, have a completed Seamwork Almada Robe! | @vintageontap

    This Seamwork pattern didn’t stitch up in the suggested time, but I’m very well aware it was because I did some extra work.

    Depending on the type of look you’re going for with sewing this robe, it can stitch up in the approximated 2 hours. Had I decided to make this in a simple woven fabric and just pinked all the seams, this could have been done in the span of a good movie.

    The most complicated thing about this pattern was just the process of trying to wrangle the fabric to stay put when I was cutting it out, which had more to do with the poly/rayon than the pattern.

    Completed Seamwork Almada Robe | @vintageontap

    Completed Seamwork Almada Robe, learn how to sew this robe! | @vintageontap

    I’ve all ready started to wear this robe every day since I stitched it up; its part of my at home “uniform!”

    I recommend this robe if you’re looking to start building up a self sewn wardrobe because its absolutely essential before bed or for early morning coffee. When you’re starting your day and catching up on Instagram (which by the way, are you following me on IG?), this makes for a quick cover up.

    Completed Seamwork Almada Robe | @vintageontap

    If you want to learn how to sew a robe, you’ll be super pleased with this sewing pattern.

    The loose, comfortable design has made it my go-to piece when I wake up in the morning and right before I go to sleep. I definitely recommend you make it ASAP and check out the video above if you want a tutorial of the process!

    Making matching underwear to this robe is a total must. For example, why not make a pair of sexy underwear to go with your new robe? 

    How to sew underwear, made with the Seamwork Geneva pattern | Vintage on Tap

    Cute pair of undies and matching robe? Gorgeous! (Click here to learn how to sew these panties!)

    And don’t forget, get $3 off your first month of Seamwork Magazine by clicking on this link!

    Pin this Post!!

    How to Sew a Robe, The Seamwork Almada | Vintage on Tap


    Do you like what you see?
    Never miss a post by following me on Bloglovin’ or via the Newsletter!
    Or go mobile- I’m on Instagram, YouTube, and Snapchat (?vintageontap)!
    Disclaimer: This post contains affiliate links :)

  • The Vintage Slip

    The Vintage Slip

    Vintage Inspired Slip | @vintageontap

    Vintage Slip Empire Waist Full Bust Adjustments | @vintageontap

    Vintage Slip Lace Detail | @vintageontap

    Vintage Inspired Slip Interior detail, hand sewing and French seam | @vintageontap

    Vintage Slip Lace | @vintageontap

    Shower Curtain | @vintageontap

    Completed Vintage Inspired Slip, hem detail | @vintageontap

    Completed Vintage Inspired Slip | @vintageontap

    Completed Vintage Inspired Slip | @vintageontap

    Wine and Flowers | @vintageontap

    Completed Vintage Inspired Slip | @vintageontap

    Completed Vintage Inspired Slip | @vintageontap

    LUSH Bath Bomb | @vintageontap

    Completed Vintage Inspired Slip | @vintageontap

    Vintage Inspired Slip Strap detail | @vintageontap

    February has me thinking of the perfect vintage slip.

    I am not immune to the beautiful silks that seem to be everywhere in February! Luckily, a vintage slip falls in line with Spring/Summer sewing plans, so I’m very happy to start filling my wardrobe with basic pieces that will be used time and time again.

    I decided to take on what I thought would be a rather simple garment- a vintage inspired slip, but as I started with it, the project turned into a pattern drafting challenge. I found a free beautiful Vintage Slip pattern by House of Jo and set down to work.

    The pattern itself definitely needed a lot of wrangling, though.

    When I sourced the pattern, it didn’t really include any directions, let alone sizes. The pattern designer left minor notes in comments below their original upload so I had to piece a lot together– converting the sizing to inches, deciphering the sizes on the pattern paper, and then going deeper into the directions than the summary. Apparently this slip was originally published in The Vintage Pattern Selector and featured in Sew Magazine at some point, but the online upload was very vague. French seams weren’t discussed, or even straps with bra hardware. Also, this pattern calls for everything to be cut out on grain, but in future iterations I’ll be doing everything on the bias for a better feel. Basically, I took what I learned from my Savannah camisole and applied it here.

    Necessary pattern drafting skills:

    1. Slash and spread
    2. Repositioning a dart
    3. FBA on an empire bust
    4. Manipulating a dart to shift fullness

    Thankfully I have experience with the above skills. However, it’s not as if these things are super simple to do since they build on each other and must be done in order. A couple resources I read up on before beginning the entire process include Full Bust Adjustment: Gathered Bodice by Alana at Lazy Stitching and Another Little Crafty Creation: Full Bust Adjustment (FBA) tips.

    Still, I love the different lines to the design. Some of the pieces could have been cut on fold (front bodice and back yoke), but I also like how the different seams give it a different effect. Yes, it added more work to the French seams, but they were worth it. Also, stay stitch every curved part of that pattern as soon as you cut it, you’ll thank yourself later.


    It was necessary to do some quality control when it came to the silk I used.

    I went with a basic silk, but it did involve some testing. Essentially I ended up walking around the fabric store, rubbing fabric against my tights to be certain the garment wouldn’t ride up during wear. Doesn’t seem like a big deal to do that, but if you’re sewing something similar for yourself, putting the fabric under a (reasonable) stress test while you’re in the fabric shop is essential, and for me that was making sure it didn’t ride up.

    My favorite part of this reproduction vintage slip is how feminine it makes me feel. I want more of these in every color as soon as possible.

    For a vintage slip reproduction pattern, I’m super happy with how it came out! I ended up working out most of the kinks of this pattern on a wearable muslin with some random fabric in my stash.

    As I started working on this piece, Seamwork Magazine featured a lovely Behind the Seams of a Vintage Slip so I was able to incorporate some of those details into my slip. I used bra strap hardware I bought from Tailor Made Shop on Etsy, French seams, and lingerie lace I was able to source from a nearby fabric store.

    This reproduction vintage slip is the first of my 2016 Vintage Pledge pieces.

    While I sew a majority of my items from vintage patterns, I think a “modern” reproduction still counts! I’m very happy that this vintage slip is a good way to practice basic skills and continue to perfect them on basic garments. Neglecting the simple skills can really kill a project and working with lace, french seams, and even learning how to make spaghetti straps can be vital!


    Do you like what you see?
    Never miss a post by following me on Bloglovin’ or via the Newsletter!
    Or go mobile- I’m on Instagram, YouTube, and Snapchat (?vintageontap)!