Tag: separates

  • Gertie Retro Keyhole Blouse, Video Sewing Tips!

    Gertie Retro Keyhole Blouse, Video Sewing Tips!

    Gertie Keyhole Blouse, how to sew | Vintage on Tap

    Any excuse for bias binding is a good one.

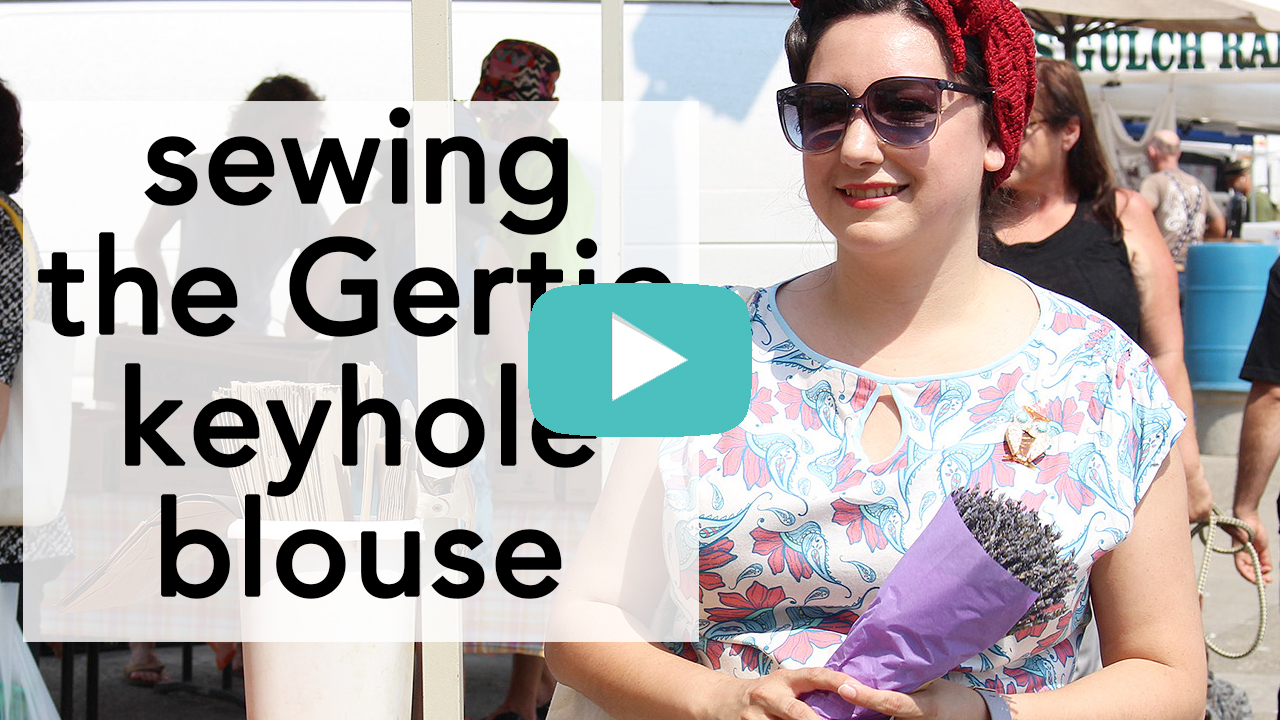
    When I spied the bias binding detail along the neckline of the Gertie keyhole blouse, I knew I had to have it.

    The design, from Gertie’s New Book for Better Sewing, is a short sleeve piece with a button down back and self-drafted adjustments outlined in the book. The gathers at the shoulder are really beautiful and super flattering, and the keyhole detail gives this blouse a gorgeous 1930s and 1940s look.

    1940s Keyhole Blouse, how to sew | Vintage on Tap

    I’ve been in search of a well-fitting, multi-purpose blouse for a while.

    To be dressed up or dressed down, to be worn with a pair of blue jeans or tucked into a wool pencil skirt, a well-fitting basic can be a game changer (think of the modern t-shirt and how comfortable and classic it is.)

    Vintage-style basics can sometimes be on the plainer side- and to be honest, I’m 100% happy with it!

    Why?

    Because if you find something that works, you can make tons of it– in all types of fabrics, all types of colors, and then you’ll have a hearty wardrobe to pick from and mix and match.

    The closest I’ve gotten to it in my recent sewing experience, is my Seamwork Astoria sweater, which I’ve already made five versions of (and I could use a few more, btw.)

    1940s Keyhole Blouse, how to sew | Vintage on Tap

    Sewing the Gertie keyhole blouse is easy- but there’s a little bit of pattern drafting that has to happen before you get started.

    Fabric by My Fabric Designs | Vintage on Tap

    Getting started sewing this 40s style keyhole blouse is a piece of cake.

    Before getting started, the usual prep has to get done! Includes, but isn’t limited to:

    • Tracing the Bow Tie blouse from the New Book For Better Sewing and making your initial muslin. (Not sure how to trace nested patterns? Click here to learn how!)
    • Getting your bias binding situation sorted out, either bought or self-made.
    • Laundering and prepping your fabric

    The fabric I used was printed from MyPatternDesigns, which graciously donated this fabric for use.

    I printed this fun paisley design onto organic cotton sateen, which sewed up like a dream and laundered well. The colors did bleed slightly, but I think that’s more due to how I hung my fabric to air dry. I would recommend air drying this fabric flat.

    Gertie keyhole blouse, how to sew | Vintage on Tap

    Stay stitch neckline on Gertie Keyhole Blouse | Vintage on Tap

    Step One: Get your prelim stitches in place.

    There are a couple different stitch considerations to keep in mind when getting everything set up.

    Stay stitch the neckline and the keyhole.

    While the instructions in Gertie’s book do not mention stay stitching, I always recommend it as standard practice and just Good Sewing.

    Taking the minute or two to make sure your neckline, which is one of the most important parts of your garment, stays put can save you hassle down the road.

    After determining your appropriate stitch settings, sew a line 1/4in away from the raw edge to provide a little bit of stability.

    Gathered shoulders, rotating darts on Gertie's Keyhole blouse | Vintage on Tap

    Be super conscious of your gathering stitches and how you intend to “finish” them.

    Covered at timestamp 3:39 in the video, do a couple backtacks at normal stitch length before lengthening your stitches to basting/gathering length.

    Why?

    The backtack at normal length will become an anchor point, at which to push your gathers towards and so your gathers don’t “fall off” the threads.

    Once the gathers are gathered, tie the threads as closely possible to the stitches and then with a normal stitch length, sew a straight perpendicular line across all gather stitches, backtacking over each gathering line. This way, your gathers will stay in place and not shift around over time, at timestamp 3:51.

    Back of the Gertie keyhole blouse, lapped zipper detail | Vintage on Tap

    Gertie Keyhole Blouse pattern adjustments | Vintage on Tap

    Step Two: Sew the side seams, shoulders, and back closure

    Sewing the side seams and shoulders are pretty straight forward- but when it comes to the back closure… the sky is the limit!

    The original Bow Tie blouse featured a button placket right up the back, which looks lovely. As I discussed on Patreon, I decided that I wanted a quick and easy zipper to not have to worry about buttoning the back of my piece.

    At timestamp 5:03, I used my adjusted pattern pieces to accommodate a lapped zipper, and stitched that in place.

    1940s retro sewing, Gertie Keyhole Blouse | Vintage on Tap

    Bias binding on keyhole blouse, Gertie New Book for Better Sewing | Vintage on Tap

    Step Three: Bias the neckline… but start with the keyhole!

    There are so many different ways to stitch in bias binding- but no matter what, take your time!

    Remember that the bias bound neckline is what makes this piece, so a twisted and wonky bias strip can make things look “off.”

    The bias binding is inserted on this particular blouse at timestamp 5:23, taking care to insert the bias binding on the keyhole first. I went step by step in the following order:

    1. Pinned the bias binding in place (5:23)
    2. Sewed the first stitch line, close to the first fold on the bias tape
    3. Pinned the bias tape closed (to the inside, 5:58)
    4. Pressed the bias tape with steam to keep it from wiggling or twisting
    5. Hand sewed the bias tape closed

    Retro sewing, Gertie Keyhole blouse | Vintage on Tap

    Retro sewing, Gertie Keyhole blouse | Vintage on Tap

    All in all, the Gertie keyhole blouse is a really cute retro sewing piece.

    I love how quickly it came together (in an afternoon!) and how much fun it is to wear– I get a lot of compliments on it and I feel like the waist tapering really gives it a great silhouette.

    And I admit, I’ve worn it at least once a week since I’ve made it. There, I said it!!

    Sewing video tutorial to learn how to make the Gertie Keyhole Blouse! | Vintage on Tap

    Have you made a keyhole blouse before? What fabric would you have chosen for this piece?

    Disclaimer: This post contains affiliate links and thank you to My Fabric Designs for donating this fabric for use!


    All the Places, All the Stuff!
    Never miss a post by following me on Bloglovin’!
    Or go mobile- I’m on Instagram and YouTube!
    Subscribe to Vintage on Tap on YouTube!

  • Completed: The Retro Tiki Collab, Butterick B6354

    Completed: The Retro Tiki Collab, Butterick B6354

    Vintage on Tap’s first collaboration- Butterick B6354 is FABULOUS!

    Can I say how happy and excited I am to have worked on this collaboration? Featuring 4 lovely ladies in the retro and pinup blogging world, sewing the same pattern in their own unique way. We each decided to give Gertie’s Butterick B6354 our own twist and its been so fun to see how the pattern has been interpreted and styled!

    Why this pattern? It’s summer time and tiki seems to be all the rage this time of year in the pin up sewing world. And besides, I was all ready itching for another tropical drink after my last tiki dress a while back.

    For my version of Butterick B6354, I made my piece… reversible!

    Bianca at Vintage on Tap wearing the reversible Butterick B6354 | @vintageontap

    The reversible tiki set, Butterick B6354 | @vintageontap

    The reversible tiki set, Butterick B6354 | @vintageontap

    Sewing a reversible garment can be fun, and the amount of hand sewing should definitely not turn you off from trying it! There’s only a few special considerations to take into account for this particular piece.

    #1: Plan your reversible from even before Step One

    Reversible Tiki outfit, Gertie's Butterick B6354 | @vintageontap

    No, you can’t just cut into your pretty fabric and go! Take a look at the pattern pieces and directions and decide what can and can’t be reversible. Locate what will be tricky and will need work arounds and test those out on a muslin first. For this piece, I knew that the back closure, interior boning, straps and cup decoration would need extra consideration and need to be made differently in order to be fully reversible.

    #2: Both fabrics on a reversible piece have to have to bought purposefully and thoughtfully

    Reversible Tiki outfit, Gertie's Butterick B6354 | @vintageontap

    Making this piece reversible means there is no real lining fabric and that means that every side of the piece has to look good! There’s no way to hide a funky sewing fumble, either. For this piece, I opted to hand-sew anything that might be questionable, including the top stitching and back closure. Also, try to make both fabrics a similar weight and feel or the piece will not behave properly.

    #3 Decide what parts of the pattern can work double time

    Reversible Tiki outfit, Gertie's Butterick B6354 | @vintageontap

    The bias decoration on this piece is the same on both sides and merely flips the opposite way to decorate the other side. There are some parts of a reversible that just have to do double duty, there’s no way around it. On this piece, I made sure to carry my top stitching underneath the band to allow it to roll over a little bit more easily. A lot of the techniques that might make the bodice more stable (under stitching, etc.) had to be skipped in order to protect the integrity of the reversible.

    #4 The closure can be the hardest part to make beautiful

    Buttonback Closure, Butterick B6354 | @vintageontap

    Don’t mind the wonky skirt in this picture, but instead focus on what will work to make the piece look good at the closure. This pattern called for a zipper, but most reversible zippers are made for winter coats and not suitable for this sort of piece. I decided to go with flat buttons that wouldn’t add too much bulk to the bustier from either side. The result looks sleek and purposeful.

    Would I make this piece again? Totally! For my particular piece I had to do a FBA on the bolero and bustier, but I may have just slightly overdone it on the bustier. Either that or I need to start rocking a bigger push up bra to fill in the cups a little bit more! Next time, though, I would take the cups in just slightly to have them not so “open” at the top.

    The bolero was a breeze to sew, though, and I actually all ready want a bunch for regular wear. I can see making this in a wool fabric with a colorful lining for date nights.

    The sarong was nice and super comfy; I actually would love to make it in a real casual fabric for an upcoming vacation, too!

    There’s so many ways to update and change this piece to suit your style, though. Check out the other posts in the collab for Butterick 6354 to learn about different ways to make it a little bit more your own. 

    Meet the ladies who participated in the Retro Tiki Collab!

    Abi from The Crafty Pinup

    Abi wearing Butterick B6354 from The Crafty Pinup | @vintageontap

    Abi wearing Butterick B6354 from The Crafty Pinup | @vintageontap

    Abi exploded onto the sewing scene just a few months ago, but has all ready been featured by BBC and The Fold Line for her awesome blogging and sewing skills! She also owns My Retro Closet for all your boudoir needs.

    Abi turned her piece into a full dress, taking the original B6354 design and merging the sarong wrap to the bustier top. She was able to match the darts in the top to the skirt perfectly and the zipper insertion looks amazing! Hop on over to her blog to see more pictures and find out the details on how to pattern hack this design.


    Akram from Akram’s Ideas

    Butterick B6354, Akram from Akram's Ideas | @vintageontap
    Butterick B6354, Akram from Akram's Ideas | @vintageontap
    Akram has been super active and such a fun blogger and vlogger who I have admired for a long time! She does everything from baking amazing recipes to sewing and thrifting up a storm. If you’re not all ready watching her on YouTube, you’re missing out!

    Akram sewed up the pattern as is- giving a full break down of what you can expect to find the moment you open up your copy of Butterick B6354. She also did some adjustments on the skirt and the images on her blog really help guide you through the process! Hop on over there to read about her experience working on her piece.


    Christina from Gussets and Godets

    Christina from Gussets and Godets Butterick B6354 tiki playset | @vintageontap

    Christina from Gussets and Godets Butterick B6354 tiki playset | @vintageontap

    Not gunna lie, I’ve had a huge blogger-girl-crush on Christina for a while because of her awesome outfits and amazing styling skills. Every time I see her post on Instagram or her blog, I’m like “omg girl, weeeerk!” She’s been featured on the lovely A Stitching Odyssey blog and is beloved by the sewing community.

    Christina turned her Butterick B6354 into a playsuit, merging the shorts and bustier top. She also played with the straps, making them into a cute spaghetti strap design which makes them that much more fun. Learn more about how to pattern hack Butterick’s 6354 by going over to her website, too. 


    Please leave your thoughts and comments on this piece and the others you’ve seen! And stay tuned for an update on a giveaway and the Making Of video of my reversible piece!

  • Completed: Butterick B5895

    Completed: Butterick B5895

    Butterick B5895, back view | @vintageontap

    Butterick B5895, enjoying the sunshine | @vintageontap

    Butterick B5895, sewed a matching summer set | @vintageontap

    Beautiful street art in the Mission | @vintageontap

    Butterick B5895, side view| @vintageontap

    Butterick B5895, back view | @vintageontap

    Butterick B5895, RIP Prince | @vintageontap

    Eclair Bandersnatch Graffiti artwork | @vintageontap

    Button close up of Butterick B5895 | @vintageontap

    Back of Butterick B5895, matching dirndl and top set | @vintageontap

    Completed Butterick B5895 summer set | @vintageontap

    Liked it so much, had to make Butterick B5895 twice!

    I absolutely love this little top! I never anticipated falling in love with a crop top, but when I made Butterick B5895 last year, it blew me away. Unfortunately, last year I never really blogged about it, even though I started a draft.

    As all other reviews of this sewing pattern have stated, the bodice is super short! This worked out great for me since my torso is equally as short and this bodice ends at my natural waist line. For those of you with a normal torso length, beware!

    When tracing out the pattern pieces, take care of all circle markings and note them well on your fabric.  These circles are where the seam allowances intersect for the collar. Every single circle must match up– over 5 layers. I find it also very curious how much clipping is called for at such a high stress point- so much so that if the circle markings don’t line up, there can be a hole under the collar. Fortunately, the hole isn’t visible, but its there nonetheless if the circles don’t line up.

    For this reiteration of Butterick B5895 I also made a matching dirndl skirt like I made a while back, lengthening it by 2.5in. I wanted this set to have a “resort” feeling to it and I’ve always wanted to have a matching set!

    The fabric was fun, too. I found it at one of the local shops and its a comfortable, breathable cotton lawn. And the hat in the above pictures is from Goorin Brothers- which I don’t get to wear very often, but was great for the photoshoot! The weather in San Francisco has been jumping from hot to cold for the past couple weeks and luckily, this project matched up on an 80*F (26*C) day.