Tag: french curve

  • How it Works: Anatomy of a Full Bust Adjustment

    How it Works: Anatomy of a Full Bust Adjustment

    Video tutorial for how to understand a full bust adjustment! | Vintage on Tap, Retro and Sewing Youtube Channel

    Do you know how to do a full bust adjustment?

    The full bust adjustment (FBA) is not for the faint of heart. If you’re brand new to sewing, it can seem like a confusing mess.

    The lines, slash and spread, and blending of curves can seem weird and nonsensical, and heaven forbid the adjustments need to be done on a non-conventional bodice! I remember that fear very well!

    As a sewing blogger, I receive countless questions regarding FBAs on all sorts of patterns, but when it comes down to it, the adjustment is standard. If you know the principles of how to do this pattern adjustment, and how to approach it, you’ll be able to tackle some of the trickier garments!

    Vintage Slip Empire Waist Full Bust Adjustment | @vintageontap

    Before discussing the Anatomy of an FBA…

    Evaluate if you indeed need to perform one!

    Not every pattern needs a full bust adjustment, even if you’re full busted.

    I’m a big proponent of sewing the pattern straight from the envelope, before making a decision on the sorts of adjustments that change the foundation pattern.

    Why?

    • Sewing the standard size will give you an idea of how the pieces come together in general (not related to the FBA, but to understanding the garment)
    • It’ll allow you to confirm whether the ease of the garment is right for you (the ease could potentially affect the size of the FBA)
    • You’ll also be able to see if the FBA really will be needed for a better fit at the bust and arm scythe

    I go into depth about my fitting process on my YouTube channel, where I have a dedicated playlist for Full Bust Adjustments.

    Video tutorials for understanding and doing full bust adjustments! Watch this playlist for tips on sewing your favorite pieces! | Vintage on Tap Pinup Sewing Blog

    Click to watch the FBA video tutorial playlist!

    Another resource I recommend checking out is the Sewing Out Loud Podcast (STOP! Before you FBA), which dives deep into some of the current rhetoric around how Full Bust Adjustments are being used as sewing cure-alls. (HINT: they are NOT a fitting cure-all!)

    Video tutorial for how to understand a full bust adjustment! | Vintage on Tap, Retro and Sewing Youtube Channel


    Tools to Complete a Full Bust Adjustment

    Before getting started doing an FBA, make sure you have your tools handy!

    Recommended Sewing Tools by Vintage on Tap

    Paper Scissors – Sharp, simple, nothing fancy. I prefer one with a comfortable handle, which is easy to skimp on, but makes a difference long term.

    Transparent Gridded Ruler – Look for one which is thin and flexible, which can bend around curves for pattern drafting. A regular ruler works fine, but transparent rulers will make your life easier with seam allowances, etc.

    Tape – I recommend 3M Magic tape, which allows you to draw over and erase graphite.


    Anatomy of an FBA, How it works and how to perform the adjustment | Vintage on Tap, Pinup and Sewing Blog

    Breaking down How a Full Bust Adjustment Works

    The standard FBA features three lines, as outlined in the tutorial video.

    Line One: Through the center of the primary dart, straight to the bust point.

    This line dissects the dart in two, and allows for a bigger “tent” to be made in your fabric. Adjusting the overlap of the dart will adjust how much the fabric will fit over the cup.

    Line Two: Parallel to the center front, straight down to the bottom of the bodice, starting at the bust point. 

    This line will allow the front bodice to be widened, creating for a wider space for the bust fit comfortably. NOTE: Most patterns are drafted to a B-Cup, and cup sizes above C-cup will need a little bit more space to be comfortable. The widening of the bodice adjusts the waist size as well, as widening at this line changes all measurements below the bust point.

    Line Three: Bust point to last third of arm scythe.

    The final line creates space for the “side boob”, spreading open space under the armpit. The exactly placement of this line is a general “final third” of the arm scythe, which is vague, as its specific placement isn’t specifically important. This line used as more of a pivot point. NOTE: The upper 2/3 of the arm scythe should be avoided as much as possible. Drafting this line out in the 2/3 or above area will start to distort the area above the bust, including the neckline, shoulders, sleeves, and fabric that sits above the bust.

    How does a full bust adjustment work? This video tutorial will walk you through how the adjustment works | Vintage on Tap Pinup Sewing Blog

    What’s happening on the pattern?

    As you spread the pattern pieces apart, a few different things are occurring:

    The Center Front of the pattern piece stays exactly the same.

    • The Center Front of the bodice front is staying stationary, as all pieces are pivoting around it.
    • The Center Front piece will need to be lengthened, depending on the amount of the FBA, to match the Side Front (see below.)

    Line One, which bisects the primary dart, opens to create a larger “tent” for the bust. 

    • A larger dart means there’s more space for the breast to sit forward comfortably.

    The Side Front of the bodice lowers due to the main dart getting larger (at Line One.)

    • With the Side Front lowering, it creates an offset with the Center Front, as noted above.
    • The Center Front should match the Side Front, which is accurately accommodating the bust lengthwise (up and over the bust.)

    Line Two, which splits the Center Front and Side Front, spreads apart the distance of the full bust adjustment.

    • The spreading of Line Two creates width in the pattern below the bust point.
    • The pattern is widening to accommodate the width of the breast.
    • The waist measurement is expanded an equal amount.
    • Ideally, the addition of space created by Line Two should reduce pulling at the sleeve and armpit, directly perpendicular to the bust point.
      • Note: The pulling is generally created by the fabric straining to accommodate the bust, pulling at the seams of the sleeve/armpit area and smooshing the bust down.

    How does a full bust adjustment work? This video tutorial will walk you through how the adjustment works | Vintage on Tap Pinup Sewing Blog

    Look for Pattern Distortions when Completing an FBA

    Pattern Distortion #1: Center Front to Side Front

    As discussed above, the Center Front should be lengthened to match the Side Front.

    Warning! Simply drawing the Center Front line to square off with the Side Front and “lengthen it” doesn’t always work! If your pattern is not a simple bodice, on the fold, with a square edge, follow my pattern adjustment tutorial video by cutting a few inches from the Center Front piece and MOVING IT DOWN. The hem of the bodice may not always be straight, and this avoids accidental distortions.

    How to use a French Curve, blending pattern pieces | Vintage on Tap

    Pattern Distortion #2: Mismatch on pattern true-ing

    Areas that will need a look over include:

    • The hem (see above)
    • The dart itself
    • How the front pattern piece fits against the back pattern piece
    • The armhole (see below)

    See my tutorial video to understand how to fix this distortion, How to Walk a Sewing pattern.

    Pattern Distortion #3: Armhole

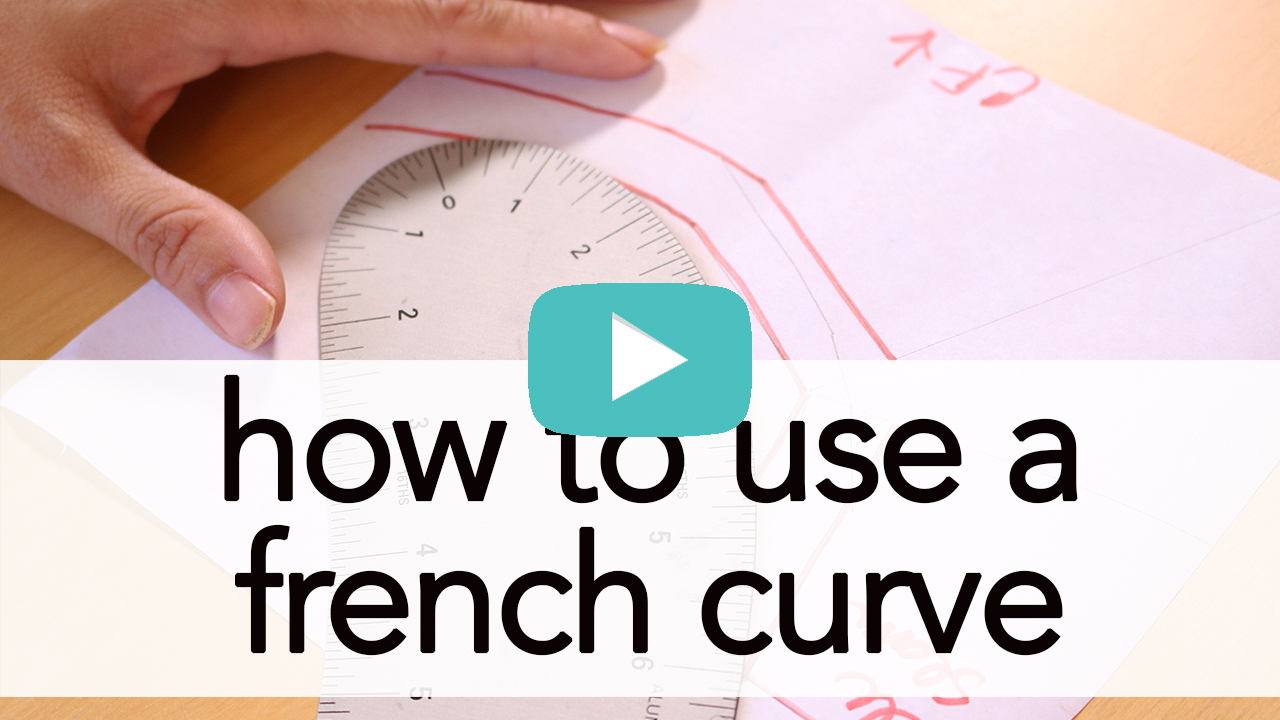
    Line Three will create a pivot point at the armhole, and by completing the FBA, the pivot point pinches into the armhole. Use your French curve to correct the armhole by drawing a simple and gentle curve. (See: How to Use a French Curve)

    How to use a French Curve, blending curves in armhole | Vintage on Tap

    Full Bust Adjustments can be intimidating, but they don’t have to be.

    As you practice doing FBAs, the more complicated bodices operate in the same way. They add width for the bust line, they add length (up and over the bust), and they add a little extra for the side-boob.

    Need a little bit more Full Bust Adjustment help? Check out the videos below!

    Subscribe to Vintage on Tap on YouTube!

    Disclaimer: This post contains affiliate links :)

    All the Places, All the Stuff!

    Never miss a post by following me on Bloglovin’!
    Or go mobile- I’m on Instagram and YouTube!
    New to sewing? Check out the Start Here page!

  • How to Use a French Curve, Video Tutorial!

    How to Use a French Curve, Video Tutorial!

    Learning how to use a French curve in your pattern drafting is important.

    So important, that I would wager to say that besides my straight edge grided ruler and mechanical pencil, I would honestly flip my sh*t if my French curve went missing. Ever since I learned about it at university, its super high on my list for top sewing tools; there is not a single project that my French curve is not integral to success.

    The types of French curves on the market are numerous.

    If you’re searching Amazon, I can definitely see how they might be intimidating to even think about!

    The two in their listings that I would recommend are:

    • Fairgate Vary Form Curve
      • Pros: This is essentially the one I use (haha!), sturdy, can use it with my rotary blade
      • Cons: Not transparent
    • Dritz Styling Design Ruler
      • Pros: Love the gridded section, love the straight edge component, transparent
      • Cons: Plastic may snap or be ruined by cutting implements, not a dual sided curve, looks kind of flimsy for long term use

    How to use a French Curve | Vintage on Tap

    With so many French curves out in the market, you can use most of them in your pattern drafting. When choosing one, please just consider the following questions:

    • What are you primarily going to use it for? If for strictly pattern drafting, you’d be ok with a plastic ruler, but if you want to also be able to cut with it, stick to a metal ruler.
    • How are you planning on storing it? If hanging, make sure it has a hole in the body to hang from.
    • Is this going to be your single French curve? If so, look for a long French curve with a sharper curve at the head that can serve double duty. If you’re able to afford and have space for multiple tools, you can purchase sharper curved pieces separately and instead aim for a more traditional French curve with more gentle, natural curves.

    The length of this sewing tool is super important.

    Please, aim for a larger French curve that will be adequate for the length between your bust line to hip line– you may have to use this curve to blend that distance.

    How to use a French Curve, blending curves in armhole | Vintage on Tap

    How to Use a French Curve Tip #1: Blending jagged edges, like armholes after a full bust adjustment.

    I discuss this particular tip at the 30 second timestamp.

    The first consideration for this step is that you’re essentially looking for the median of the jagged edge: a line that blends as many of the points together into a smooth, curve that would feel natural against the body.

    1. Identify the areas that need to be blended and decide what type of curve it needs– convex, concave, S-shape, etc.
    2. Identify which part of the ruler will hit the right median between the points.
    3. Move the ruler around in order to capture different parts of the curve as needed. For example, if you’re working on an armscythe you might need one portion of the french curve versus if you’re blending the waist of a dress, you might need to reference 4+ edges of the ruler!

    The main take away of this step, is that when you’re learning how to use a French curve, you can really make that new line do whatever you want it to do. 

    Even a change in a curve of 1/4in makes a difference. If an armhole is too tight, you can change that curve as needed. If a pencil skirt is too straight, you can give it a little more va-va-voom.

    Experiment with the different parts of the ruler for the best curve for the part of the garment you’re working on, but don’t forget to walk your pattern seams after doing this step, just to make sure everything lines up!

    How to use a French Curve, blending pattern pieces | Vintage on Tap

    How to Use a French Curve Tip #2: Blending between pattern pieces.

    In my example at timestamp 1:45, I blend between the front and back pieces that aren’t matching at the side seam.

    This will apply in so many different situations:

    • Blending the shoulder seams
    • Blending a bodice to a skirt
    • Blending a sleeve head
    • Blending skirt pieces to one another

    The concept is pretty simple, though! If you’re walking a seam, and see that no matter what you do, your pattern pieces are not walking properly (bodice is too long compared to the back, etc.)– identify which pattern piece needs to be blended to its corresponding seam.

    In practice, the steps are straight forward:

    1. Walk pattern pieces and calculate how much more needs to be added or subtracted from the “off” piece
    2. Walk pattern until the relevant seam is sitting as it will ultimately be finished (for example, if you’re working on a princess seam, walk the pattern from the top edge, down the curve, to the waist seam.)
    3. Complete steps as outlined in the video, using the French curve to redraft the seam into a smooth curve
    4. Rewalk the seam to confirm that the new seam is meeting correctly (in the above example, rewalk the seam from both the top edge AND the bottom edge of the princess seam, to make sure BOTH seam ends match up and are smooth)

    How to use a French Curve, blending pattern pieces | Vintage on Tap

    Completing the above process will make a brand new cut line, so be sure to only add on the appropriate amount for the seams to match. 

    If you’re making a bodice for a dress, doing this step on the side seam means that you’ll have to rewalk the bodice pieces to the skirt to make sure THOSE seams match properly.

    Ultimately, this is where the “drafting” in “pattern drafting” is at its full, 100% effect. You are essentially using your French ruler to mold a pattern to your body and make sure a piece of paper is translating your natural curves. Its a combination of sewing and geometry, down to the 1/4 inch.

    How to Use a French Curve on Darts | Vintage on Tap

    How to Use a French Curve Tip #2: Trueing a dart.

    Or “truing” a dart- same thing. This step is covered at 3:56 in the video.

    Essentially in this step, you’re making sure that any changes to a dart are accommodated for by making sure there is enough fabric at the bottom of the dart to fit within the seam allowance.

    While this might be tricky to conceptualize, if you think back on a dart you may have had to a change on- whether its a full bust adjustment, a small bust adjustment, or even just a movement of the dart, you need to make sure that when the dart is closed, that the dart seam allowance fits neatly within the final seamline.

    To get this step done, complete the following steps:

    1. Close the dart in the direction of where the dart will be pressed
    2. Identify the seam that needs to be blended
    3. Draw the new blended line using the appropriate section of the French curve. You can also use a tracing wheel for this step. Please no more than 2- max 3- passes of the tracing wheel (too many passes and the line gets “blurry” to follow)
    4. Open up the dart and complete the new dart redraw. If you used a tracing wheel, use the French curve to connect the dots of the tracing.

    Please note- the above steps are for MOST darts, whether a side seam dart, a waist dart, skirt dart, whatever. At the very least, close the dart and make sure you have a smooth seamline just to confirm that your dart will sit properly when you move onto the fabric.

    How to Use a French Curve on Darts | Vintage on Tap

    Learning how to use a french curve can really elevate your sewing experience like crazy.

    For such a simple and relatively cheap tool, it can make for better drafting overall and for better understanding of how pieces fit together.

    As I cover in my Walking a Pattern video, a 1/4in here and there can add up into garments that don’t fit. By using a combination of walking seams and French curve, you can remove some of those obstacles that can make it difficult to fit clothing to the body.


    I hope you found the tutorial useful!

    As I said in the video, I receive lots of questions about this tool because I use it so extensively in my pattern drafting tutorials. The playlist for pattern drafting tutorials has grown like crazy at this point- and I think at this point the French curve has made in appearance in at least 50% of them!

    Want MORE sewing tips and advice?

    Get my sewing tips, advice, tutorials, and encouragement right in your inbox!

    Powered by Kit


    How to use a French Curve, tutorial | Vintage on Tap


    Have you learned how to use a French curve before? Are there any other ways that you use this tool? If you haven’t used one before, why not? How can this sewing tool help your pattern drafting?


    Disclaimer: This post contains affiliate links :)


    All the Places, All the Stuff!

    Never miss a post by following me on Bloglovin’!
    Or go mobile- I’m on Instagram and YouTube!