This post is part of the Vintage Vogue 9280 collab video series with McCall’s Pattern Company! To learn more about the series, including the accompanying Sewing Compendium for this series and GIVEAWAY, check out the intro post!
Fitting Vintage Vogue 9280 isn’t particularly tricky, but it can seem that way since it features five darts AND a princess seam.
The major fitting aspect of this piece lies in the princess seam, with the other darts each deserving different consideration.

On the bodice front, the shoulder darts help the collar lapels fall elegantly open and aren’t particularly adding more to the fitting experience. Same goes for the dart at the side front, which (from my observations) seems to assist in molding the dress around the bust, which I love.
With Vintage Vogue 9280 being a 40s retro sewing piece, the extra molding makes sense. The dart is aiming for a close fit and tight silhouette with light ease; the side front dart really helps nip in the design. It actually reminds me of my Butterick 6453 fitting video, where a regular princess seam wasn’t enough to really get that nipped in waist, and I had to do some additional molding to make that look work on my body.
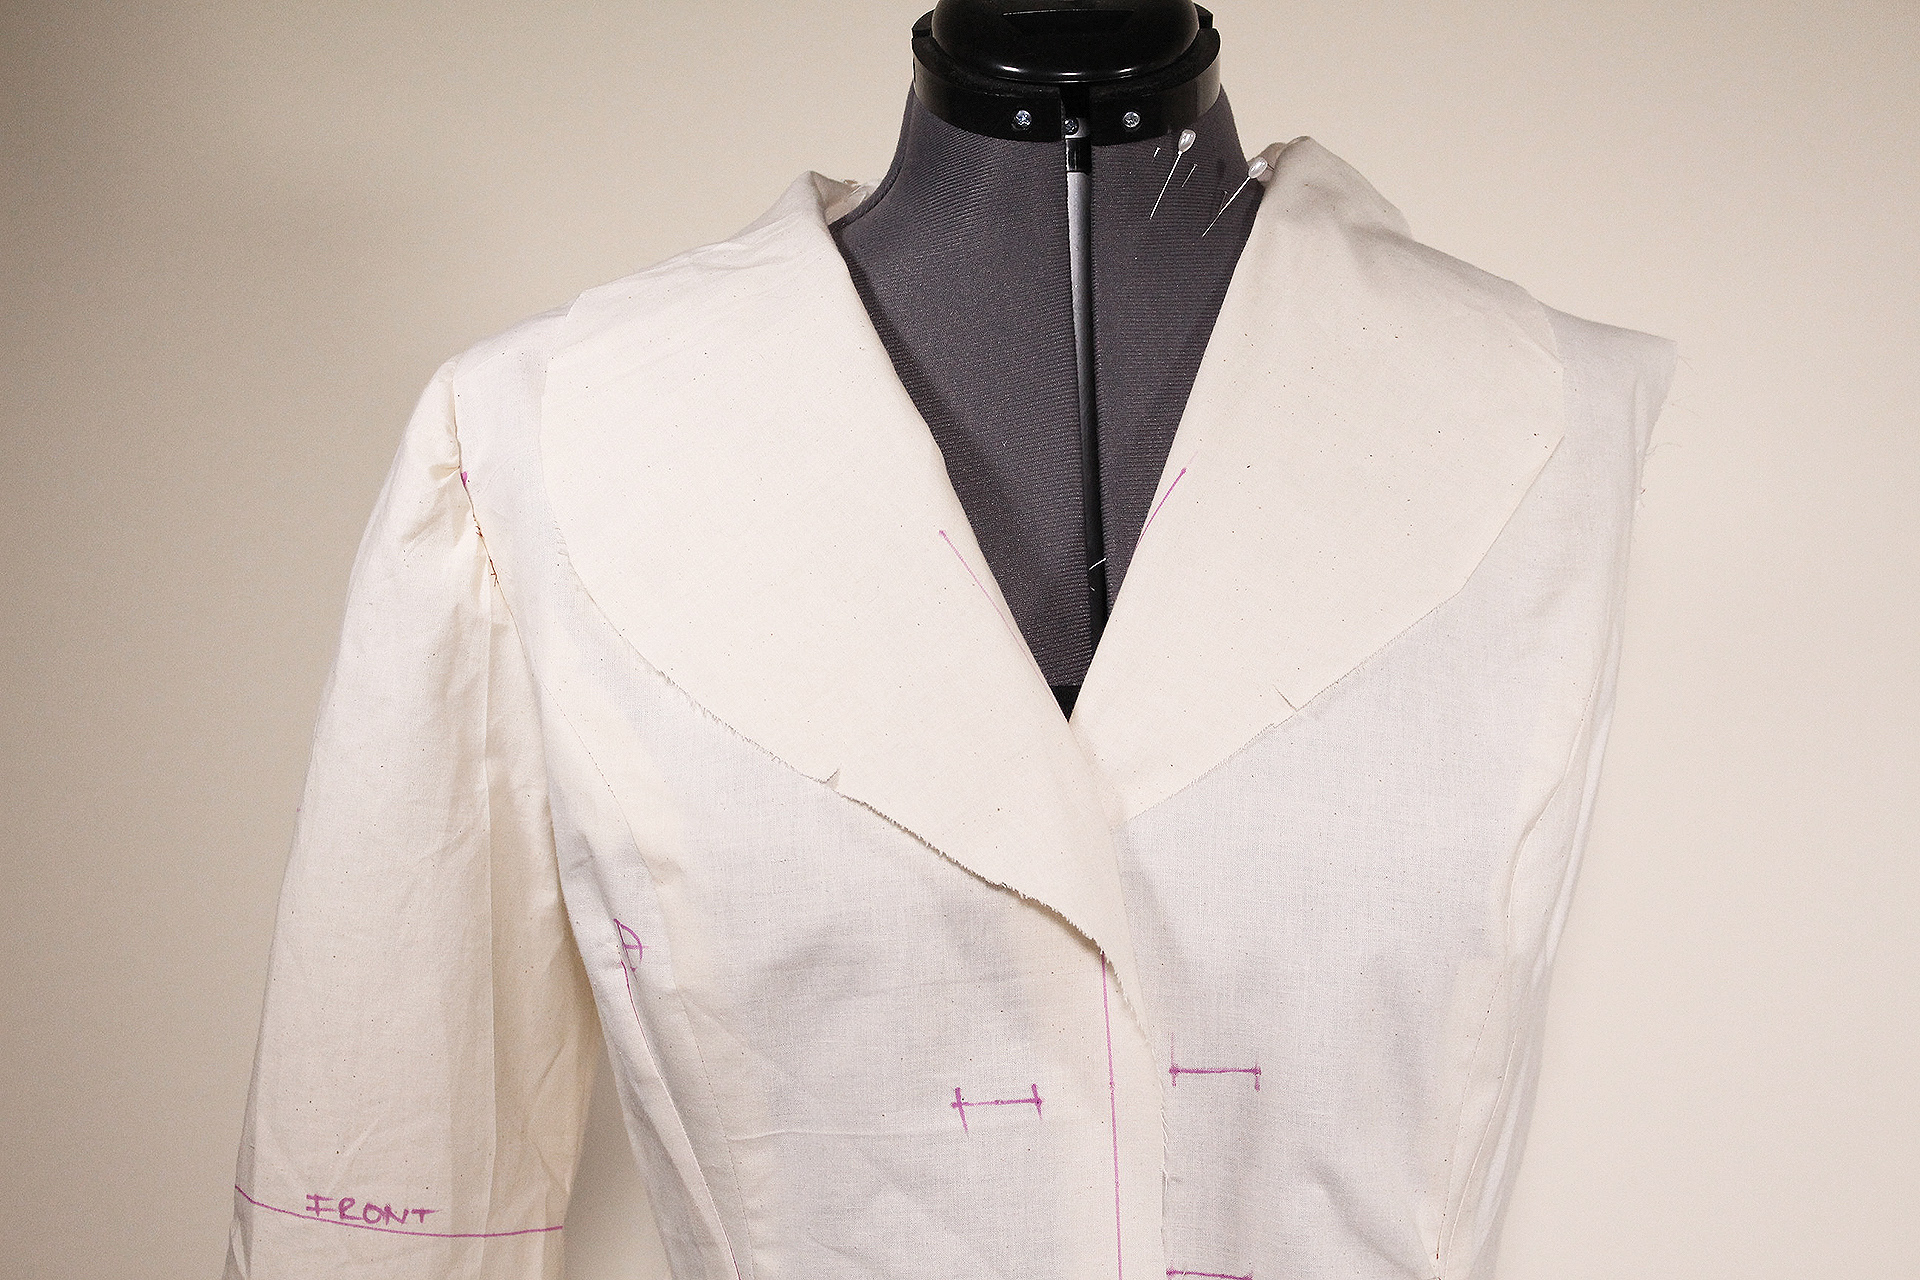
On the bodice back, the darts in the back come together for the inverted pleat design. (For the purposes of the muslin, I did a simple stitch to close up the center back in order to fit the piece. However, where the two darts meet, the pleat will open.)
Also, the shoulder darts create a warm rounded design, which seem to help the shoulder look more distinct in combination with a shoulder pad.
With all of that said, start fitting the princess seam before altering any other darts right away.
As with most of my tutorials, besides doing a swayback adjustment, I did few changes to the other darts and focused almost entirely on the princess seam to accommodate my full bust.
Before getting started, get your tools ready:
Also, review the following videos:
Other prep work to do before jumping in:
- Using the hip adjusting line, cut the bodice from the skirt. For this tutorial, you’ll be working on the bodice only, which is more complicated than adjusting the skirt later on. Isolating the bodice will make it easier to adjust and then reattach later.
- Find a couple larger shoulder pads for fitting purposes- OR- do like I did and find a couple of my boyfriend’s socks and roll them up for some make-do shoulder pads.
Step One: Select your size and stitch up your first muslin
Taking time to select your Vintage Vogue 9280 size is generally straight forward in that the bust is the key, as it affects the “frame” of the garment, which includes the neckline and shoulder, both which are harder to fit than the waist.
My measurements are below:
- Full Bust: 41in/104cm
- High Bust: 38in/96.5cm
- Waist: 33.5in/85cm
- Hips: 42.5in/108cm
- Torso Length: 15in/38cm
- Height: 5’2?/157cm
I selected a size 16 due to my high bust measurement, which matches the listed bust measurement for this design. If you’re like me and have a larger bust, a full bust adjustment (FBA) adds extra width to the waistline! Worry about the waistline after you’ve completed your FBA for a better fit.
From there, sew your first half muslin- straight from the packet, to take in the design, and observe how it fits over your body before deciding what adjustments will be necessary.
Step Two: Start Plugging away your pattern adjustments, one at a time.
Vintage Vogue 9280 uses the standard McCall’s Patterns block, so in my case I knew what adjustments to do right away. However, if you’re still playing around with pattern drafting in general, approach it in the following order, using the following questions:
Starting with the bodice back (in order):
- Does the center back line of the pattern go straight down your body’s center back line?
- Is there pulling at the shoulders?
- Where does the waist line sit compared to your natural waist?
- Is there pooling of fabric at the bottom of your back?
Note: Before hacking into the pattern, compare the collar facing and contrast collar pattern pieces to the center front pattern piece, to notice how big they are compared to one another. Any changes you do on the center front will need to be done to these corresponding pieces once the whole process is complete.
In my case, I identified that I needed to shorten my waist by approximately 3/4in (1.9cm), which I cover at timestamp 2:02. Also, I had to do a swayback adjustment of approximately 1/2in (1.27cm)
Make your next half muslin at this point.
Step Three: Take special care with the bust area.
Turning to the front pattern adjustments, the main thing to consider before changing neck, arm scythes, shoulders, waist— is the center front line between the neck and bust and whether or not the fullest area of the bust in the muslin matches your body.
Note: The front bodice notches are extremely important for Vintage Vogue 9280, so if you haven’t yet reviewed the Walking a Pattern video, now is the time!
In my case, I saw that the fullest part of the pattern bust fit me great. Then, I measured a distance of 2in (5.08cm) in order for the muslin to fit towards my center front, covered at timestamp 4:32 in the video. The pattern bust point (identified in the side front pattern piece) generally fitting the correct area, meaning I only had to add to the center front pattern piece.
If you’re doing an FBA, slash a straight line up the pattern, curving slightly towards the shoulder, spreading open the pattern (with hinge,) covered at timestamp 4:55.
After the FBA is complete and you’ve walked your princess seams, stitch up a full muslin.
Step Four: Determine what final adjustments you may need.
Questions you might ask yourself for Vintage Vogue 9280 include some of the following (in order):
- Does the center front match your body’s center front? If not, where? (If at the waist, add extra at the side seams, not the center front)
- Does the shoulder point (with shoulder pad) match your shoulder point? (If not, determine how much or how little to add or remove from the shoulder or sleeve cap)
- How does the sleeve look in comparison to your arm? Do you need to narrow or widen it?
- Is the arm scythe comfortable?
- Do you have enough wearing ease to move comfortably around in?
After you’ve done any final small adjustments, be sure to transfer your center front bodice changes to both the collar facings and collar contrast pattern pieces. Be sure to account for notches, length, and FBA (or SBA.)
At this point, you can tape your bodice pieces back to their corresponding skirt pieces, widening the skirt if necessary.
The key for more “complicated” pieces such as Vintage Vogue 9280 is to break down the fitting process into one adjustment at a time.
Looking at patterns that include lots of bells and whistles can absolutely scare beginners from tackling more advanced projects. I’m here to say… it definitely doesn’t have to be that way. Listing each adjustment in a properly defined order allows you to tackle each thing, feeling like you’re making headway and have a good grasp of the pattern.
Do you have any questions or comments about this process? Please leave them down in the comment section below!


This post is part of the Vintage Vogue 9280 Video series! Check out the other installment of this series by clicking the image below:


Thank you, McCall’s Pattern Company, for making this video series and collaboration possible!
Like what you see?