Category: Lingerie

Click the links below to jump to learn about sewing vintage fashions from specific pattern companies:

  • How to Sew Underwear: The Seamwork Geneva pattern

    How to Sew Underwear: The Seamwork Geneva pattern

    How to sew underwear, made with the Seamwork Geneva pattern | Vintage on Tap

    Learning how to sew underwear is easier than you might think.

    Between brightly colored elastic and happy jersey prints, learning how to sew underwear is meditative. Most websites will talk about how great these types of projects are at using up scraps, how they’re quick and easy to do, you know, practical stuff. Me, on the other hand, like to sew undies for one main reason:

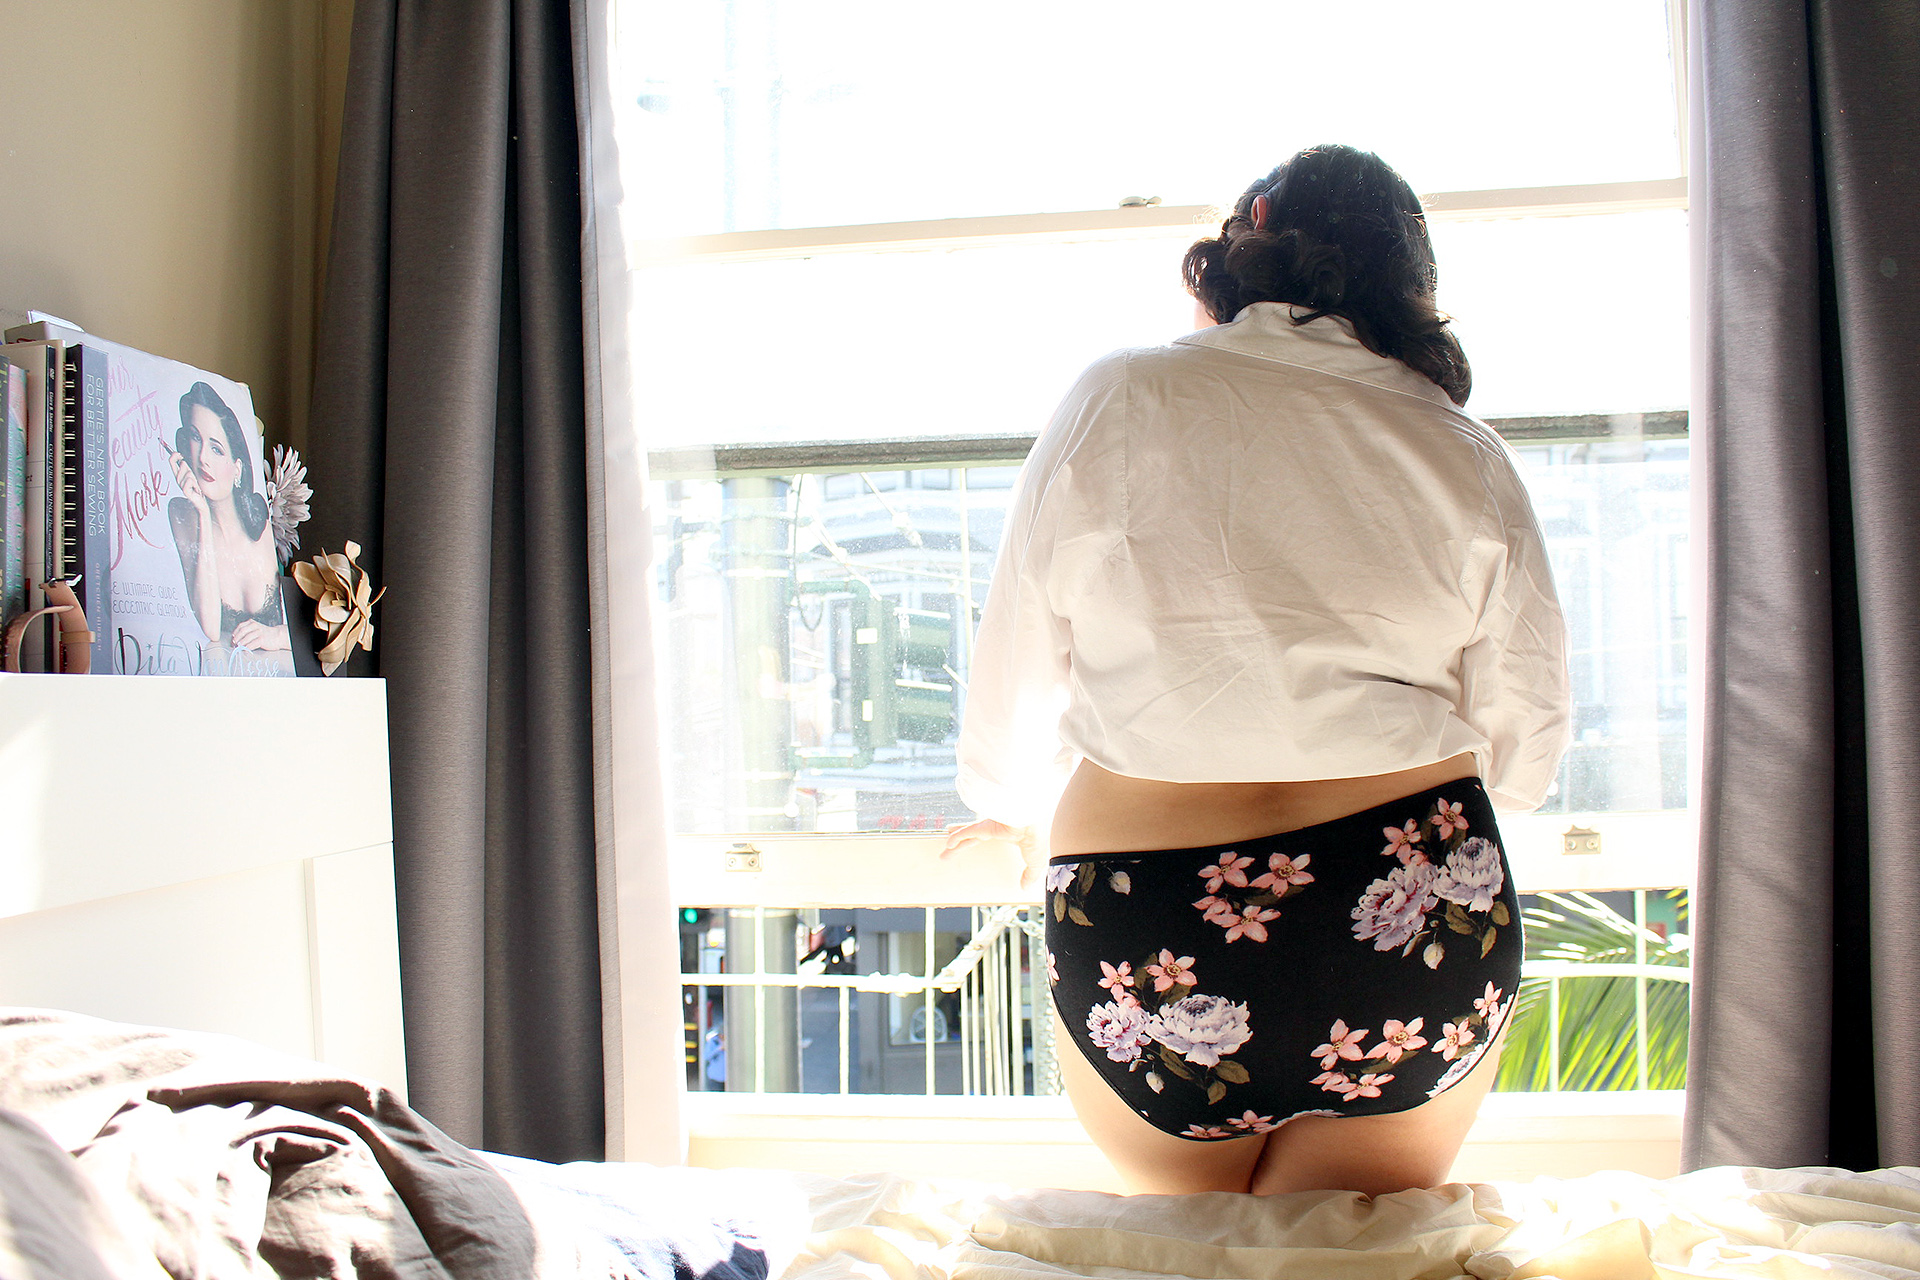
    Sewing my own underwear means that I can wear outrageously loud prints on my bootie every single day.

    Seamwork Geneva panties, how to sew video tutorial | Vintage on Tap

    I’m actually a huge sucker for the Victoria’s Secret PINK line, with it’s bright and funky prints, so this is 100% on-brand for me. The PINK briefs usually go on sale on a regular basis: 5 pairs for $30 (£22 // €25), which in the grand scheme of things isn’t ridiculous, but since I try to be a Me Made girl, making them myself just made sense. Especially when a fun jersey print can be insanely inexpensive.

    sHow to Sew Underwear, sewing tutorial | Vintage on Tap

    Enter the Seamwork Geneva undies.

    For this particular video walkthrough, I decided to use a slightly more demure fabric print, picked up from a local San Francisco shop. It was also a great opportunity to pull out a little bit of stretch lace that I’ve had in my sewing stash for a while to make View B.

    To be honest, I was extremely impressed by this pattern, mainly because of how straight forward it was. It’s simple enough that it could be stitched up in an afternoon, but also leaves enough room for variation and for you to play around with the design.

    Examples of things you might want to switch up:

    • Fabric type, including sewing with lycra, nylon, cotton, or polyester blends
    • Using all over lace, or just lace appliqués
    • Elastic type (as I did) using fold over or decorative
    • Creating visual interest with color blocking

    Buy Geneva here.

    How to Sew Underwear, video tutorial | Vintage on Tap

    Tips for Sewing the Seamwork Geneva Panties

    Tip #1: Get comfortable with jersey and stretch needles and pins

    While switching out your sewing machine needle to a more appropriate needle makes sense for knits, most people aren’t aware that they should also switch out the rest of their notions! These include both pins and hand sewing needles that might be used for basting. I discuss needles more in depth at 2:50 in the video.

    Why?

    Using universal (sharp) pins, sewing needles, and hand sewing needles will stab holes into your fabric, which over time will begin to run (similar to pantyhose.) Ball point needles and pins, however, are dull enough that they part the fibers, which helps the integrity of the fabric remain intact at the stitch line.

    You can purchase the same sewing needles and pins I used for this project, over on my Recommended Sewing Tools page!(Amazon)

    Seamwork Geneva, How to Sew Underwear | Vintage on Tap

    Tip #2: Plan out your lace motif (View B)

    Taking how to sew underwear to the next level means LACE! Take a moment to decide on the repeat that you’d like to feature on your Seamwork Geneva undies, and what your desired motif looks like mirrored to the opposite side of the underwear.

    In my View B of the Seamwork Geneva, I spent some time “mapping out” how I wanted my lace to look on either side of center panel. Things I looked out for:

    • Is there a full, equal amount of the repeat on both sides of the center panel?
    • How does the stretch lace look “reversed”?
    • Does the placement of the repeat make sense for my seam allowances?

    Keep in mind that you can use a similar lace cut out technique anywhere on the panties that you might like! Since I made View B, my lace was strictly on the sides of the center panel. However, adding a giant circle lace piece on the bootie piece could have totally been possible! Pin the lace in place with your ball point pins, zig zag along the outside as shown at 0:58 in the video, and cut out the underlying fabric for that peak-a-boo reveal.

    Elastic detail on Seamwork Geneva panties | Vintage on Tap

    Tip #3: Chose your elastics wisely and sew slowly.

    It’s extremely temping to start sewing up a storm as you’re nearing the finish line, but be careful! You’ll thank yourself later by slowing down and being cognizant of maintaining a straight and steady stitch line.

    There are several types of elastic you can use for your garment, and I highly recommend the following article by Colette Patterns about sewing lingerie elastic for additional information:

    Lingerie Elastic 3 Ways

    When learning how to sew underwear, keep in mind that the elastic you chose should be comfortable to wear, so test it against your wrist before committing to it:

    • Does it have a comfortable amount of stretch?
    • Does it itch or potentially aggravate?
    • Does it have a good level of bounce back and recovery?

    For the pair of Geneva panties I made for this post, I decided to use fold over elastic, which fits smoothly and comfortably against the skin, and also creates an encased seam. I cover this elastic insertion at 4:45 in my walkthrough video.

    How to sew underwear, made with the Seamwork Geneva pattern | Vintage on Tap

    The Seamwork Geneva pattern is a great staple to make comfy undergarments at home.

    The fit is great, though it does run a little bit on the large size, so please keep that in mind when starting out your project.

    You can also have a lot of fun picking both classic and crazy knit fabrics to use, but be sure that the crotch lining is 100% cotton to protect your personal bits!

    Also, making underwear matching other boudoir inspired fashion is a total must. For example, why not make a pair that matches a Seamwork Almada robe?

    Completed Seamwork Alamada Robe | @vintageontap

    Cute pair of undies and matching robe? Gorgeous! (Click here to learn how to sew this kimono robe!)

    Pin this Post!!

    Learn How to Sew Your Own Underwear, video tutorial! Let's make the Seamwork Magazine Geneva undies! | Vintage on Tap

    Have you ever learned how to sew underwear at home? How did you like them? Did you like them more than store-bought ones? Leave me a comment down below to let me know!


    All the Places, All the Stuff!

    Never miss a post by following me on Bloglovin’!
    Or go mobile- I’m on Instagram and YouTube!

    New to sewing? Check out the Start Here page!

  • How to Sew a Robe: The Seamwork Almada video tutorial

    How to Sew a Robe: The Seamwork Almada video tutorial

    How to sew a robe, the Spring Seamwork Almada Robe | @vintageontap

    If you were curious about how to sew a robe, this video tutorial is perfect for you.

    Working on a string of tricky projects always makes me want to turn my eye to something light, airy, and comfortable. And no matter your sewing level, stitching up the Seamwork Almada robe is simple and quick.

    The Almada robe is a Seamwork Magazine pattern that was released as part of their Intimates issue in 2016. Its comfortable kimono-style makes it a quick make and a nice lounging piece.

    This robe is comfortable and it would also work just as well in a light flannel for cuddling up on the couch when its cold out!

    Enjoying a glass of wine in my Spring Seamwork Almada Robe, learn how to sew a robe with this post! | @vintageontap

    Using a seam ripper on my Alamada Robe, learn how to sew a robe with this post | @vintageontap

    I sewed this kimono robe with a smooth poly/rayon satin.

    I picked this blend specifically for its washing ease and soft print, which for it being a “home” piece, was absolutely paramount. The bias binding trim was self-made from 100% silk, which gives the robe a great pop of color, though the original pattern doesn’t include this trim. Instead, the original pattern uses the bias band as an interior bias facing, but I decided to skip it since the trim is more fun! I covered this section in my video tutorial at 0:48 and more in depth at 3:17.

    Luxe sewing details are always a fun thing to incorporate when you’re considering how to sew a robe, and I decided to add piping on the sleeve hem, since it seemed to make sense with the silk bias band. I go over this in depth at 4:02 in the robe sewing video.

    To buy this pattern, subscribe to Seamwork Magazine (and get $3 off your first month!) by clicking here.

    Or, buy the pattern as a standalone by clicking here.

    Wine afternoon in my Seamwork Almada Robe | @vintageontap

    Wine afternoon in my Seamwork Almada Robe video tutorial | @vintageontap

    Learning how to sew a robe of this fabric type requires a few extra steps.

    Because of the fabric, I opted for french seams throughout to completely cut down on the unraveling issues. For the hem, I did a simple rolled hem with a rolled hem foot I didn’t realize I’ve had for years!

    I also made sure to use only sewing needles and pins that would be maintain the integrity of the fabric, which meant satin-grade pins and thin sewing machine needles.

    Ukulele love with Seamwork's Almada Robe | @vintageontap

    Sewing Spring Seamwork Alamada Robe | @vintageontap

    Curious about my sewing tools? Click below!

    Recommended Sewing Tools by Vintage on Tap

    Learn how to sew a robe, have a completed Seamwork Almada Robe! | @vintageontap

    This Seamwork pattern didn’t stitch up in the suggested time, but I’m very well aware it was because I did some extra work.

    Depending on the type of look you’re going for with sewing this robe, it can stitch up in the approximated 2 hours. Had I decided to make this in a simple woven fabric and just pinked all the seams, this could have been done in the span of a good movie.

    The most complicated thing about this pattern was just the process of trying to wrangle the fabric to stay put when I was cutting it out, which had more to do with the poly/rayon than the pattern.

    Completed Seamwork Almada Robe | @vintageontap

    Completed Seamwork Almada Robe, learn how to sew this robe! | @vintageontap

    I’ve all ready started to wear this robe every day since I stitched it up; its part of my at home “uniform!”

    I recommend this robe if you’re looking to start building up a self sewn wardrobe because its absolutely essential before bed or for early morning coffee. When you’re starting your day and catching up on Instagram (which by the way, are you following me on IG?), this makes for a quick cover up.

    Completed Seamwork Almada Robe | @vintageontap

    If you want to learn how to sew a robe, you’ll be super pleased with this sewing pattern.

    The loose, comfortable design has made it my go-to piece when I wake up in the morning and right before I go to sleep. I definitely recommend you make it ASAP and check out the video above if you want a tutorial of the process!

    Making matching underwear to this robe is a total must. For example, why not make a pair of sexy underwear to go with your new robe? 

    How to sew underwear, made with the Seamwork Geneva pattern | Vintage on Tap

    Cute pair of undies and matching robe? Gorgeous! (Click here to learn how to sew these panties!)

    And don’t forget, get $3 off your first month of Seamwork Magazine by clicking on this link!

    Pin this Post!!

    How to Sew a Robe, The Seamwork Almada | Vintage on Tap


    Do you like what you see?
    Never miss a post by following me on Bloglovin’ or via the Newsletter!
    Or go mobile- I’m on Instagram, YouTube, and Snapchat (?vintageontap)!
    Disclaimer: This post contains affiliate links :)

  • The Vintage Slip

    The Vintage Slip

    Vintage Inspired Slip | @vintageontap

    Vintage Slip Empire Waist Full Bust Adjustments | @vintageontap

    Vintage Slip Lace Detail | @vintageontap

    Vintage Inspired Slip Interior detail, hand sewing and French seam | @vintageontap

    Vintage Slip Lace | @vintageontap

    Shower Curtain | @vintageontap

    Completed Vintage Inspired Slip, hem detail | @vintageontap

    Completed Vintage Inspired Slip | @vintageontap

    Completed Vintage Inspired Slip | @vintageontap

    Wine and Flowers | @vintageontap

    Completed Vintage Inspired Slip | @vintageontap

    Completed Vintage Inspired Slip | @vintageontap

    LUSH Bath Bomb | @vintageontap

    Completed Vintage Inspired Slip | @vintageontap

    Vintage Inspired Slip Strap detail | @vintageontap

    February has me thinking of the perfect vintage slip.

    I am not immune to the beautiful silks that seem to be everywhere in February! Luckily, a vintage slip falls in line with Spring/Summer sewing plans, so I’m very happy to start filling my wardrobe with basic pieces that will be used time and time again.

    I decided to take on what I thought would be a rather simple garment- a vintage inspired slip, but as I started with it, the project turned into a pattern drafting challenge. I found a free beautiful Vintage Slip pattern by House of Jo and set down to work.

    The pattern itself definitely needed a lot of wrangling, though.

    When I sourced the pattern, it didn’t really include any directions, let alone sizes. The pattern designer left minor notes in comments below their original upload so I had to piece a lot together– converting the sizing to inches, deciphering the sizes on the pattern paper, and then going deeper into the directions than the summary. Apparently this slip was originally published in The Vintage Pattern Selector and featured in Sew Magazine at some point, but the online upload was very vague. French seams weren’t discussed, or even straps with bra hardware. Also, this pattern calls for everything to be cut out on grain, but in future iterations I’ll be doing everything on the bias for a better feel. Basically, I took what I learned from my Savannah camisole and applied it here.

    Necessary pattern drafting skills:

    1. Slash and spread
    2. Repositioning a dart
    3. FBA on an empire bust
    4. Manipulating a dart to shift fullness

    Thankfully I have experience with the above skills. However, it’s not as if these things are super simple to do since they build on each other and must be done in order. A couple resources I read up on before beginning the entire process include Full Bust Adjustment: Gathered Bodice by Alana at Lazy Stitching and Another Little Crafty Creation: Full Bust Adjustment (FBA) tips.

    Still, I love the different lines to the design. Some of the pieces could have been cut on fold (front bodice and back yoke), but I also like how the different seams give it a different effect. Yes, it added more work to the French seams, but they were worth it. Also, stay stitch every curved part of that pattern as soon as you cut it, you’ll thank yourself later.


    It was necessary to do some quality control when it came to the silk I used.

    I went with a basic silk, but it did involve some testing. Essentially I ended up walking around the fabric store, rubbing fabric against my tights to be certain the garment wouldn’t ride up during wear. Doesn’t seem like a big deal to do that, but if you’re sewing something similar for yourself, putting the fabric under a (reasonable) stress test while you’re in the fabric shop is essential, and for me that was making sure it didn’t ride up.

    My favorite part of this reproduction vintage slip is how feminine it makes me feel. I want more of these in every color as soon as possible.

    For a vintage slip reproduction pattern, I’m super happy with how it came out! I ended up working out most of the kinks of this pattern on a wearable muslin with some random fabric in my stash.

    As I started working on this piece, Seamwork Magazine featured a lovely Behind the Seams of a Vintage Slip so I was able to incorporate some of those details into my slip. I used bra strap hardware I bought from Tailor Made Shop on Etsy, French seams, and lingerie lace I was able to source from a nearby fabric store.

    This reproduction vintage slip is the first of my 2016 Vintage Pledge pieces.

    While I sew a majority of my items from vintage patterns, I think a “modern” reproduction still counts! I’m very happy that this vintage slip is a good way to practice basic skills and continue to perfect them on basic garments. Neglecting the simple skills can really kill a project and working with lace, french seams, and even learning how to make spaghetti straps can be vital!


    Do you like what you see?
    Never miss a post by following me on Bloglovin’ or via the Newsletter!
    Or go mobile- I’m on Instagram, YouTube, and Snapchat (?vintageontap)!