Category: Butterick

  • How to Sew a Pinup Holiday Dress, Video Tutorial

    How to Sew a Pinup Holiday Dress, Video Tutorial

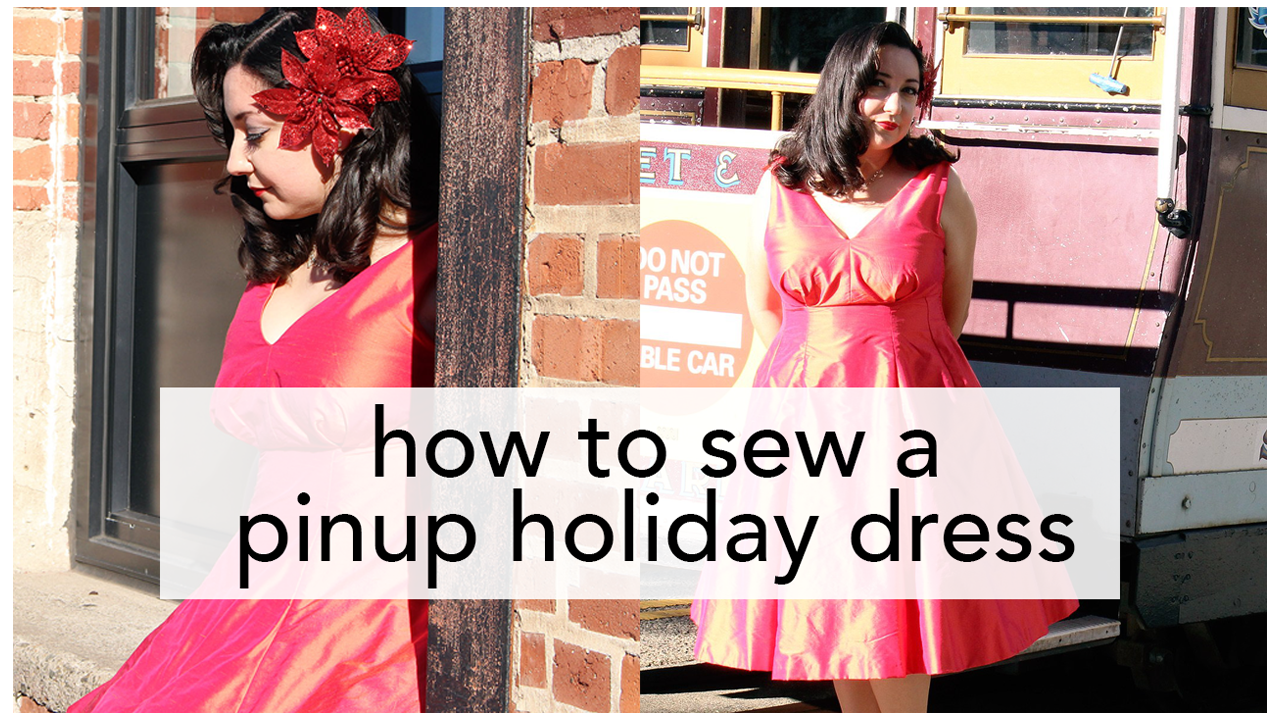
    Butterick B5603 Pinup dress, silk dupioni fabric from Britex Fabrics | @VintageonTap

    Every girl into 50s fashion should sew a pinup holiday dress.

    In sultry emerald green, sequin black, or shimmery white, sewing a pinup holiday dress is a good excuse to pull out the Fancy Fabric.

    For the version featured in my YouTube tutorial, I used silk.

    I wanted shimmer and fabric with body, so silk dupioni was an amazing choice. It holds its shape super well and rustles in a very luxurious way when I walk. For me, this immediately became a dry-clean only dress, so super special care taken from beginning to end on construction. In this particular fabric, the warp and weft are two different colors, so when I move in the sun, it changes colors.

    Butterick B5603 Pinup dress, silk dupioni fabric from Britex Fabrics | @VintageonTap

    Butterick B5603 Pinup dress, shoulder tie | @VintageonTap

    The pattern I selected for my pinup holiday dress was Butterick B5603, from the 1950s.

    Click to buy the pattern!

    Buy this beautiful Butterick pattern and then watch my sewing tutorial to make your own! | Vintage on Tap

    I decided to go with View B for this dress, with the V-neck (and V-back) and tie top shoulders. There was just something about how elegant the design is that really drew me to it. Also, the nipped in princess lines at the waist are attractive and give a natural slenderness that would look demure and very cute during holiday celebrations.

    If you’re considering this pattern, please read my sewing tips down below!

    Butterick B5603 Pinup dress, back view | @VintageonTap

    Butterick B5603 Pinup dress, Union Square Christmas Tree | @VintageonTap

    Step One: Pay special attention to “Special Occasion” fabrics.

    Before starting to sew, determine the look and feel of the fabric you want to use. If you have a fabric swatch book (click here to learn more about fabric swatches!), look over the options that you may want to work with.

    Questions to ask yourself:

    • Does it have the right texture and drape for the pinup holiday dress you want to make?
    • Have you had the opportunity to work with the fabric before?
    • Will this fabric be dry-clean only, or can you hand or machine wash it?

    Going through the steps to investigate your fabric will help determine how much time, effort, and even how much difficulty you might have in stitching up your pinup holiday dress!

    It’ll also determine the internal foundation that will need to be worked into the sewing process, to make sure that your dress holds its shape and stands the test of time with nights out dancing!

    Butterick B5603 Pinup dress, silk dupioni | @VintageonTap

    Step Two: Read the Underlining and Silk Organza cheat sheet

    After you’ve selected your fabric, spend a few minutes reading the cheat sheet I created for this project. The FREE Underlining and Silk Organza cheat sheet outlines directions for reinforcing and strengthening your garment from the inside out.

    These vintage techniques are essential to sewing a pinup holiday dress. The cheat sheet goes into:

    • How to underline fabric. This is useful when working on special occasion fabrics that might be slippery or difficult to work with. Underlining will make them more stable so you can sew them a lot more quickly.
    • Reinforcing your seams with silk organza. Reinforcing them will reduce stretching on the bias, which can cause the neckline (such as the V-neck of this Butterick B5603 dress) to warp and become distorted.

    Both techniques are useful even past sewing a special occasion dress- they work over all sewing types and are techniques you’ll want to know if you want your garments to last over time.

    To download the cheat sheet, just fill out the form below!

    FREE Checklist PDF!

    Get my checklist for Underlining and Stabilizing with Silk Organza FREE and sent to your inbox!

    Powered by Kit
    Butterick B5603 Pinup dress, made in Britex Fabrics | @VintageonTap

    Step Three: Don’t Rush It.

    Simple, but easy to over look when things are crazy in your corner of the world. Having a festive pinup dress to wear at the end of the year is fantastic, but speed sewing should not be a practice when you’re working on materials that may be more finicky than the standard quilting cotton.

    • Cut fabric one day, start sewing the next. Spending one day cutting out your fabric will ensure that you don’t rush into snipping into the Nice Fabric and accidentally cut things incorrectly. Special occasion fabric can occasionally be costly, and giving cutting time its own time and space will make a difference.
    • When you start sewing, take frequent breaks. Every hour get up to stretch, drink a glass of water and maybe go outside for some fresh air.
    • Don’t work on your pinup holiday dress for more than four to five hours in a day. Similar to the Take Frequent Breaks note, working on the dress in small chunks of time guarantees that when you see it, you’ll be in a good headspace and able to tackle it with fresh eyes every time. This is especially important if you’re working with fabric that can be new to you and/or expensive.

    Butterick B5603 Pinup dress, made in Britex Fabrics | @VintageonTap

    This pinup holiday dress is ready for Christmas or Valentine’s Day.

    This dress was sewn in conjunction with Britex Fabrics, who kindly donated a gorgeous silk dupioni that shimmers gold in the light. Please note that the color fabric I have is SOLD OUT! But there are still plenty of dupioni options available on the Britex website.

    Vintage sewing techniques in this pinup dress include extreme (!!) use of silk organza throughout to prevent warping at the neckline, waist seam, and zipper insertion point. Also, rayon seam binding was used quite a bit. To add extra stability to the entire piece, though, I used silk charmeuse as underlining.

    Be sure to watch the sewing walkthrough video to see how I made this pinup holiday dress from start to finish!

    How to Sew a Pinup Holiday Dress! Video Tutorial and sewing tips | Vintage on Tap

    My B5603 holiday dress was also sewn as part of a collab with…

    Allie J!

    Butterick B5603 dress, made by Allie J | @VintageonTap

    Butterick B5603 dress, made by Allie J | @VintageonTap

    Butterick B5603 dress, made by Allie J | @VintageonTap

    Doesn’t her dress look amazing?

    We decided to tackle the same pattern and give it our own twist. Allie chose version A of Butterick B5603 and I chose version B. Both versions feature a handpicked zipper, and a gored, flared skirt. The instructions for both dresses are nearly the same… except for the approach of the bodice which can give this pattern a totally different feeling!

    Allie goes into her thoughts and experiences sewing version A of this pattern over at her blog; please go check it out!

    I love the textured fabric Allie used for her dress, which gives her garment a super luxe feeling. It’s absolutely her style- very timeless and very classy (reminds me of something First Lady Michelle Obama might wear!) I also like the addition of the second pleated detail on the waist line, which breaks up the long line on the skirt. Allie also runs a mailing list where you can keep up with her different projects and get a behind the scenes look into her life. Click here to subscribe to keep up with Allie! 

    Pin this Post!!

    How to Sew a Pinup Holiday Dress! Video tutorial with tips for making a beautiful dress at home | Vintage on Tap

    Subscribe to Vintage on Tap on YouTube!

    Disclaimer: This post was made possible by Britex Fabrics :) Also, this post contains affiliate links.

    Do you like what you see?

    Never miss a post by following me on Bloglovin’! Or go mobile- I’m on Instagram and  YouTube!

  • Video: The Retro Tiki Collab, Patterns by Gertie B6354

    Sewing for the Retro Tiki Collab, Patterns by Gertie B6354 | @vintageontap

    Black version of the Retro Tiki Collab piece, Patterns by Gertie B6354 | @vintageontap

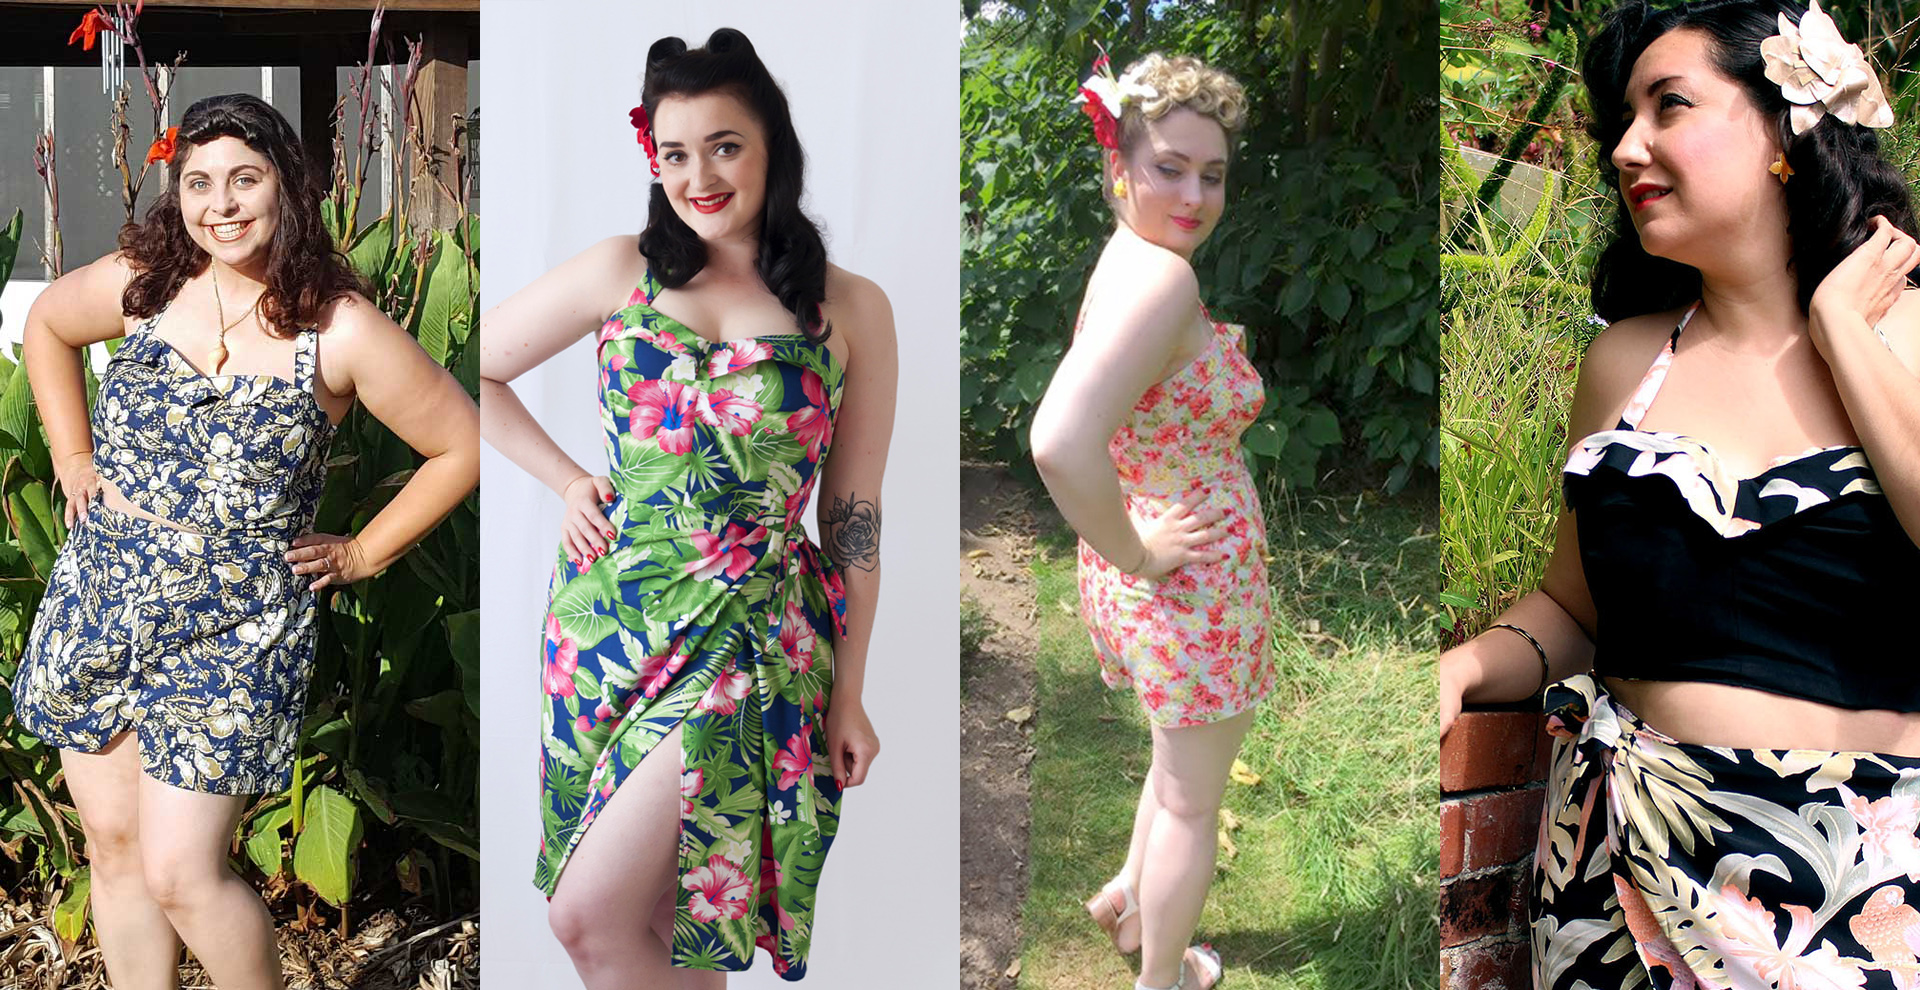
    Patterned version of the Retro Tiki Collab piece, Patterns by Gertie B6354 | @vintageontap

    For pinup girls, Patterns by Gertie B6354 is a must have

    This video features my tips for making this beautiful 3-piece ensemble reversible in both a beautiful rayon and black poly/cotton blend. Full disclosure, this video definitely took a very long time to shoot; you’ll see multiple outfit changes over the course of the video. I think all in all, it took me about a week and a half as I worked an hour here, an hour there.

    The project was fun, though. Patterns by Gertie B6354 has been sitting in my pattern collection since June 2016 and it was nice to be able to pull it out so soon. There are many patterns which have been sitting in my collection for years that still haven’t seen the light of day- B6354 was put into use right away!

    If you missed out on my previous post, this video was made as part of the Retro Tiki Collab with the beautiful and smart Christina from Gussets and Godets, Abi from The Crafty Pinup, and Akram from Akram’s Ideas. Please check out their individual blogs to read more about their versions of this pattern and their respective tutorials!


    Disclaimer: This post contains affiliate links :)

  • Completed: The Retro Tiki Collab, Butterick B6354

    Completed: The Retro Tiki Collab, Butterick B6354

    Vintage on Tap’s first collaboration- Butterick B6354 is FABULOUS!

    Can I say how happy and excited I am to have worked on this collaboration? Featuring 4 lovely ladies in the retro and pinup blogging world, sewing the same pattern in their own unique way. We each decided to give Gertie’s Butterick B6354 our own twist and its been so fun to see how the pattern has been interpreted and styled!

    Why this pattern? It’s summer time and tiki seems to be all the rage this time of year in the pin up sewing world. And besides, I was all ready itching for another tropical drink after my last tiki dress a while back.

    For my version of Butterick B6354, I made my piece… reversible!

    Bianca at Vintage on Tap wearing the reversible Butterick B6354 | @vintageontap

    The reversible tiki set, Butterick B6354 | @vintageontap

    The reversible tiki set, Butterick B6354 | @vintageontap

    Sewing a reversible garment can be fun, and the amount of hand sewing should definitely not turn you off from trying it! There’s only a few special considerations to take into account for this particular piece.

    #1: Plan your reversible from even before Step One

    Reversible Tiki outfit, Gertie's Butterick B6354 | @vintageontap

    No, you can’t just cut into your pretty fabric and go! Take a look at the pattern pieces and directions and decide what can and can’t be reversible. Locate what will be tricky and will need work arounds and test those out on a muslin first. For this piece, I knew that the back closure, interior boning, straps and cup decoration would need extra consideration and need to be made differently in order to be fully reversible.

    #2: Both fabrics on a reversible piece have to have to bought purposefully and thoughtfully

    Reversible Tiki outfit, Gertie's Butterick B6354 | @vintageontap

    Making this piece reversible means there is no real lining fabric and that means that every side of the piece has to look good! There’s no way to hide a funky sewing fumble, either. For this piece, I opted to hand-sew anything that might be questionable, including the top stitching and back closure. Also, try to make both fabrics a similar weight and feel or the piece will not behave properly.

    #3 Decide what parts of the pattern can work double time

    Reversible Tiki outfit, Gertie's Butterick B6354 | @vintageontap

    The bias decoration on this piece is the same on both sides and merely flips the opposite way to decorate the other side. There are some parts of a reversible that just have to do double duty, there’s no way around it. On this piece, I made sure to carry my top stitching underneath the band to allow it to roll over a little bit more easily. A lot of the techniques that might make the bodice more stable (under stitching, etc.) had to be skipped in order to protect the integrity of the reversible.

    #4 The closure can be the hardest part to make beautiful

    Buttonback Closure, Butterick B6354 | @vintageontap

    Don’t mind the wonky skirt in this picture, but instead focus on what will work to make the piece look good at the closure. This pattern called for a zipper, but most reversible zippers are made for winter coats and not suitable for this sort of piece. I decided to go with flat buttons that wouldn’t add too much bulk to the bustier from either side. The result looks sleek and purposeful.

    Would I make this piece again? Totally! For my particular piece I had to do a FBA on the bolero and bustier, but I may have just slightly overdone it on the bustier. Either that or I need to start rocking a bigger push up bra to fill in the cups a little bit more! Next time, though, I would take the cups in just slightly to have them not so “open” at the top.

    The bolero was a breeze to sew, though, and I actually all ready want a bunch for regular wear. I can see making this in a wool fabric with a colorful lining for date nights.

    The sarong was nice and super comfy; I actually would love to make it in a real casual fabric for an upcoming vacation, too!

    There’s so many ways to update and change this piece to suit your style, though. Check out the other posts in the collab for Butterick 6354 to learn about different ways to make it a little bit more your own. 

    Meet the ladies who participated in the Retro Tiki Collab!

    Abi from The Crafty Pinup

    Abi wearing Butterick B6354 from The Crafty Pinup | @vintageontap

    Abi wearing Butterick B6354 from The Crafty Pinup | @vintageontap

    Abi exploded onto the sewing scene just a few months ago, but has all ready been featured by BBC and The Fold Line for her awesome blogging and sewing skills! She also owns My Retro Closet for all your boudoir needs.

    Abi turned her piece into a full dress, taking the original B6354 design and merging the sarong wrap to the bustier top. She was able to match the darts in the top to the skirt perfectly and the zipper insertion looks amazing! Hop on over to her blog to see more pictures and find out the details on how to pattern hack this design.


    Akram from Akram’s Ideas

    Butterick B6354, Akram from Akram's Ideas | @vintageontap
    Butterick B6354, Akram from Akram's Ideas | @vintageontap
    Akram has been super active and such a fun blogger and vlogger who I have admired for a long time! She does everything from baking amazing recipes to sewing and thrifting up a storm. If you’re not all ready watching her on YouTube, you’re missing out!

    Akram sewed up the pattern as is- giving a full break down of what you can expect to find the moment you open up your copy of Butterick B6354. She also did some adjustments on the skirt and the images on her blog really help guide you through the process! Hop on over there to read about her experience working on her piece.


    Christina from Gussets and Godets

    Christina from Gussets and Godets Butterick B6354 tiki playset | @vintageontap

    Christina from Gussets and Godets Butterick B6354 tiki playset | @vintageontap

    Not gunna lie, I’ve had a huge blogger-girl-crush on Christina for a while because of her awesome outfits and amazing styling skills. Every time I see her post on Instagram or her blog, I’m like “omg girl, weeeerk!” She’s been featured on the lovely A Stitching Odyssey blog and is beloved by the sewing community.

    Christina turned her Butterick B6354 into a playsuit, merging the shorts and bustier top. She also played with the straps, making them into a cute spaghetti strap design which makes them that much more fun. Learn more about how to pattern hack Butterick’s 6354 by going over to her website, too. 


    Please leave your thoughts and comments on this piece and the others you’ve seen! And stay tuned for an update on a giveaway and the Making Of video of my reversible piece!

  • Tips for Sewing a Cocktail Dress, with video!

    Tips for Sewing a Cocktail Dress, with video!

    Butterick B5814, Cocktail Dress | @vintageontap

    Embarking on sewing a cocktail dress is an exciting process!

    The possibilities of stitching up your very own cocktail dress are absolutely endless. Things that you can dive into are…

    • What luxurious fabric do you want to use?
    • What sort of embellishments will you like to incorporate?
    • Vintage inspired or more modern?
    • What sort of silhouette?
    • What SHOES are going to go with it? (had to throw in something fun!)

    Without a doubt, it’s extremely easy to fall into a rabbit hole planning out the process for an exciting cocktail dress!

    This blog post discusses sewing a cocktail dress, and some of the biggest tips and tricks I learned from making my own. In this case, I made Butterick B5814, a Patterns by Gertie design released in 2012.

    Butterick B5814, Cocktail Dress | @vintageontap

    Tip #1: Select your fabric with care.

    Depending on your sewing level, this is one of the biggest factors in sewing a successful cocktail dress. The fabric will determine things like:

    • The sewing tools you use (see my list of recommended tools here!)
    • Your sewing machine settings
    • Pre-sewing fabric preparation (eg. the silkier the fabric, the more finicky, which will mean sewing more slowly!)

    Special considerations have to made to interior fabrics and materials as well!  

    As long as you’re mindful about the materials you’re using and how they operate, your sewing experience will go swimmingly. For example, for my Butterick B5814 cocktail dress, I decided to use a lovely acetone/viscose Italian crepe. It had a silky hand, medium weight, but was also difficult to work with because there was a slight stretch to it, was flimsy, and unravelled easily.

    Due to the volatile nature of the fabric I chose for this dress, I had to go out of my way with additional sewing techniques, including marking all my notches with tailor’s tacks to maintain the integrity of the fabric.

    Don’t know why tailor’s tacks are VITAL for delicate fabric? Click the link below to learn more about tailor’s tacks in sewing.

    Learn how and why to use Tailor's Tacks in your sewing process! | Vintage on Tap

    Butterick B5814, Cocktail Dress | @vintageontap

    Butterick B5814, Cocktail Dress, sunny day on the rooftop of the Fairmont in San Francisco | @vintageontap

    Tip #2: The interior of your cocktail dress should get as much care as the exterior.

    It’s very easy to say, “No one is going to see the inside- who cares?!” but when sewing your cocktail dress, the interior is just as integral as the exterior.

    For example, for Butterick B5814, I wanted to keep and maintain the quintessential pinup dress look, which meant some additional pre-planning.

    Changes I made include:

    • Spiral steel boning throughout the bodice (not the plastic boning that was suggested in the pattern)
    • Bra carriers to hide my bra in the dolman sleeves
    • Reinforcement at the neckline with bias strips to keep the neck from stretching through wear
    • Underlining throughout

    The final two points for my pinup cocktail dress were not included as part of the original pattern. However, because I was using some super luxe fabric, taking preemptive measures to care for the interior is key to a sturdy dress!

    To learn how to both reinforce the neckline with bias strips AND to underline your cocktail dress, be sure to check out a tutorial video I did on this topic. The sewing techniques are incorporated into a Butterick B5603 holiday dress. The sewing tips covered in that video 100% apply to your cocktail dress!

    How to Sew a Pinup Holiday Dress! Video Tutorial and sewing tips | Vintage on Tap

    Butterick B5814, Cocktail Dress at the Fairmont Hotel in San Francisco | @vintageontap

    Butterick B5814, Cocktail Dress, dramatic posing! | @vintageontap

    Tip #3: Divide your work into manageable chunks.

    My Butterick B5814 had… 50 individual steps. Not including cutting fabrics, boning, and prepping all additional notions.

    Having reasonable expectations of how long things take will keep you motivated and focused. 

    If you’re making a cocktail dress for the very first time, beware of the following workflow:

    Of course, each of the above steps will take longer or shorter depending on your sewing experience, but be sure to be mindful of the process! Projects started on a whim have a tendency to have a mind of their own, and a successful garment isn’t guaranteed when worked on in a hurry.

    Butterick B5814, Cocktail Dress, bust detailing | @vintageontap

    Butterick B5814, Cocktail Dress, waist detailing | @vintageontap

    Butterick B5814, Cocktail Dress, back view | @vintageontap

    If you’re tackling Butterick B5814…

    The dolman sleeves are super tricky. After 5 muslins, they still were slipping and sliding. I had to rely heavily on the bra carriers, not just to hide bra straps, but to also help hold up the sleeves.

    Also, the gathered attachment at the waist is tricky to stitch through, at ten layers deep (!!) Switch sewing needles to something more industrial, and hand crank through the layers to attach them.

    Interested in buying this pattern? Click the image below!

    Butterick B5815 cocktail dress! Learn to make this at home with my video tips!

    Butterick B5814, Cocktail Dress, dramatic angle | @vintageontap

    Butterick B5814, Cocktail Dress, sitting in the Fairmont Hotel | @vintageontap

    Butterick B5814, Cocktail Dress | @vintageontap

    Subscribe to Vintage on Tap on YouTube!

    Pin this Post!!

    Sewing Tips for Sewing a Cocktail Dress. Tips and tricks to make a beautiful dress! | Vintage on Tap

    Disclaimer: This post contains affiliate links :)

    All the Places, All the Stuff!

    Never miss a post by following me on Bloglovin’!
    Or go mobile- I’m on Instagram and YouTube!
    New to sewing? Check out the Start Here page!