
Bound buttonholes can seem intimidating, but they don’t have to be.
The fear of bound buttonholes seems to lay in the perceived amount of steps that go into the process.
To be honest, there aren’t as many steps as you might think.
Adding fuel to that fire is that there are multiple ways to sew bound buttonholes. With the sheer amount of ways to get the job done, anyone encountering the technique for the first time can be intimidated.
For me, I was put off from them for a long time because I kept using a tutorial that was making it harder for me to understand the concept, not easier.
At one point I had made over 20 buttonholes and they all kept coming out wrong.
I was using what I’m dubbing the “two lips” method. With that technique, you were instructed to cut out two tiny lips and then attach them to the buttonhole and in the process, becoming stressed out and angry.
Yikes.
Sewing bound buttonholes should not make you angry.

When getting started with bound buttonholes, expect to make multiple samples before tackling your fashion fabric.
Ultimately, practicing ANY new technique, it’s a good rule of thumb to go through at least four or five iterations. One or two iterations to mess up the technique entirely, but then by the time you get to version five+, the process looks and sews cleaner and more gorgeous.

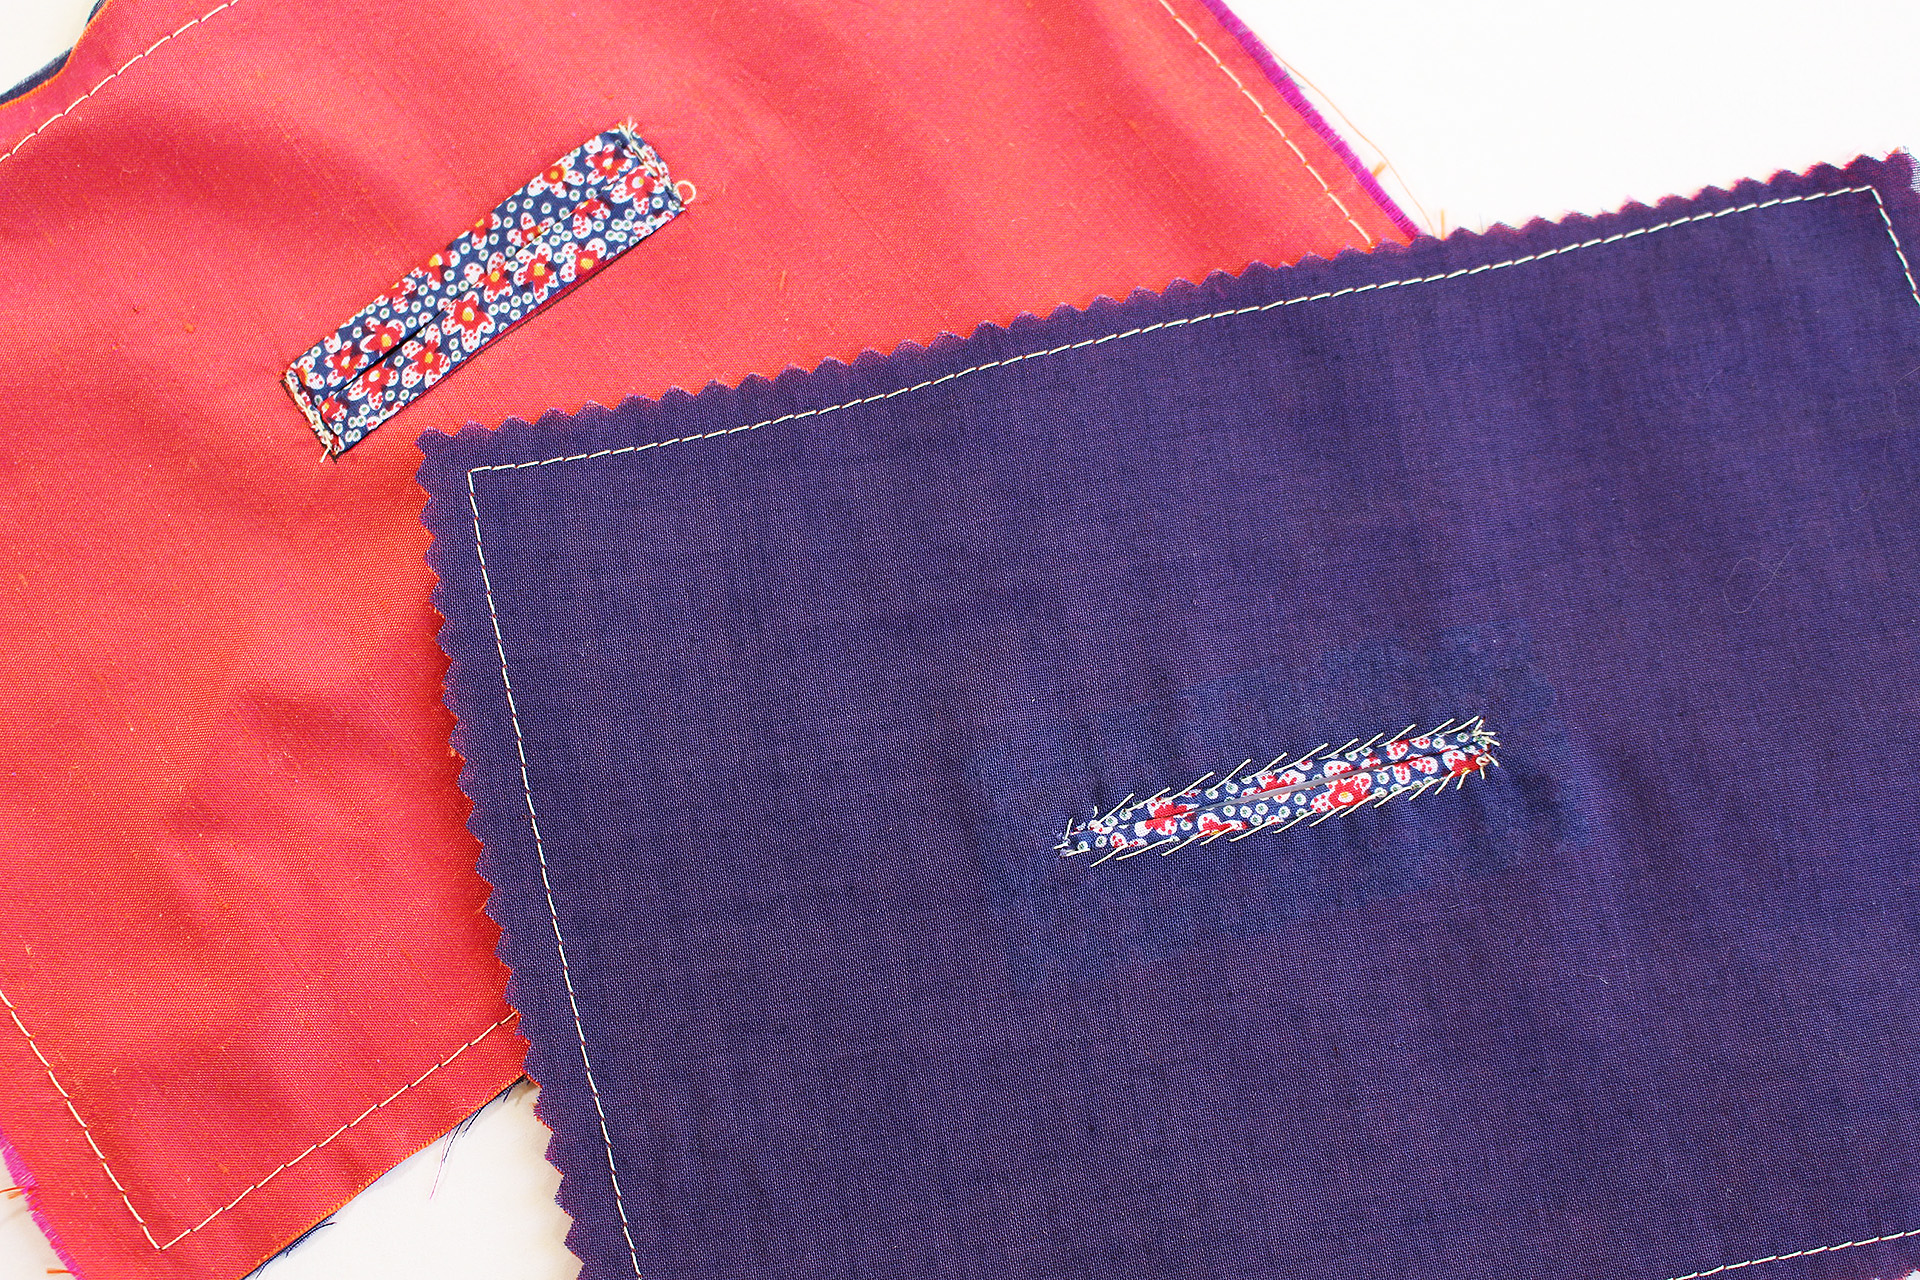
Step One: Sew your bound buttonhole rectangles.
In my video tutorial, my rectangles were 2in x .5in (5.08cm x 1.27cm.)
Trace your rectangle onto both your fashion fabric and the fabric that I’m dubbing the “lips” of the buttonhole. Using a couple pins, line up both rectangles as closely as possible (timestamp 1:30) and then pin the two layers of fabric together.
Sew along the rectangle, all the way around. Start and end your stitches as exact on the corners as possible.

Step Two: Mark your cut lines, cut, and turn inside out.
Starting at timestamp 2:38, draw your cutting lines. You need one line directly down the middle of the buttonhole, then as you approach the corners, create Y-shape from the center line to the corners.

Using a pin, find the center of the bound buttonhole (timestamp 2:50) and then snip down the guidelines, careful not to cut through your previous stitch line.
Carefully turn inside out.


Step Three: Tack your Bound Buttonhole “lips” in place.

At your iron, press the buttonhole lips in place, taking care that the corner tabs are laying correctly (timestamp 4:53.) Also be sure that your buttonhole lips are straight and look correct from the right side.
When everything is pressed and pinned, stitch the short ends of your buttonhole, through all layers, stitching “in the ditch” (the crease.) This step will keep the buttonhole from pulling open and and will tack everything in place, timestamp 6:34.
Trim from the wrong side any excess buttonhole lip fabric, leaving roughly 3/4″in around the buttonhole.
Press!
If you’re attaching a facing or lining to your bound buttonhole…
Be sure to complete the steps above before attaching the facing or lining. You want to be sure the shell is prepared with its buttonholes so you can focus entirely on the facing/lining.

Step Four: Stabilize the facing or lining around the bound buttonhole.
After sewing your lining or facing to the garment as a whole, pin the facing/lining approximately 2in (5cm) around the buttonhole.
The exact amount of pins or the exact distance is not important, however, you’re aiming for the facing/lining to not wiggle or pull during the remaining process.
Using pins at the edges of the bound buttonhole, identify the center of the buttonhole, timestamp 7:34.

Step Five: Cut through facing/lining and handsew in place.
Carefully snip through the facing/lining, careful not to cut through the lips of the buttonhole. Cut all the way to the edges of the opening.
Fingerpress the facing/lining approximately 1/16in-1/8in (0.15cm – 0.32cm) under, pinning it carefully in place. Hand sew the facing to the lips of the buttonhole.
Press and admire your work!
Sewing bound buttonholes does not have to be a chore.
If anything, with this type of technique you can consistently make something small but beautiful. For me personally, because I tend to use older machines with considerably janky-er buttonhole attachments, this comes out more beautifully long term. It also gives my sewing more of that Intentional Vintage Sewing look, elevating it past the standard machine made buttonhole.
Have you made bound buttonholes before? What was your experience?


This post is part of the Vintage Vogue 9280 Video series! Check out the other installment of this series by clicking the image below:

